![]()
The intent of this section is to be oriented around vehicles that are commonly encountered in missions, and oftentimes are crewed by "non-specialized" players (as opposed to more combat-oriented armored vehicles like tanks). These vehicles are typically intended to be used to safely convey troops to a fight, and support them the whole way, including participation in the fight as well as everything leading up to and resulting from it.
We will start off with a rundown on the pros and cons of mechanized and motorized support, as seen from the eyes of the infantry it is tasked with supporting.
Pros & Cons of Mechanized/Motorized Support in Combined Arms Operations 
The pros and cons of mechanized/motorized support in the combined arms role are as follows.
Pros 
- General
- Mobility and resulting flexibility. Mech/motor assets allow an infantry force to move over most types of terrain at a rapid rate. This gives infantry leaders tactical flexibility and allows them to rapidly react to changing situations in a way that a foot-mobile force would not be capable of.
- Carry extra gear, ammo, medical supplies, etc. Vehicles can carry additional supplies that would not be feasible to ruck in as an infantry force. This can prove key for longer duration missions, and can help to prevent anyone from needing to scavenge from the enemy for weapons and ammo.
- Great as a base of fire/overwatch. Thanks to the weapon systems carried, mech and motorized vehicles can work very well as a base of fire element, or as overwatch. Their mobility facilitates this as well, as it allows them to maneuver themselves to provide the best support in light of the ever-changing tactical situation.
- Keep infantry fresh for the fight. In
 , stamina can play a big role in how an attack is conducted. Mechanized and motorized transportation allows an infantry force to arrive at the battle fresh and ready to fight, instead of tired from having to move and assault on foot.
- Motorized
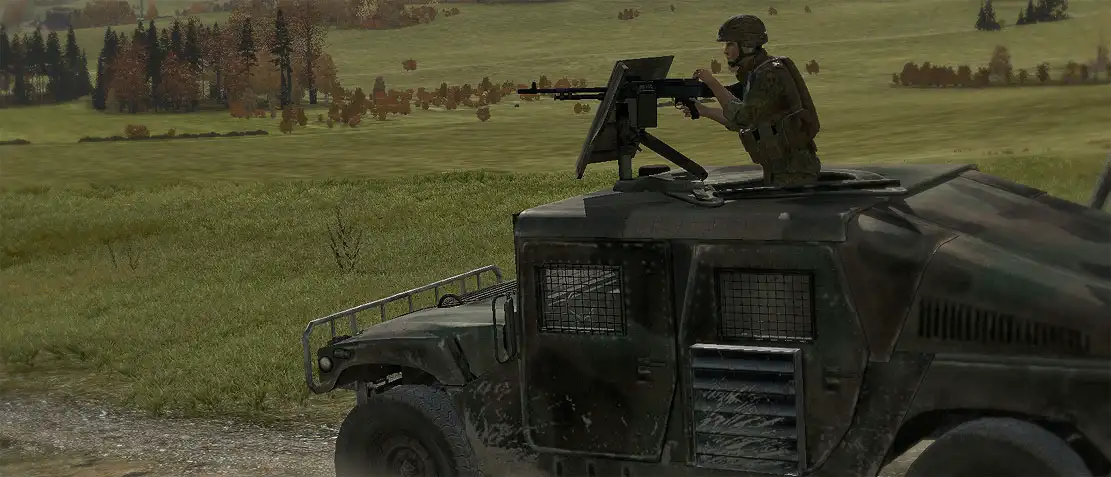
- Crew-served weapon systems. These come in a variety of forms - typically medium machineguns, heavy machineguns, grenade machineguns, and anti-tank missile systems. All of them are useful complements to an infantry force, and provide a nice increase of firepower.
- Provide some protection to mounted infantry and crew. While they will not survive any heavy fire, uparmored vehicles can provide basic protection to anyone mounted in them.
- Mechanized
- Heavier weapon systems. Mechanized vehicles often carry cannons in addition to machineguns. Some carry grenade machineguns as well, or ATGMs. The cannons in particular
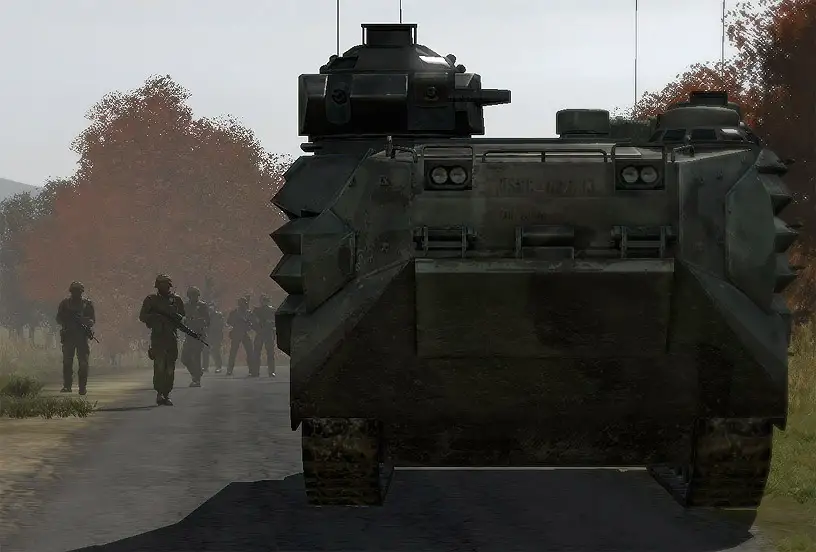
- Provide protection to mounted infantry and crew. Though they cannot survive serious fire (tanks, ATGMs, etc), mechanized vehicles typically will give some additional survivability over motorized vehicles to anyone mounted in them.
- Amphibious abilities. The USMC's LAV-25 and AAV7 both provide an amphibious capability to friendly infantry. This can be employed to cross water obstacles such as rivers or lakes, or 'swim in' from a seaborne launch. The AAV7 is the primary vehicle for ship-to-shore maneuvers, while both are suitable at crossing smaller water obstacles such as rivers/ponds/etc.
- Breaching. Due to their sturdy hulls, mechanized vehicles can smash down walls to open up breach points for accompanying infantry.
- Smoke dischargers. Mechanized vehicles typically are equipped with smoke dischargers. These can be employed to screen infantry movements as well as mislead the enemy about how an attack is being conducted.
- Clearing lanes of fire. Mechanized vehicles can be employed to knock down trees, walls, fences, and any other obstructions that may be preventing a good line of fire.
Cons 
- Lose some stealth. The noise of vehicles operating tends to reduce the ability for a mechanized or motorized force to employ stealthy movement. While this is most significant with the tracked vehicles (such as the AAV7), on a quiet day or night, even wheeled vehicles may be heard in advance of their arrival. While this does give up some of the element of surprise, the speed and mobility of the mech/motor forces can be used to make up for it and regain initiative.
- Catastrophic destruction of a loaded vehicle can cause horrific casualties. A fully-loaded AAV7 driving over an IED and being destroyed can wipe out an entire squad. It is important to always employ mech and motorized assets with care, ensuring that troops are dismounted when there is any threat that could result in a catastrophic kill of a vehicle.
- Vulnerable to AT assets (mech). Enemy ATGMs, AT rocket systems, and other weapon systems can wipe out mechanized vehicles when employed properly.
- Vulnerable to everything (motor). Motorized vehicles are more vulnerable than mechanized ones as a general rule, and must be even more vigilant in how they scan for threats, move, etc.
Note that mechanized vehicles share many of the traits of armor, and additional information about their strengths, weaknesses, and employment uses can be learned by reading the armor section later on this page.
Basic Vehicle Roles 
As a general rule, we expect our players to be capable of handling vehicle role responsibilities early in their experiences with us. While the mechanized vehicles will tend to have more senior and experienced crews, it is important that players are familiar with all of the roles available so that they can operate as a motorized vehicle crewman, or a mechanized one, when the time comes.
To that end, let's look at the different vehicle roles available, as they apply to combined arms operations.
Note that on the Vehicle Usage page, later, the roles of armored vehicle crewmen will be described in detail. For those interested in operating mechanized vehicles, ensure that you read the armored crew sections as well, as they share much in common.
Driver 
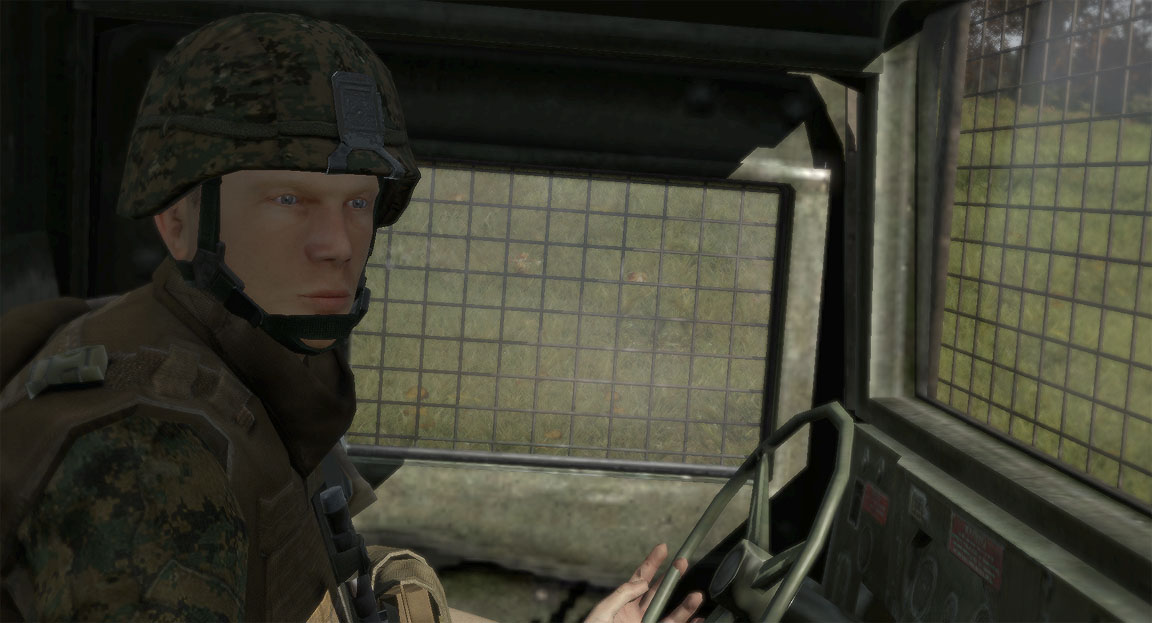
A driver does what it sounds like - drives the vehicle around the battlefield in accordance with his team leader or squad leader's directions.
The driver does not dismount unless he is explicitly told to by his team leader, or when the verbal command "BAIL OUT, BAIL OUT, BAIL OUT!" is given by himself or another player.
A summary of the driver's responsibilities follow.
Driver Responsibilities 
- Drives the vehicle according to the directions of his team leader.
- Maintains spacing when moving with other vehicles, knows the overall formation being employed.
Stays mounted at all times unless told to dismount directly, or when a "BAIL OUT" command is issued. - Communicates the vehicles' status and issues a "BAIL OUT!" command if necessary. If the vehicle's tires are blown, he immediately attempts to pull the vehicle into cover or concealment or out of the kill zone before giving the "BAIL OUT!" order. If this is not possible, he immediately halts the vehicle and gives the bail out command.
- Listens to his navigator's directions or navigates on his own.
- Watches the road for any signs of satchels, mines, IEDs, explosives, etc.
- Stays alert and avoids colliding with other vehicles as well as any unexpected obstacles in his path.
Navigator 
The navigator is often a fireteam leader. He typically sits in the front passenger seat of the vehicle and utilizes his map and view of the terrain to give the driver clear, concise directions on where to go and how to get there.
Navigator Responsibilities 
- Gives the driver clear and concise direction at all times. This includes describing the route, giving advance warning of any turns that may be needed, etc.
- Must be familiar with what the movement plan is from start to finish, in order to be able to make judgment calls if re-routing becomes necessary.
Gunner 
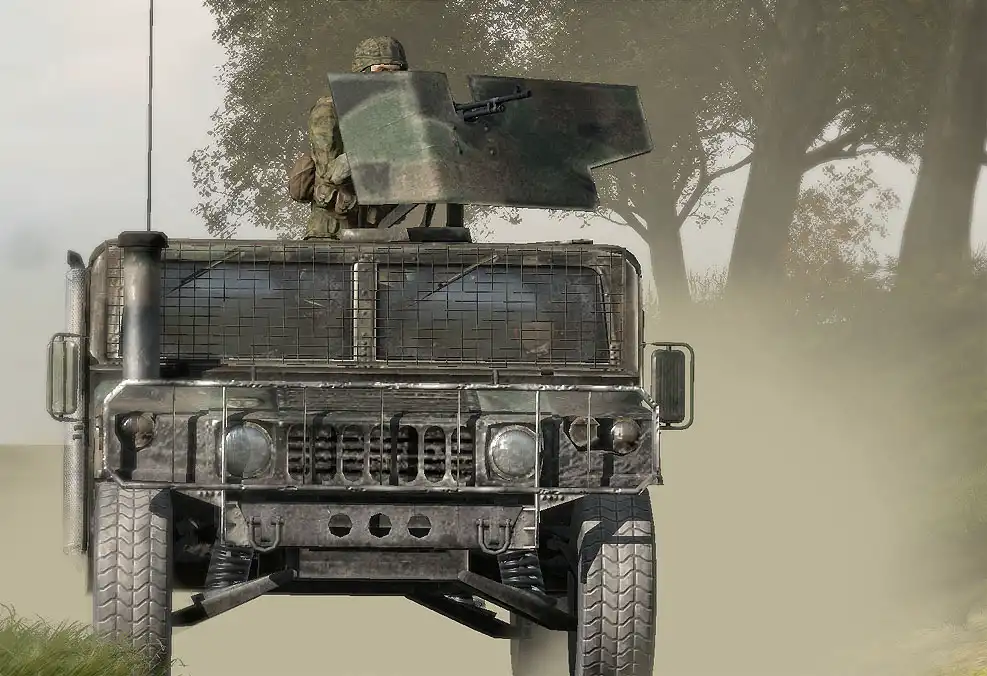
A gunner is tasked with employing the crew-served weapon system of the vehicle. Due to his elevated position, he has better observation of the terrain than the rest of the vehicle and communicates what he sees to help maintain the rest of the vehicle's situational awareness.
A gunner does not dismount the vehicle unless his crew-served weapon is empty, when he is directed to by his team leader, or when the command "BAIL OUT, BAIL OUT, BAIL OUT!" is given.
A summary of the gunner's responsibilities follow.
Gunner Responsibilities 
- Employs the vehicles crew-served weapon system.
- Maintains a high state of situational awareness and conveys what he sees to the passengers of the vehicle
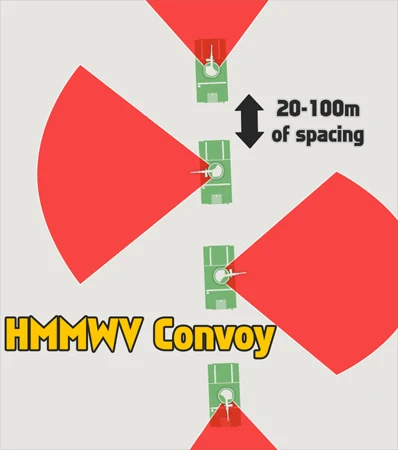
- Scans a sector appropriate to the position of his vehicle in the overall vehicle formation or convoy
- Front vehicles always scan to the front
- Rear vehicles always scan to the rear
- All other vehicles watch either left or right, alternating
- Stays mounted on his weapon until it is empty, he is directed by his team leader to dismount, or the command "BAIL OUT!" is received.
Passenger 
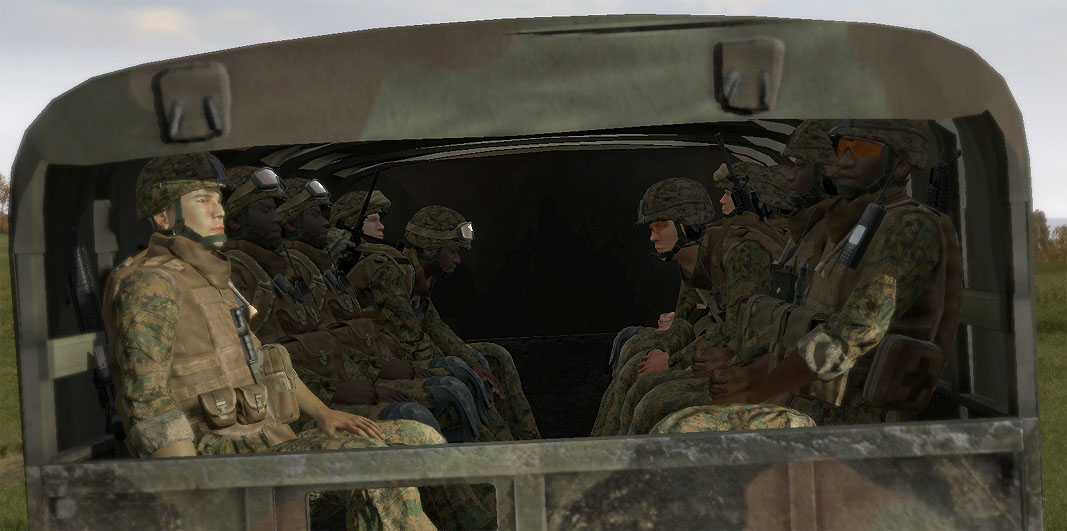
Passengers of transport vehicles are generally infantry embarked for the purpose of transporting them to a fight. They're interested in getting safely to the fight, and their responsibilities reflect this.
Passenger Responsibilities 
- Scan for and communicate threats. While they will sometimes not have a good view of their surroundings, they will take advantage of whatever view they do have to maintain situational awareness.
- Dismount to provide local security. When required (as detailed later in this section), infantry dismount to provide local security for vehicles. This is generally done during temporary halts en-route to their actual final dismount point.
- Dismount to fight. Once at the final dismount point, or as required otherwise, infantry disembark the vehicles, form up into their respective units, and begin the assigned fight. This can include reacting to a convoy ambush as well as any other unexpected fights that might happen before the main objective.
Basic Vehicle Guidelines 
Loading Up 
When it comes to embarking troops into a vehicle, the process is straightforward so long as leaders take initiative and command, and subordinates listen for and follow directions.
Element leaders always load up last in vehicles. Their responsibility is to get their team members into the vehicle that has been assigned by their higher leadership. After being designated a vehicle, they will direct their team members to it, supervise their loading, and then load up as the last man. If they need to take the front passenger seat of a vehicle to act as a navigator, they will need to direct the person sitting in that seat to get out, then wait for them to mount up before remounting the vehicle. This is simply due to ArmA2 not allowing you to choose which specific passenger seat you load into.
As a general rule, a fireteam will attempt to occupy the following positions in a vehicle if they're assigned to one.
- Fireteam Leader - Navigator
- Automatic Rifleman - Passenger
- Assistant Automatic Rifleman - Turret gunner
- Rifleman - Driver
However, if the rifleman is a completely new player, he will often switch places with another member, though this is not ideal.
while the two passengers move on the flanks on foot"
Halts & Dismounting 
Due to the way ArmA2 models vehicles and armor (which is to say, not very elaborately), armored personnel carriers and troop-carrying vehicles tend to be a bit too vulnerable to enemy fire. It is a good idea to avoid staying mounted as passengers in them, due to the risk of a single RPG wiping out the entire vehicle, its crew, and the immediate family and close friends of everyone who was embarked on it at the time.
When dismounting, infantry elements should provide 360° security as a standard. They should also try to get at least fifteen meters of clearance from the vehicle to help protect against primary or secondary explosions in the event that it is engaged.
It is a good idea to have "Eject" bound to an easily accessed key combo for emergency dismounts. I use 2x Ctrl+E.
Moving on, let's look at the various other considerations that must be made regarding halts and dismounting from vehicles.
When to dismount? 
To help decide on when to dismount, versus when to stay mounted, follow these basic guidelines.
- If a halt is short duration (30 seconds or less), mounted troops typically stay in their vehicles. All personnel continue to scan around the vehicle and stay alert to any potential enemy threats.
- If a halt is longer duration, mounted troops dismount and provide local security. Team leaders and squad leaders will order the dismount, at which point the "Dismount Drill" procedures are conducted. When it comes time to remount and move out, team leaders and squad leaders will say "Remount", "Mount up", or some variation thereof, which will then be repeated by everyone in earshot over direct-speaking VON. Each team leader will maintain accountability of their men each time they dismount and remount to ensure that nobody is ever left behind.
- Regardless of the duration of a halt, the driver and gunner always stay mounted. The only time they will leave the vehicle is if it is disabled or destroyed. The gunner may also dismount if the vehicle gun is out of ammo, so that he can employ his personal weapon.
5 & 25 Scan 
A "5 & 25" scan involves scanning the area immediately around you and the vehicle for five meters, then dismounting and scanning for 25 meters in all directions. The idea is to ensure that the vehicle did not stop near a concealed satchel charge, mine, or enemy. The tactical situation will determine how much time you have to spend on this scan. At the very least, upon dismounting, ensure that you do a hasty 360° threat scan.
Note that due to the peculiarities of how ArmA2 models armor and vehicle protection, the "5 & 25" scan often becomes "get out of the vehicle FIRST and scan afterward", instead of the more real-world procedure of scanning the first 5 meters while still mounted. In reality, being mounted in an armored vehicle provides a very large degree of protection. In ArmA2 - less so, so getting out generally takes priority.
Dismount Drill Procedures 
The 'dismount drill' is a standard set of procedures that are executed upon dismounting a vehicle. While they can differ somewhat based on the tactical situation (ie: under fire or not), the same concepts apply at all times.
If dismounting under fire...
- Dismount once the vehicle has come to a halt or is moving slow enough that exiting will not injure you.
- Immediately return fire on known or suspected enemy positions while moving to a position that offers cover or concealment. If no cover or concealment is available, either use the vehicle as cover, or take a lower stance.
- Begin the "React to Contact" battle drill and follow it until directed otherwise.
- If the situation allows, conduct a hasty "5 & 25" scan, as described above. Ambushers will often try to get vehicles to stop in an area that has been mined or otherwise booby-trapped.
If not under fire...
- Dismount once the vehicle has come to a halt.
- Move away from the vehicle to a position that offers cover or concealment. If unavailable, take a knee or go prone to reduce your exposure.
- Conduct a deliberate "5 & 25" scan, as described above.
- Scan outward and identify likely threat avenues, key terrain, etc.
- Continue scanning the surrounding terrain for enemy threats until ordered to remount the vehicle or move out with your team leader.
Bear in mind that this same dismount drill can be used when exiting a helo or any other vehicle where you may need to immediately fight or form a perimeter and provide security.
The decision to dismount can be a command from a leader or on your own disciplined initiative. If given as a command, it will be "Dismount, dismount!". Individual initiative is important here, of course. Don't sit in a vehicle getting shot up if you know you should be dismounting to react to the threat on foot!
Important!!! DO NOT say "BAIL OUT!" when ordering an infantry dismount! "BAIL OUT" will cause the entire crew to exit the vehicle as well, and should only be used if the vehicle is in imminent threat of being completely destroyed.
Situational Awareness 
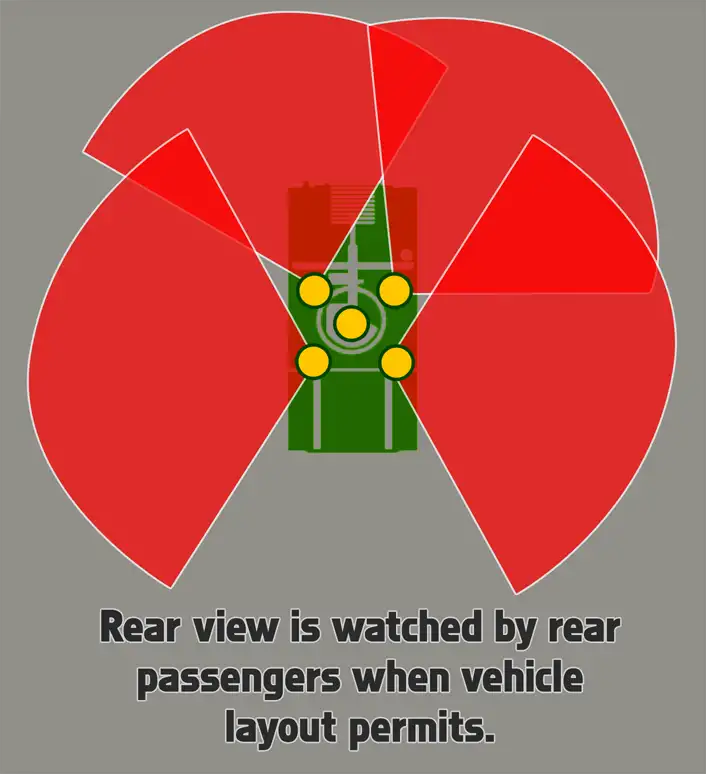
Everyone in a vehicle must scan their sectors to maintain situational awareness at all times. Vigilance will help to spot enemy ambushers and spoil their element of surprise. The sector a person scans will depend upon where they are placed in the vehicle. For a HMMWV, basic sectors are depicted below. 360° coverage is the ultimate goal.
Convoy Operations 
Guidelines for Convoy Operations 
Speed is Life, but Cohesion is Important 
Speed in a convoy tends to result in security. This is due to the fact that speed makes it harder to engage the vehicles with threat weapons such as RPGs, command-detonated explosives, and more. However, one must be careful to balance speed with cohesion - if a convoy is spread out too far, the mutual support of each vehicle's weapons, and the security they bring, is lost. This leaves individual vehicles subject to the massed fires of the enemy, which can cause a lot of trouble in short order.
To maintain convoy cohesion, the first vehicle must be aware of their speed and the proximity of those behind him. The convoy commander and other vehicle drivers can facilitate that situational awareness by communicating with the lead vehicle and other vehicles, giving them guidance on their speed, interval, sectors of observation, and more.
If the lead vehicle needs to unexpectedly brake hard for some reason, the driver will say "BRAKING, BRAKING, BRAKING" loudly over comms to help to prevent the trailing vehicles from piling into him when he brakes.
Interval 
Maintaining good interval is a key aspect of multi-vehicle operations. Depending on the terrain, vehicles should keep from 20 to 100 meters of spacing between each other. This helps to lessen the effects of enemy explosives such as satchel charges and IEDs and makes it harder for the enemy to mass fires on multiple vehicles at once.
It is particularly important to maintain good interval when stopping temporarily, taking corners or other types of turns, and halting the convoy.
Route Selection & Actions-On 
- Avoid urban areas whenever possible. It is far too easy for an enemy force to set up a devastating ambush in an urban area. Routes which pass through heavily wooded areas are likewise dangerous, but due to the nature of the terrain found in Chernarus, they cannot be avoided. Caution is the prime defense in that case.
- The convoy must know where to go, and must be planned out in advance with backup courses of action. If every driver knows the path they're supposed to take, and what the end goal is, they are able to better make tactical decisions and judgment calls in high-stress situations.
- The convoy must know actions-on. If the vehicles take contact, the drivers must know what they are supposed to do. In some situations it will be important to maintain high momentum and fight through every ambush or contact with ferociously aggressive action, while others will benefit from a more deliberate approach which involves clearing each contact with the help of dismounted infantry. It is up to the convoy commander to ensure that actions-on are briefed before the convoy starts rolling.
Situational Awareness & Security 
- Gunners must cover appropriate sectors. The first vehicle in a convoy watches to the front, the last vehicle watches to the rear, and vehicles in between alternate left-right-left so that guns are pointed in all threat directions at all times. It is important that gunners maintain their 360° observation even when contact seems to primarily be coming from a specific direction - if not, it is easy for the enemy to exploit this and maneuver into or fire from unobserved areas while the gunners are distracted elsewhere.
- Cohesion and security at halts are critical. Maintaining a cohesive formation and using good security procedures are critical to convoy survivability. If a full halt must be conducted, dismounted infantry must be employed to keep the convoy safe while halted. Cohesion is just as important, as it masses friendly forces and makes it much more difficult for the enemy to endanger the convoy.
Actions on... 
Contact - Blow Through 
If ambushed, our standard procedure is to fight through it while mounted and not stop until we have exited the kill zone. If the enemy begins firing on a convoy, all gunners should immediately bring their weapons to bear and put out a heavy volume of return fire. Even if the gunners cannot see the enemy, they need to be firing in the direction that they are taking fire from. Once an ambush is initiated, the lead vehicle driver needs to be particularly vigilant in his scanning of the road. The odds of an IED or other explosive being placed in the path is extremely high, and it will require split-second timing to avoid such devices.
When an ambush occurs, "blow through" is done unless otherwise stated. Leaders can also emphasize this by stating "Blow through!" or "Push through!" upon making contact.
Contact - Assault Through 
The alternate method of dealing with contact as a convoy is to assault into the contact. This is done with the verbal command of "Assault through!". When this order is given, troops dismount while vehicle gunners lay heavy fire onto the enemy positions. The dismounts and vehicles then proceed to maneuver towards the enemy and decisively engage and destroy them. When the enemy has been defeated, troops remount and continue on with the mission.
Note that when assaulting through, the infantry and vehicles are still ultimately interested in continuing on the convoy. They have some freedom to maneuver off of the convoy route to take the fight to the enemy, but they do not want to get pulled too far away.
Disabled Vehicle 
Most of the types of damage that can result in a disabled vehicle cannot be worked around in ArmA2. Because of this, our standard procedure for a disabled vehicle is for the other vehicles to drive around it, halt in a safe area (out of the kill zone, if it's an ambush), and recover the vehicle crew if they're still alive.
It is up to the crew of the disabled vehicle to get out of their vehicle and fight their way to friendly forces. Stopping more vehicles within an ambush kill zone would only result in casualties and more disabled vehicles.
When a vehicle is disabled, anyone who sees it states "Vehicle down!" on comms to indicate it.
Canalizing Ground 
Canalizing ground is any sort of ground in which vehicles are heavily restricted in how they maneuver within it. When this sort of terrain is encountered, infantry are dismounted to move ahead and sweep the area before the convoy is committed to moving through it. It is important to keep the dismounted infantry within range of the supporting fires of the convoy vehicles while conducting this sweep, too.
Convoy Halts 
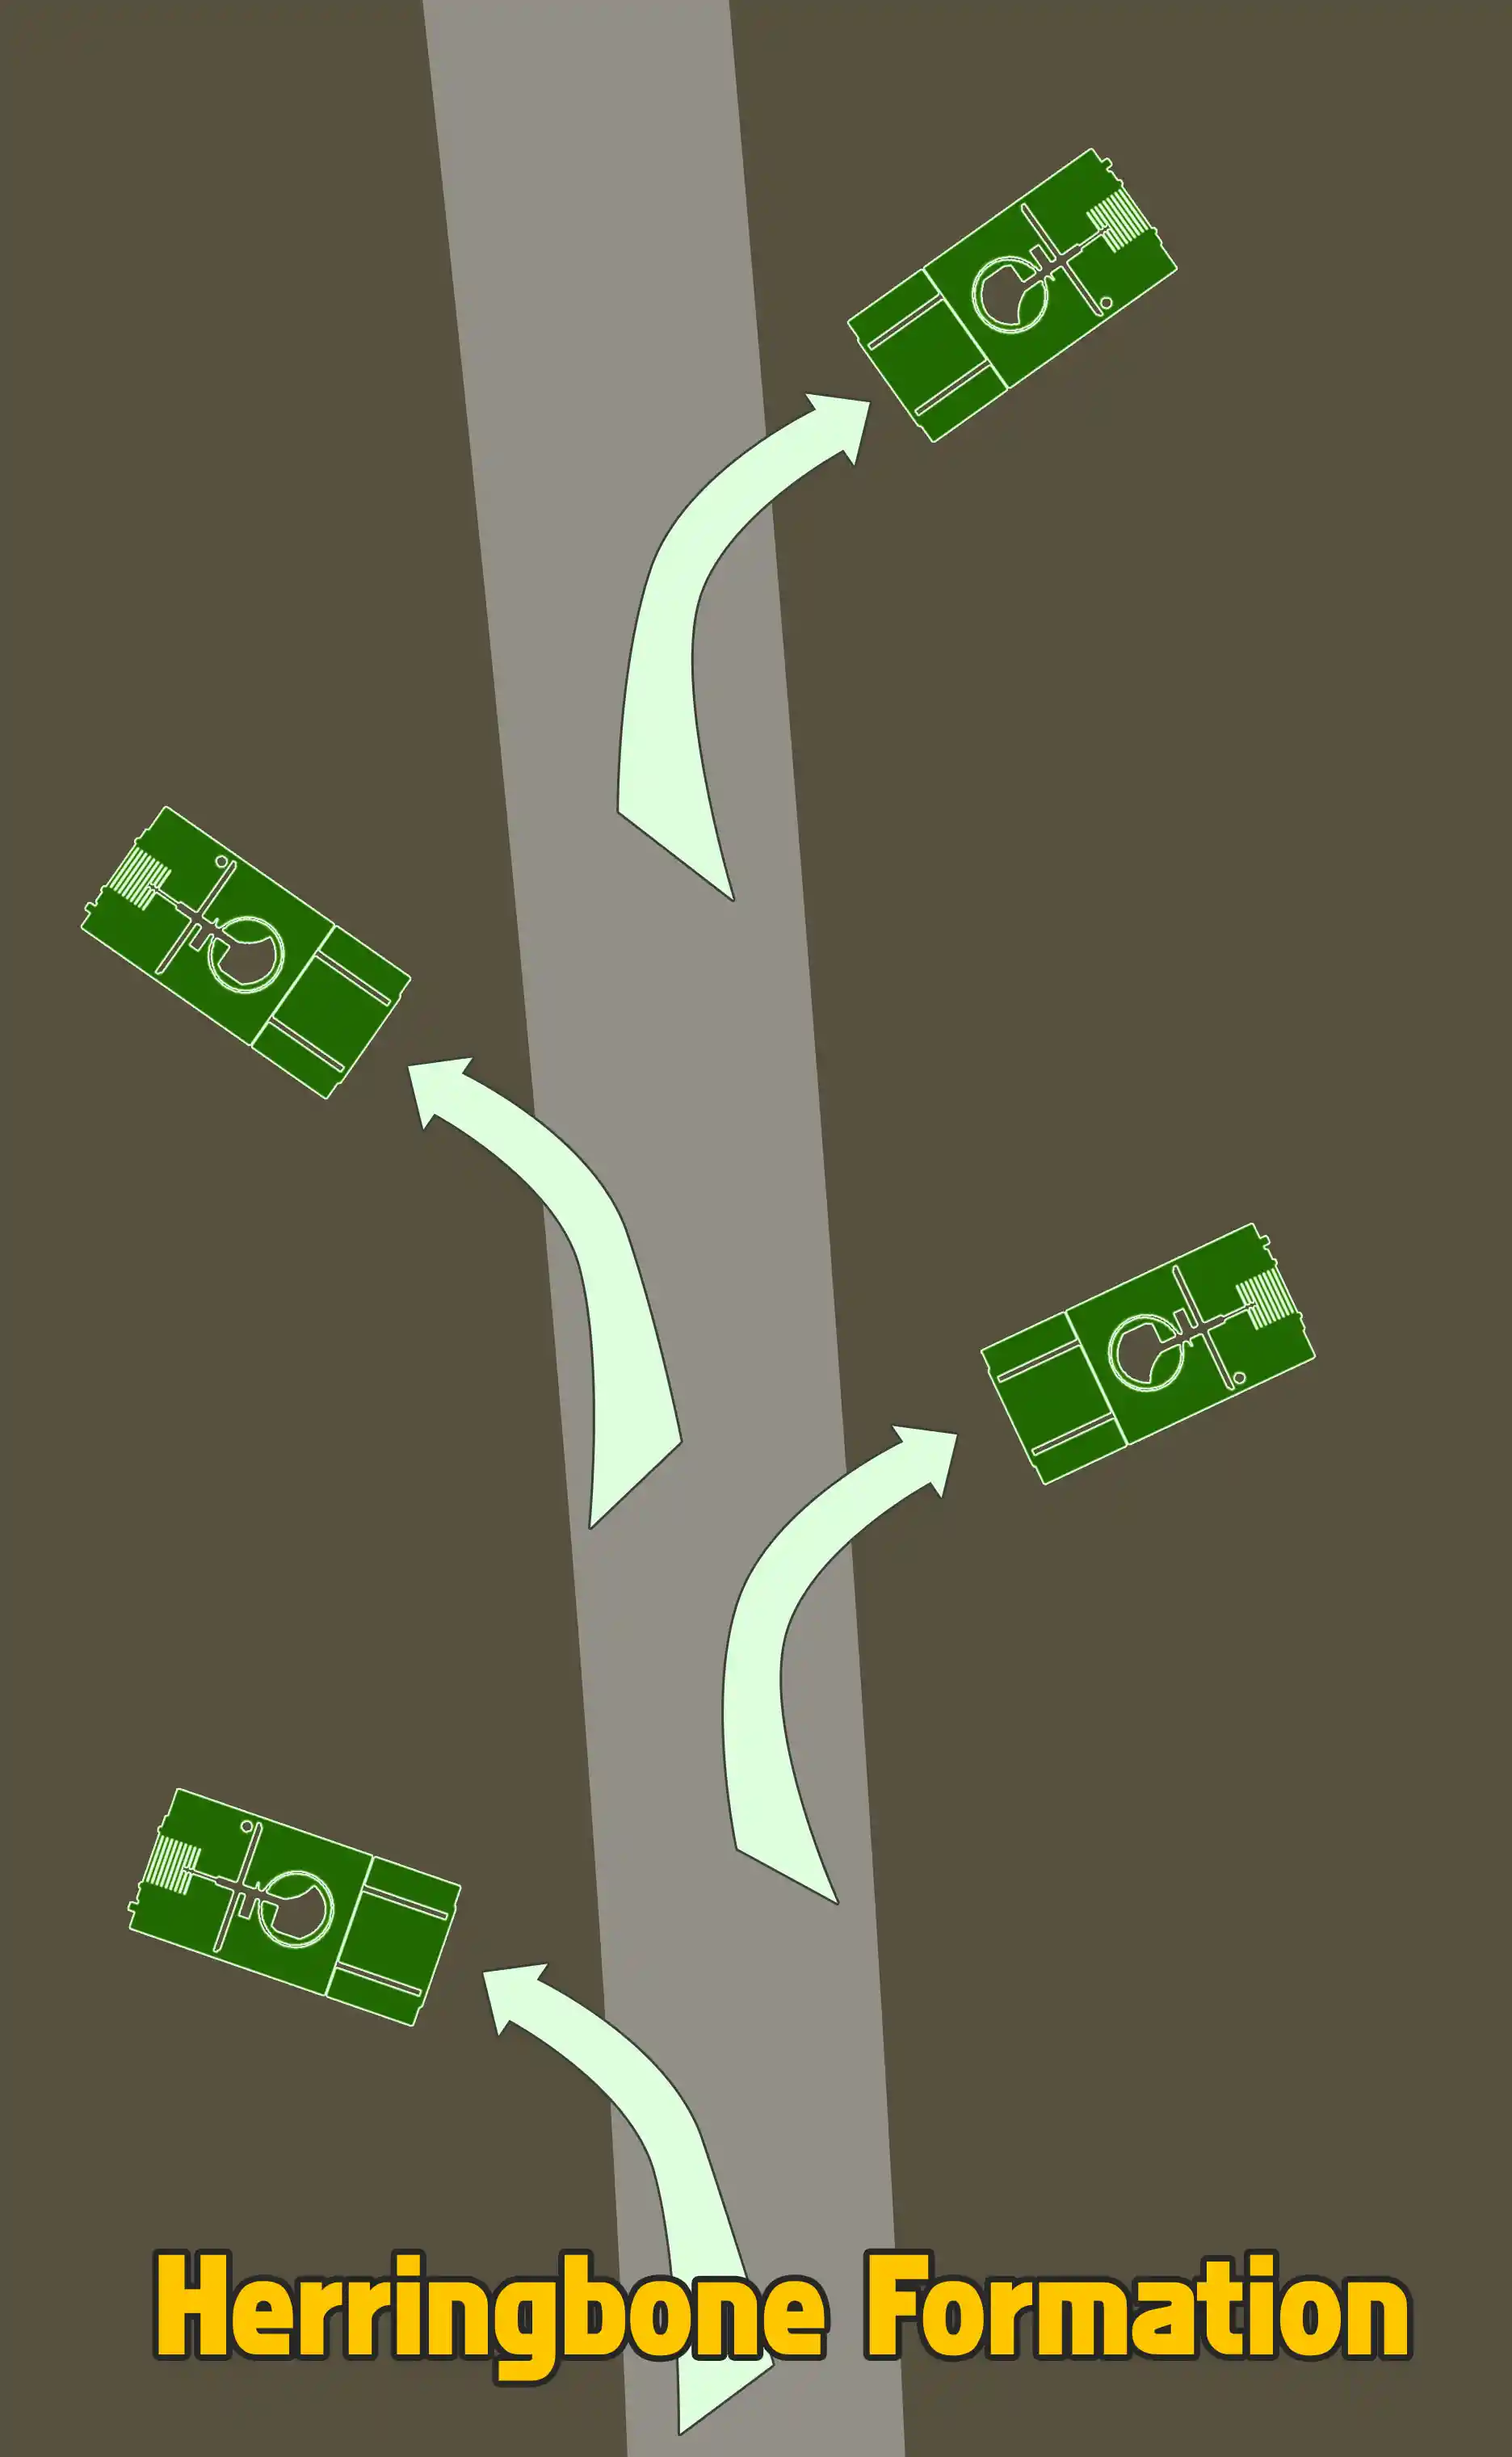
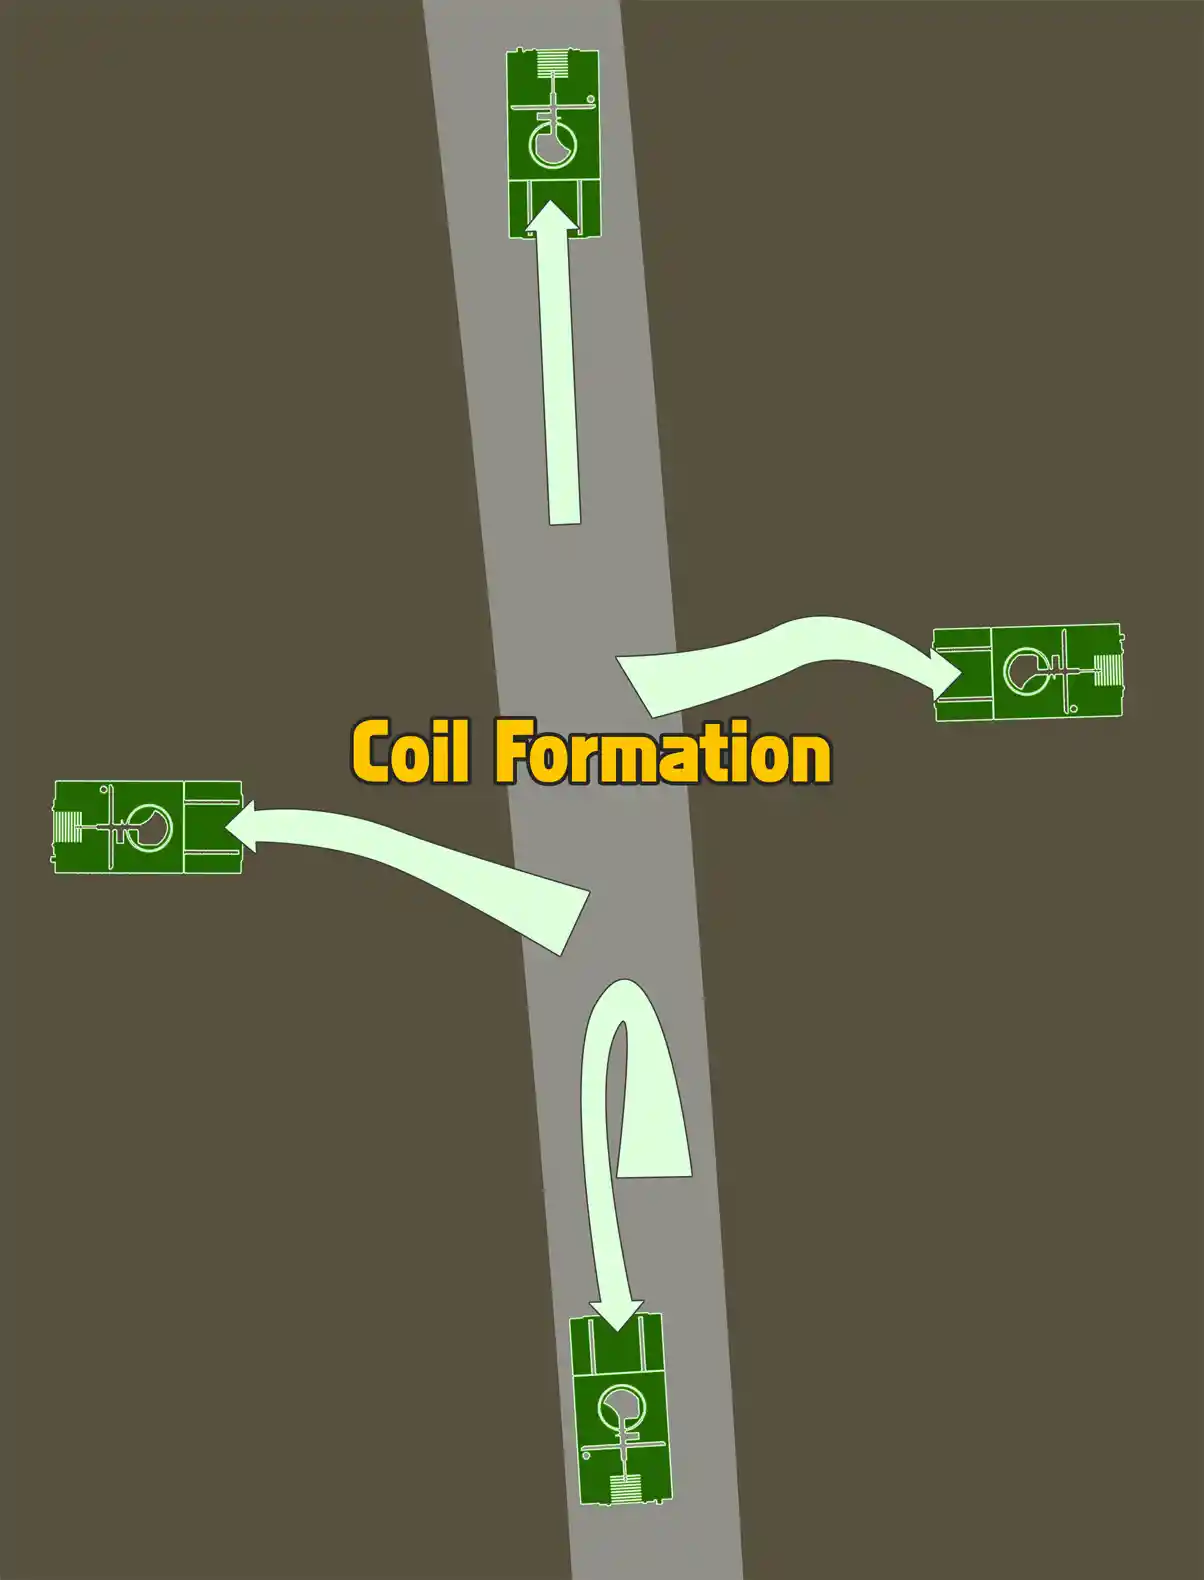
When halting a convoy, simply stacking the vehicles up on the road one-after-the-other is not the ideal way to do things. While this can be used for very brief halts, the better choice for reaction-to-contact or longer-duration halts is either the Herringbone formation (preferred, easiest to do) or the Coil formation.
Note, of course, that infantry should conduct dismount drills and provide local security whenever convoy halts are made, as described previously.
Herringbone Formation 
The standard formation to use when halting a convoy is known as the "Herringbone". In this, the vehicles pull off to both sides of the road in an alternating manner - the first vehicle pulls off to the right, second to the left, third to the right, and so on. The vehicles stay angled at about a 45° angle relative to the road. This formation is easy to execute and allows for the convoy to get good security when halted while also spreading the vehicles out a bit more than otherwise. This formation can be used in open terrain as well, in which case the direction of movement becomes the "road" and vehicles move relative to it.
Coil Formation 
The other formation that can be used is more geared towards armored vehicles. When executing a "Coil" formation, the lead vehicle stops and faces forward, the second vehicle pulls to the left and faces left (angling his strong frontal armor to the left), the third vehicle pulls to the right and faces right, while the trail vehicle turns around or spins in place so that it is oriented towards the rear. This allows for the vehicles to place their strongest armor in the direction that they're covering and provides excellent 360° security.
 新規
新規 編集
編集 添付
添付 一覧
一覧 最終更新
最終更新 差分
差分 バックアップ
 凍結
凍結 複製
複製 名前変更
名前変更 ヘルプ
ヘルプ
