データ 
| House Arrest - Part 2 | |
|---|---|
 | |
| データ | |
| マップ | STREETS OF TARKOV |
| トレーダー | Skier |
| Kappaタスク | 不要 |
| 前のタスク | House Arrest - Part 1 |
| 次のタスク | - |
開始条件 
- 「House Arrest - Part 1」完了報告後から約21時間後
- レベル 36
メッセージ 
「I made some background checks on the guy who runs the place. The warden's condo is in the same house. That's where he was supposed to take all the loot. You know, the payment for keeping people locked up. I'd be looking for a way into the apartment straight from the jail. So go check it out again. I'm guessing the motherfucker's still in there hiding. Okay, you know what to do with him. Anything you find in the crib is all yours. Deal?」
「His crib is smashed to bits, huh. So I wasn't the only one who had a grudge against him. You say there's a body in there? Maybe that's him? Can't be sure, but I'll have the boys check it out.」
目標 
- 刑務所長のアパートを探す
- 刑務所長に何が起こったか調べる
- 生還する
※調査後に死亡して別途生還でも問題ない。
必要なアイテム 
| アイコン | アイテム名 | 必要な数 | 要求事項 | FiR | 備考 |
|---|---|---|---|---|---|
| Chekannaya 15 apartment key | 1 | - | 不必要 | - |
報酬 
- 経験値+29,200
- Skier親密度+0.03
- 資金+114,000₽
- 資金+119,700₽ ※ Intelligence Center Level 1
- 資金+131,100₽ ※ Intelligence Center Level 2
- TDI KRISS Vector Gen.2 9x19 submachine gun x1
攻略のヒント 
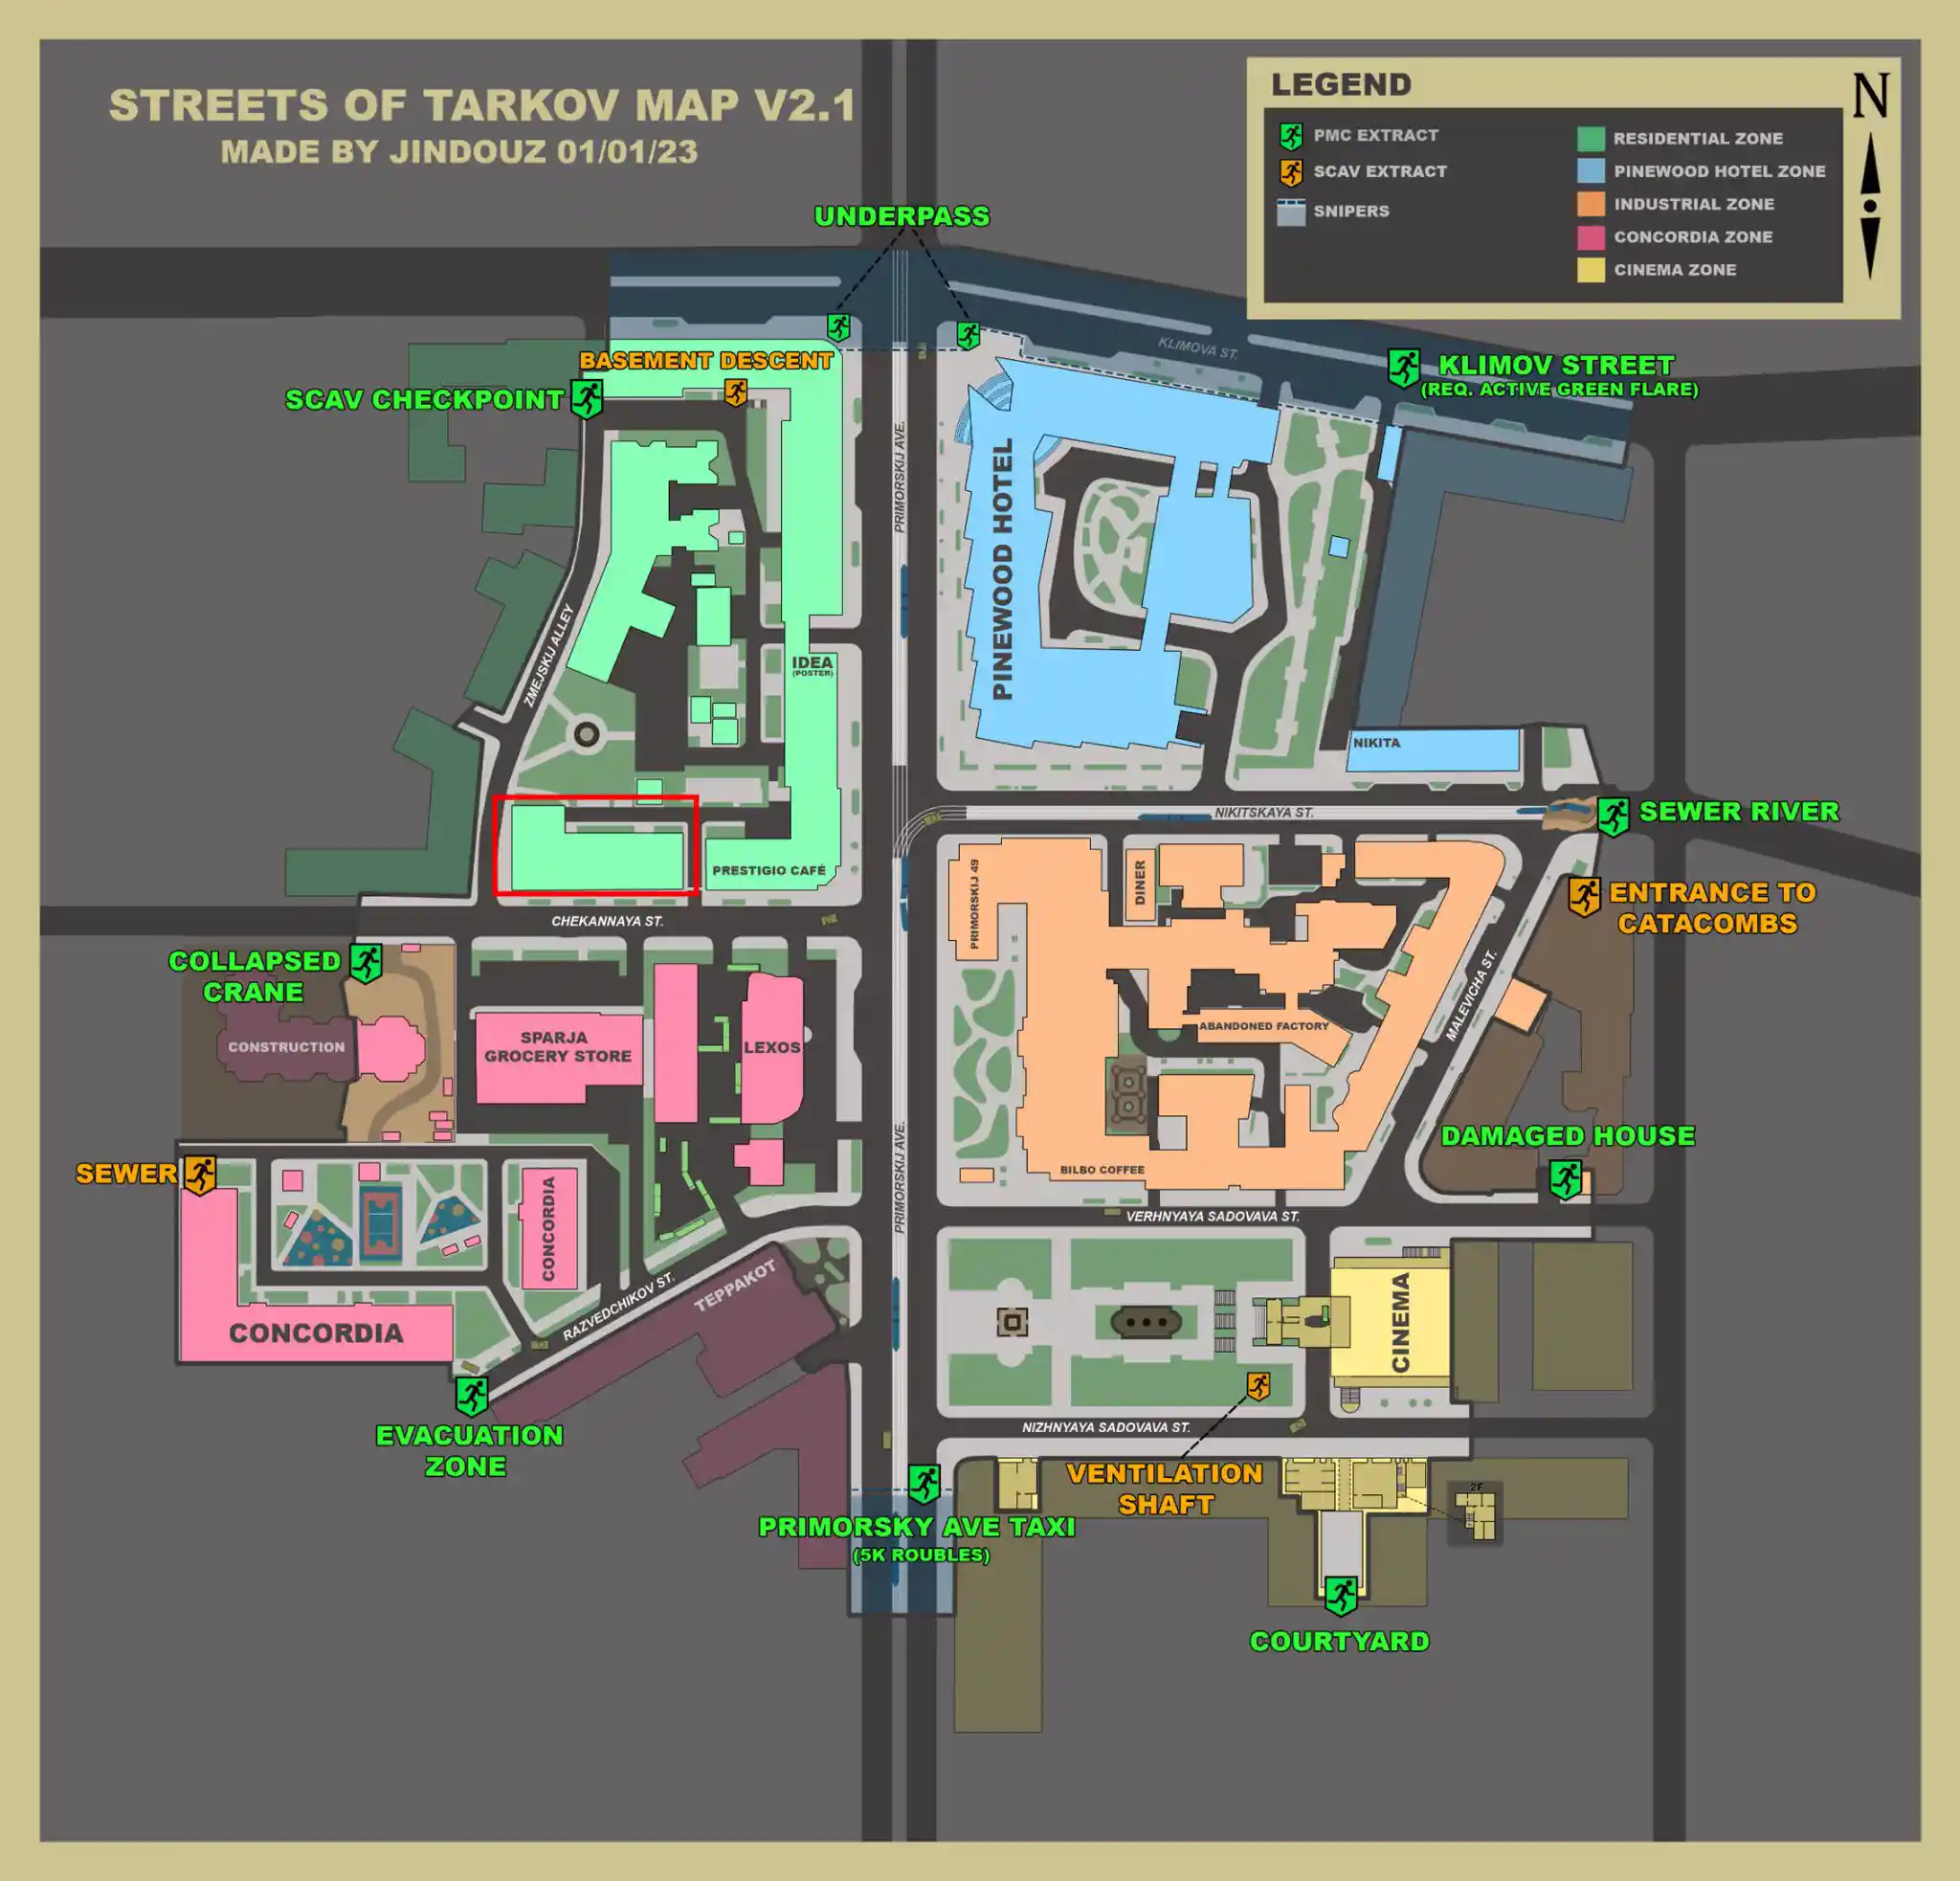
建物の入り口は2か所
①マップ下(南)の割れ壁から入る
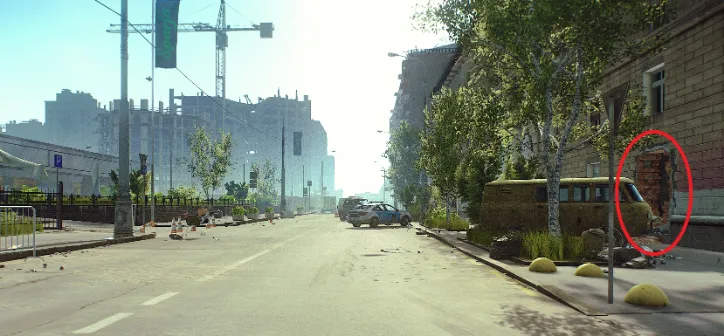
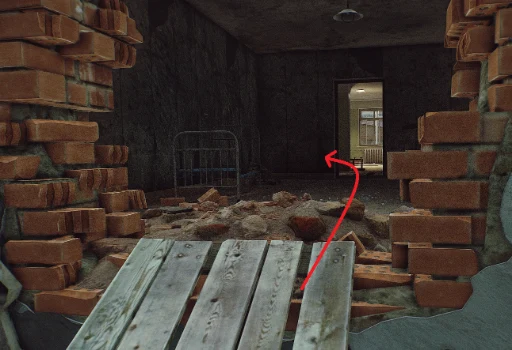
※入ってすぐ右の階段にタスク目標の死体がある(先に見ても達成できる)
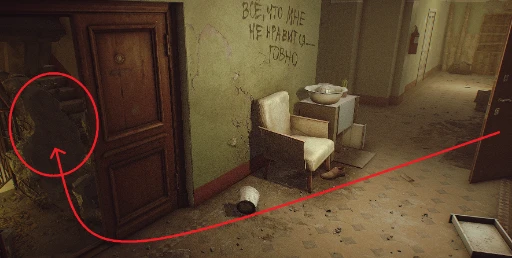
②マップ上(北)建物の裏から階段フロアに入る
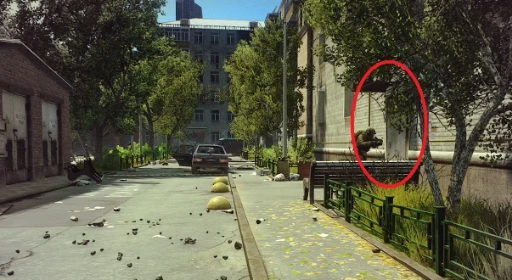
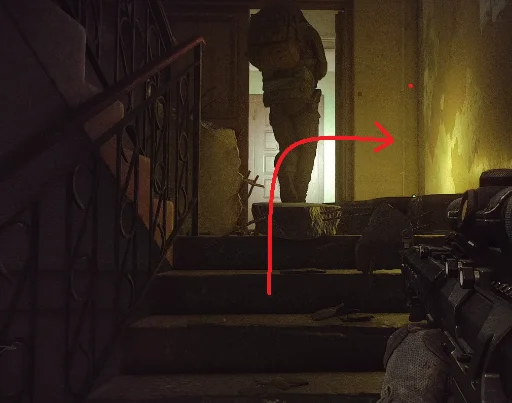
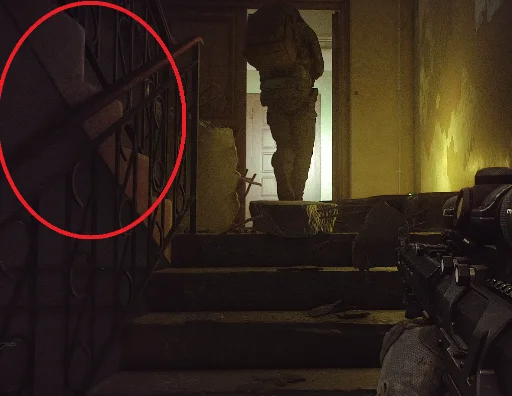
※このすぐ左にタスク目標の死体がある(先に見ても達成できる)
崩壊した壁から先に進む
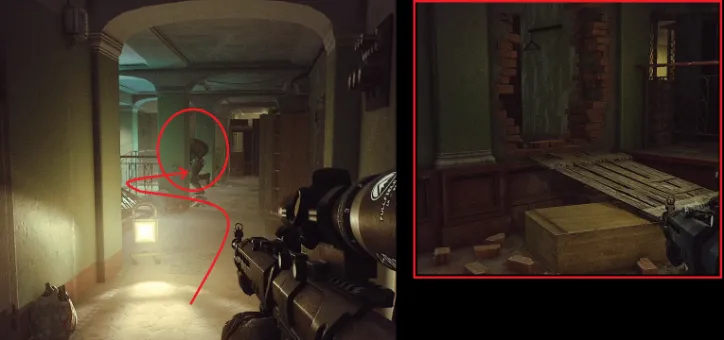
キッチン右のドアを出て右の廊下から階段フロアに向かい3階に進む
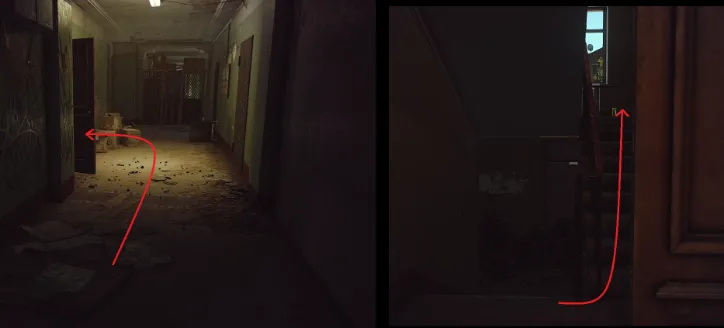
3階のドアを出た左の廊下
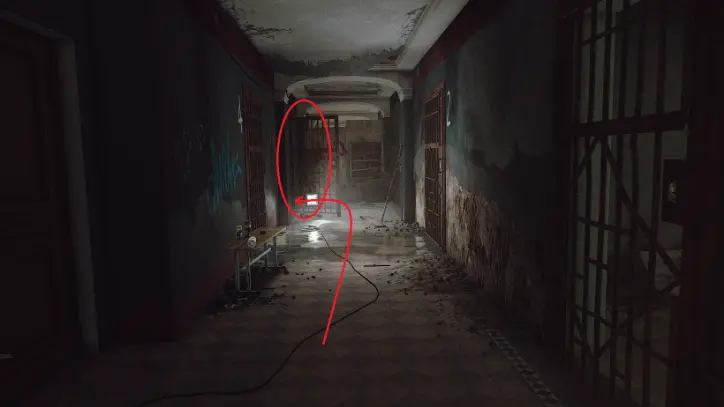
3階の廊下の5番の部屋の床の穴から2階に降りる
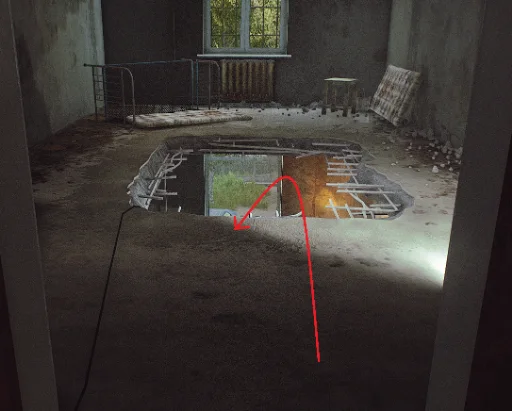
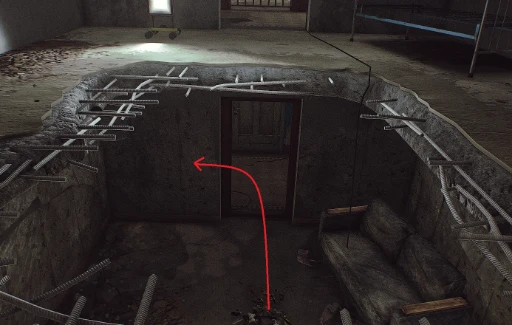
2階の廊下の崩落した天井の隙間を匍匐で潜り抜ける
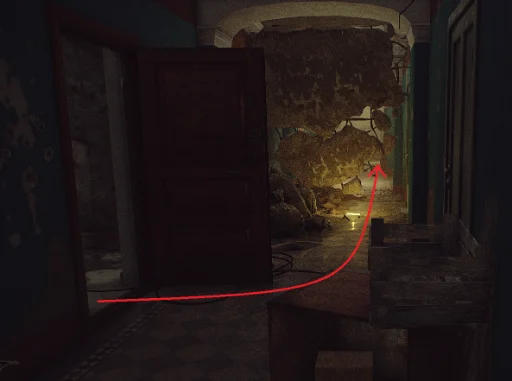
潜り抜けた先の一番奥右側の部屋に鍵を開けて入る 部屋の中央に進めばサブタスククリア
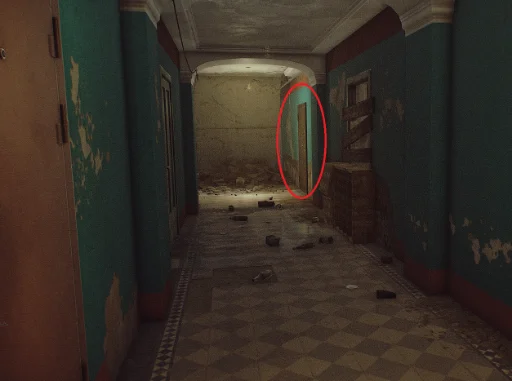
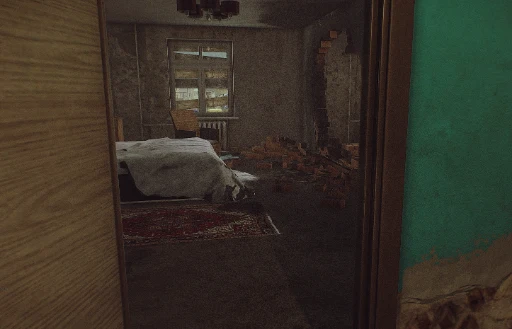
タスク部屋すぐ前の階段を鍵で開けるか
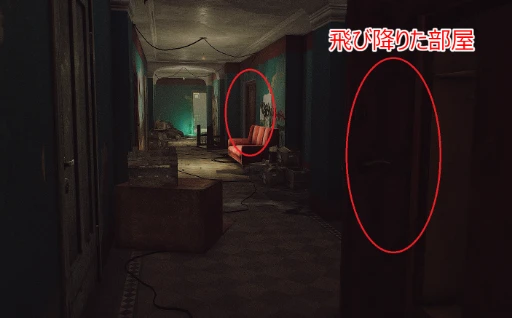
匍匐前の飛び降りた部屋まで戻れば、右手の階段ドアをブリーチで蹴り開けられる
コメント 
情報提供や編集にご協力をよろしくお願いします。
備考 
この記事は、Fandom の Escape from Tarkov Wiki の「House Arrest - Part 2
 」の要素が利用されており、これはクリエイティブ・コモンズ 表示 - 非営利 - 継承
 のライセンス下で提供されています。
 新規
新規 編集
編集 添付
添付 一覧
一覧 最終更新
最終更新 差分
差分 バックアップ
 凍結
凍結 複製
複製 名前変更
名前変更 ヘルプ
ヘルプ![[hatena]](https://cdn.wikiwiki.jp/to/w/common/image/face/hatena.gif?v=4)
![[tip]](https://cdn.wikiwiki.jp/to/w/common/image/face/tip.gif?v=4)