The idea behind a "Battle Drill" is that it is a standardized way to react to a common battlefield event. Battle Drills ensure that everyone is on the same page of music, so to speak, and allows for a rapid reaction to an event with the minimum of orders needing to be issued. The following battle drills cover the most common combat events to be encountered in ArmA2, and are the foundations on which additional tactics are built.
Reaction to Contact/Enemy Fire
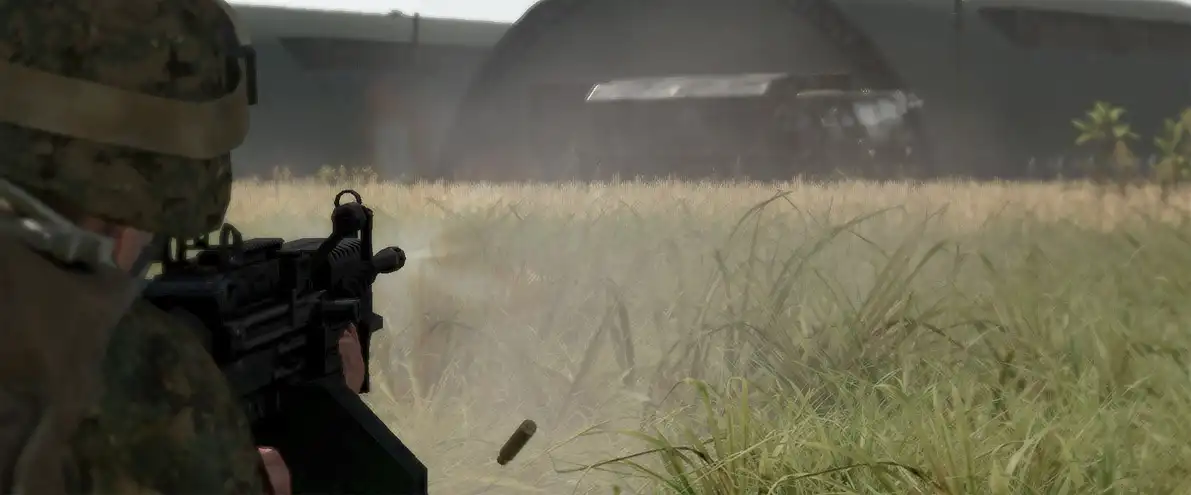
The most fundamental battle drill is reacting to enemy fire. It forms the basis for many of the other tactics covered in this guide, and these guidelines should be kept in mind when reading about them and applied as necessary. I've broken them down based on leadership level.
If your element comes under fire, follow these basic guidelines, depending on what level of leadership you're at.
Fireteam Member
- Make a hasty contact report (ie "CONTACT LEFT!") while you move to take up as good of a position as possible (cover first, concealment if no cover available) and return fire in the direction of the enemy.
- Listen for orders from the Fireteam Leader or Squad Leader. If your element leader is killed, and you are next in command, take command and evaluate the situation as a fireteam leader would (see next section).
- Continue scanning for, engaging, and communicating the location of known, suspected, and likely enemy positions. Ten seconds into the firefight, you will likely have a much better feel for what is happening, and where the enemy is. Ensure that you continue to communicate this information to your team and squad members. Scan all around, too - just because the enemy is firing from one particular area does not mean that they aren't already flanking or positioned in other, dramatically different locations as well. Do not fall prey to tunnel vision!
- Don't be afraid to show disciplined initiative. Fireteam members are at the cutting edge of the battle - if you see an opportunity or a danger, take the initiative to do something or say something about it. This includes something like seeing or hearing evidence of enemy armor coming - if out in the open, for instance, a fireteam member may announce this to his team and thus get them moving towards better cover instead of staying in place and being caught in an even worse position.
- If wounded, announce it and make your way to the squad medic if the wound is dire. If it's a light wound, continue fighting until things calm down.
Fireteam Leader
- Ensure that your fireteam has positioned itself appropriately, and if not, order them to a covered or concealed position. If necessary due to bad positioning, deploy smoke and pull your team back to better cover or concealment.
- Determine the location of the enemy as precisely as possible and report it to the Squad Leader.
- Begin engaging the enemy yourself. Use your M203 grenade launcher against clusters of the enemy and high-value targets and use the rifle against individual soldiers. Stay tactically alert and avoid getting tunnel vision.
- Direct the fire of your team as needed. This includes massing fire on specific targets or covering a very specific sector.
- Be prepared to maneuver in accordance with your Squad Leader's orders. Scan the area and consider how and where you might move to gain a tactical advantage over the enemy.
Squad Leader
- Achieve fire superiority. If the enemy opens an ambush with an automatic rifle and rifle fire, pour more fire on his position than he is putting on you. The sheer volume of return fire you direct at the enemy may be the deciding factor of the firefight from a psychological standpoint.
- Ensure that the fireteams are reacting appropriately. If necessary, order them around to achieve a more effective posture or maximize fires in one direction. If one team is particularly exposed, direct the other teams to increase fire while the exposed team moves to a better position.
- Report to the Platoon Commander and tell him what the situation is when time and the situation permits. This should be brief - "Alpha squad taking heavy fire from our East". Prioritize appropriately - if you need to be communicating with your squad to keep them alive instead of spending time reporting up the chain, do so, and worry about telling the PltCo once things have calmed down a bit.
- Assess the situation. Can your squad fight from where you are 2009-08-15 (土) 13:13:46 If not, direct your fireteams to new positions, moving via bounding overwatch so that you maintain fire on the enemy at all times. If you can fight from your current position, do so and act as a base-of-fire element for the platoon. If you cannot fight from your position and cannot move to a more favorable one, execute a "Break Contact" drill (as described below).
- Coordinate with neighboring squads if possible. If a nearby squad is in position to exploit the enemy's vulnerability, pass your thoughts to them and see if they can do anything about it.
- Listen for orders from the Platoon Commander.
- Maintain situational awareness. Stay alert for possible flanking attacks.
- Ensure that the Squad Medic is taking care of casualties as they occur.
Breaking Contact/Withdrawing
Breaking contact is the means by which an element disengages from a confrontation with an enemy force in an orderly fashion. Fire & maneuver tactics are used to ensure that a steady volume of fire is put on the enemy location(s) during the withdrawal. This helps to keep the enemy's head down and prevents them from keeping friendly forces decisively engaged.
Breaking contact is basically an assault done in reverse.
Break Contact via Bounding Overwatch
The primary method of breaking contact is via bounding overwatch.
To execute a "Break Contact via Bounding Overwatch" drill, the following steps are taken.
- The element leader announces his intent to break contact via bounding overwatch. He designates one or more elements as the "base of fire". This element can be as small as a fireteam or may consist of multiple fireteams.
- The base of fire element takes the best hasty position possible and begins laying fire on the enemy.
- While the base of fire element lays down sustained accurate fire on the enemy, other elements move via rushes to the rear. These elements pick spots of natural or artificial cover or concealment from which they can support the base of fire element when it pulls back. Smoke is deployed to conceal movement when available.
- On the element leader's command, or at their discretion, the base of fire displaces to the rear towards the supporting elements. These supporting elements begin sustained accurate firing on the enemy until the base of fire element has moved past them and established a new position.
- This process is repeated as necessary until friendly forces have successfully disengaged from enemy contact.
Conducting an Ambush
An ambush is defined in the Army's "Infantry Platoon and Rifle Squad" publication as "...a surprise attack by fire from concealed positions on a moving or temporarily halted enemy unit. It combines the advantages and characteristics of the offense with those of the defense."
Ambushes are an extremely favorable way to engage the enemy. The combination of surprise and fierce, accurate fire can rip an enemy element to pieces before they have time to react.
Types of Ambushes
There are three main types of ambushes for our purposes - the deliberate one, in which we know that an enemy force is going to be moving through a given area, the hasty one, in which we unexpectedly have an opportunity to ambush an enemy force that has not detected us, and the delaying or guerilla one, in which we are attempting to strike the enemy, cause casualties and confusion, and they withdraw before they can retaliate.
Deliberate Ambush
These are typically convoy ambushes. We may be tasked in a mission to stake out a slice of terrain and cover roads that an enemy convoy is expected to pass. In such a situation, demolition plays a large part. Mines can be set, as can satchel charges and other explosive devices. A relatively large amount of prep time is given for this, and the results tend to reflect this. Deliberate ambushes are devastating and highly effective. The one big unknown is whether the expected enemy force will be the same composition and size as our mission briefing or intelligence reported. The difference between a troop convoy and a tank convoy, for instance, is huge, and both must be engaged with different tactical considerations.
Hasty Ambush
Hasty ambushes are usually against enemy infantry but can also be against other enemy forces. The decision to conduct a hasty ambush needs to be communicated rapidly, since there usually isn't much time to get positioned and ready to open fire. Fireteam leaders and squad leaders are the most common leaders to give orders for a hasty ambush. Satchel charges and other explosives play a very limited role in these types of ambushes due to the lack of time and ability to position them.
Delaying/Guerilla Ambush
Delaying or guerilla ambushes work best against enemy infantry. The purpose of them is to either delay the enemy's pursuit of friendly forces during a withdrawal or sow confusion and death amid their ranks unexpectedly before vanishing. The size of an ambush team of this nature is usually a squad or less.
The goal of a delaying ambush is to engage the enemy by fire and cause enough casualties to temporarily halt them. At that point, the team withdraws to another defensive position from which they repeat the ambush if possible.
The goal of a guerilla ambush, on the other hand, is to engage the enemy by fire, cause casualties, and withdraw before the enemy can decisively respond to the ambush team and fix them. The guerilla ambush team breaks contact, maneuvers to lose any pursuit from the enemy, and then evaluates its next moves.
Both of these ambush teams must be able to engage the enemy, produce the desired effect, and relocate or disengage before enemy support assets such as artillery or close air support can be brought to bear.
Key Elements of an Ambush
The key elements of any ambush are friendly positioning, location of the kill zone, and proper initiation of fires.
- Friendly Positioning. The best ambushes have the friendly forces located in good cover and concealment, firing from an elevated position. This makes it the most difficult for the ambushed enemy to be able to effectively retaliate.
- Location of the Kill Zone. The kill zone is the area in which fire is focused at the initiation of the ambush. An ideal kill zone has very little cover or concealment, and no significant terrain features that might cause "dead zones" to exist. A kill zone should be well-covered by friendly lines of fire, and any potential exits from it should be able to be fired at/into without friendly forces shifting positions. Grenadiers should ensure that any "dead space" or obvious cover or concealment can be easily be taken under fire with their grenades and position themselves accordingly.
- Proper Initiation of Fires. The signal to start the ambush is usually given verbally by the element leader (ie squad leader). He will give a warning that the ambush is about to begin, so that everyone can sight in on targets and prepare to fire. Once the order is given, all friendlies should begin firing a heavy and accurate volume of fire into the kill zone. Continue firing until all enemies are confirmed dead or the element leader gives a command to shift or cease fire. One special consideration must be made clear for ambushes - if a friendly accidentally fires before the element leader, the ambush is initiated whether it should have been or not. All players must immediately open fire in such a situation to try to salvage as much of the surprise and lethality as possible. One must also keep in mind that a player may hastily fire on an enemy who has spotted the ambush group, in which case he may not have time to announce what is happening and must rely on his teammates to immediately begin firing on their targets as well. Because of both of these situations, every member of an ambush team must be ready to initiate fires either at the element leader's verbal command or the sudden firing of any member of the ambush party.
Players must also consider the use of explosives devices like satchel charges and claymore mines. These are usually not practical for a hasty ambush, but a vehicle ambush or deliberate ambush can benefit greatly from their usage. Triggering explosives to start an ambush is very effective, as it adds an extra layer of shock and confusion to the situation for the enemy.
The Linear Ambush
A linear ambush is the most basic type. In it, all ambushing forces are arrayed in a single line. This type of ambush is easy to set up in a hurry and works well in most situations. Many hasty ambushes end up as linear ambushes due to lack of time and mobility to get an L-shaped ambush enacted. Note that the longer the line is, the harder it is for the enemy to find cover or concealment - features that may conceal him from one end of the line may not have an effect due to a member on the other end being able to still see him. Note also that the ambushing team should not be spread so thin that the ambushees are able to assault into the ambush and drive a wedge through the line.
The L-Shaped Ambush
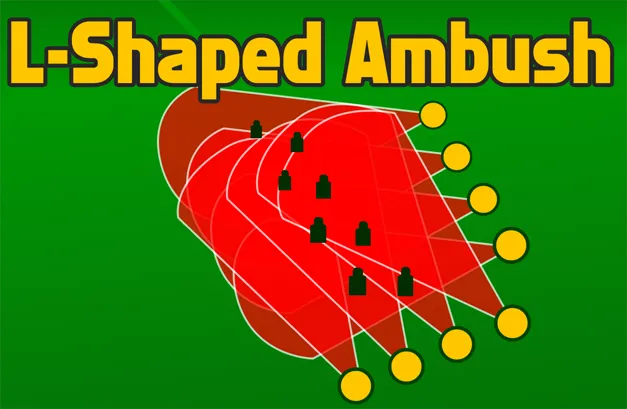
An L-shaped ambush is a bit more complex to pull off, but the extra effort is rewarded by markedly increased effectiveness. An L-shaped ambush requires that one element be positioned at a right-angle to the rest of the ambush. When the ambush is initiated, one of the two elements will find itself firing into the flanks of the enemy, while the other element will be firing into its front. Being hit from two sides like this will rapidly attrit the enemy and make it almost impossible for them to survive. A well-conducted L-shaped ambush is near certain death for those trapped in the kill zone.
L-Shaped ambushes can be done with any composition of forces. Even a single infantryman who is off to the side of the enemy when they come under fire from the front can have a dramatic effect. Initiating fires from the front while a sniper or designated marksman lurks quietly off to the enemy's flank can be highly effective - the enemy will find cover or concealment that protects them from the front, leaving their flanks open to the sniper or designated marksman who can then pick them off at will.
The Convoy/Vehicle Ambush
Vehicle/convoy ambushes are similar to infantry ambushes, with the main difference being that the vehicles are able to exit the kill zone rapidly if nothing is done to stop them, and armored vehicles can quickly turn the tides by attacking into the ambush if they are not rapidly dealt with.
Special Guidelines for a Vehicle/Convoy Ambush
- When ambushing soft vehicles, shoot for the tires and drivers. Flat tires make it almost impossible to move with any decent speed. Dead drivers add confusion to the mix, and require that someone get out of the vehicle and then back in as a driver to continue on. Doing that effectively under fire without having your head shot off is difficult at best.
- Hit the lead vehicle first, then the trail vehicle, then work up and down the rest of the convoy. Stopping the lead vehicle with fire can cause the rest of the convoy to temporarily halt and compress until the convoy can make the combat decision to drive around the disabled vehicle. Taking out the trailing vehicle can prevent the convoy from reversing out of the kill zone. This is more pronounced the tighter the terrain is. Trying to block in a convoy like this in the open desert may not work well, but in a constricted valley or urban environment it will be highly effective.
- Take out other vehicles in order based on the threat they pose. If there is armor in the convoy, ensure that it is taken out immediately or else the enemy will likely be able to use it to fight free of the kill zone.
- When numbers allow for it, "double up" anti-tank gunners on each target. One AT should fire his weapon at a tank or other piece of armor, with the other AT gunner standing by to take a shot if the first misses.
- Stay away from knocked-out vehicles. Secondary explosions in ArmA2 can wipe out infantry with ease. Flames from the wreckage can also cause damage in
 .
. - Decoy devices can be used to halt a convoy in a kill zone. Placing an abandoned vehicle in the middle of a road can oftentimes cause a convoy to slow down or halt if they suspect that the vehicle is hiding an IED or satchel charge. To take advantage of this precaution, place IEDs or satchel charges further up the road and then place the vehicle in a position such that the convoy will stop upon seeing the vehicle, and upon stopping they will be in the kill radius of the explosives you hid along the road, not to mention that they will also be in the kill zone of friendly infantry positioned to overwatch the explosives.
Reaction to Ambush
An ambush typically is a more coordinated enemy effort than your average "meeting engagement" firefight. The 'kill zone' (where the enemy focuses their fires) is under heavy, concentrated fire, and those within it have to rapidly react to the situation if they hope to survive.
The reaction to an ambush depends on whether it is a 'near' or 'far' ambush. Both will be described below. The guidelines above for a general "Reaction to Contact" should be kept in mind as well.
Near Ambush
A 'near ambush' is defined as an ambush occurring with the enemy within grenade-throwing distance.
When an element is subjected to a 'near ambush', the action required varies depending on whether any given player is in the "kill zone" or outside of it. The voice call for a near ambush is simply "Near ambush, (direction), and should be said by the first person to identify it. Due to the confusion caused by a near ambush, the element will likely require a moment to identify the type of ambush. This means that you'll likely hear a "Contact (direction)!" call, followed by "Near ambush!" after a brief pause.
If you are in the kill zone (meaning, the enemy is focusing the bulk of their fire in your area), you must immediately return fire and take up covered or concealed positions. Immediately throw frag grenades or smoke at the enemy and assault their position. The speed and violence of your element's reaction to the ambush will be the deciding factor as to how many of you walk away from it.
If you are not in the kill zone, your job becomes one of support. Identify and engage the enemy with as much firepower as you can bring to bear, as quickly as possible. When the "kill zone" element assaults into the ambush, shift or cease fire to avoid friendly fire.
Far Ambush
A 'far ambush', on the other hand, is any ambush in which the enemy is further than 50 meters away. These can take a multitude of forms, and the only positive aspect of them is that the increased distance of the enemy means that friendly forces can potentially maneuver better and the enemy may not be as deadly with their fire from an extended range.
Again, the action of each individual varies depending on their location within or outside of the "kill zone". The voice call for this is "Far ambush, (direction)". Simple enough.
If you are in the kill zone, immediately return fire and move to a covered or concealed position. Focus fires on enemy crew-served or high-volume weapons (machineguns) and try to knock them out as quickly as possible. Smoke grenades (both M203 and hand-thrown) can be used in two primary fashions - the first is to place them around the "kill zone" ambushed squad to conceal them from enemy fire. The other use, for the M203 smoke grenades, is to fire them at the enemy location and try to obscure their view of friendly forces.
In a far ambush, the ambushed element does not attempt to assault through the ambush. Instead, they form a base of fire while the elements not in the kill zone maneuver against the ambushing enemy force. Once the maneuvering team begins to assault the enemy ambush team, the base of fire team should shift or cease fire to avoid friendly casualties.
If you are not in the kill zone, your job is to flank and knock out the enemy ambush element. You should move with your element via covered/concealed routes when possible and try to work your way onto a vulnerable enemy flank. Ensure that you notify the base-of-fire element when you begin the close assault on the enemy to avoid friendly-fire.
Reaction to Sniper
If an element receives sniper fire during a mission, the reaction to it will depend upon the assets available, the terrain, and the overall mission.
The effectiveness of a sniper is inversely proportional to how knowledgeable players are in counter-sniper and reaction-to-sniper drills. A 'green' group can find themselves pinned down by one, whereas an experienced group will be able to utilize proper movement techniques, smoke, and organic and non-organic assets to find, fix & suppress, and ultimately kill or bypass the sniper.
The basic things to keep in mind when dealing with snipers are as follows:
Individual Reaction to a Sniper
- If a friendly soldier is shot beside you, the first thing you should be thinking about (while moving to make yourself a hard target) is "Where did that shot come from?". If you know, immediately move to put some sort of hard cover (preferably) or put some good concealment between you and the enemy sniper. If you don't know, make an educated guess and find cover or concealment, then assess the situation.
- If you recognize the distinctive 'crack!' of a sniper rifle or suspect that it is a sniper engaging you, shout "Sniper!" over direct VON as you move to cover or concealment.
- If you're out in the open, keep moving, and move unpredictably. Depending on how far away the sniper is, and the type of weapon he is using (ie bolt-action compared to semi-auto), he will probably wait for 'high-probability' shots. This means he wants to catch someone who is stationary or moving directly towards or away from him who is presenting a large profile. Low-probability shots (ie high deflection, limited exposure, or erratic target movement) will typically only be taken when the situation is desperate, the sniper is at close range, or when the sniper has a semi-automatic rifle like the SVD Dragunov.
- Once you're in cover, relay the position of enemy snipers or sharpshooters to other friendly forces to help to minimize casualties. Marking their position on the map is a good way to give friendly units an idea of where they should expect to find the shooter.
- Use the heaviest asset available to kill the sniper. If you have artillery, call it on the suspected sniper position. If you have mortars, set them up somewhere safe and pound the sniper position. If you have any kind of protected armor (ie LAV, AAV, tank, etc), use it to flush out and kill the sniper. Ditto with aircraft. The last resort is infantry working as a cohesive team. Infantry will typically take casualties when hunting down a sniper, so if it can be done any other way, it should be.
Tips for Dealing with Snipers
- Teamwork kills snipers. Individuals do not. Remember that you are part of a team, and that that team can help extricate you from situations that you cannot get out of yourself. You will almost never be able to out-shoot a good sniper by yourself. Instead, work with your team to suppress the sniper (if feasible) and then flank them. If you cannot realistically flank or otherwise reach the sniper, adapt your movement techniques to try to minimize the threat posed by him.
- If you peek, keep it short. If you must look in the direction of the sniper and expose yourself, do so as carefully as possible. This means that you should utilize leaning, and should only peek out for a very brief period of time - half a second to one second is fairly safe. Because of the range and aiming precision required to make a kill shot, a sniper typically will require a second or two to sight in on an exposed target, compensate for drop, and fire the shot - at which point it may take another second for the bullet to travel the distance. Try to keep in mind that many people have caught a bullet in their forehead because they thought they could peek safely for "just a second longer".
- Never peek from the same place twice. Snipers will frequently sight in on the area a person peeked from, and if they pop up from the same spot a second time, the chances of the sniper hitting them increase dramatically. If you have to peek, be unpredictable. Stand up and peek around a wall. Next time, crouch and peek. Peek around different corners. Et cetera. Don't establish a pattern.
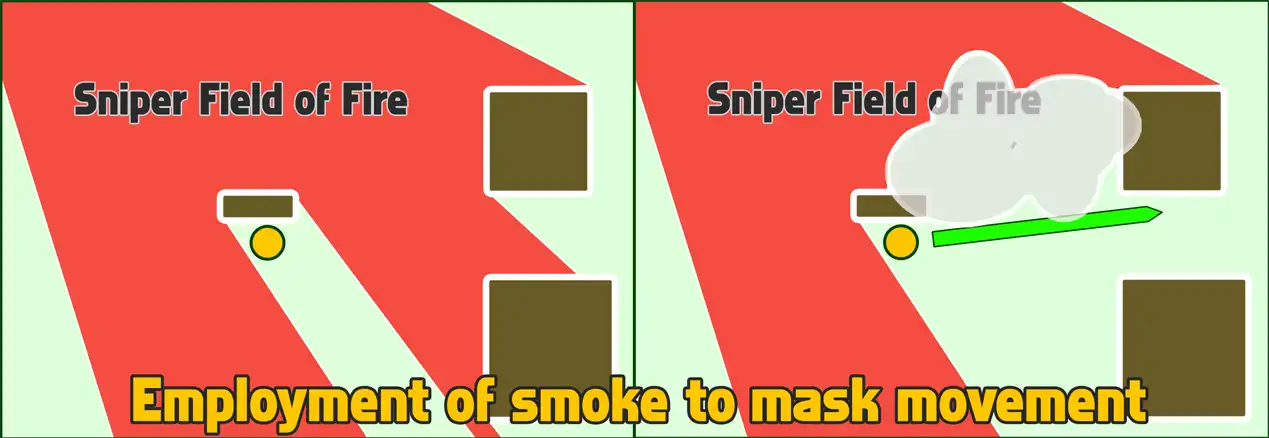
- Smoke if you've got it. Proper application of smoke can give you just enough concealment to extricate yourself from a tough situation. Throw smoke in such a way that it conceals the way you're intending to run, and not just the position you're currently at. If you are hiding behind a small obstacle that is giving you cover, you don't need the smoke's concealment on your position, but you will need it when you run.
- Use the crack/bang method to locate the sniper. Thanks to the modeling of supersonic bullet 'crack' and the speed of sound, the real-world "crack/bang" method can be used to locate an enemy sniper. In this, you listen for the crack of the bullet passing, followed by the bang of the muzzle blast. The time interval between these two events gives you an idea of the range of the shooter - if it's a long delay, the shooter is quite far away. If it's a medium delay, they're probably at normal sniping range - say, 500 meters or so. If it's a short delay, they're within that. After hearing the crack of the bullet passing you can also turn yourself so that you pick up what specific direction the muzzle blast comes from.
Reaction to Air Attack
General
Coming under air attack as an infantry force is a serious issue, compounded moreso if your unit does not have any organic air defense assets. You must know how to avoid being spotted by an enemy air asset, and if spotted, how to react.
- If you hear the sound of a jet or helicopter coming in the direction of friendly forces, call it out over the radio (Helo inbound NW!) to alert other units.
- If the aircraft does not know your position and is just scouting, the best course of action is to move the unit into concealment and wait until it has passed.
- Minimize movement when the aircraft is near, as this makes it harder for the crew to spot camouflaged troops.
- If the aircraft does spot your element, ensure that everyone spreads out and avoids bunching up. This will minimize the effects of the enemy weapon systems such as FFARs.
- Assess the terrain and situation and prepare to move. You will want to head for terrain that will minimize the effects of the aircraft. Move into dense trees/forests, urban terrain, or try to get into a valley or on the reverse slope of a hill to reduce the angles that the aircraft can attack from.
- Avoid firing on the aircraft with small-arms unless absolutely necessary. This typically only alerts them to your position and is generally ineffective unless massed against helicopters.
Rotary-Wing (Helos)
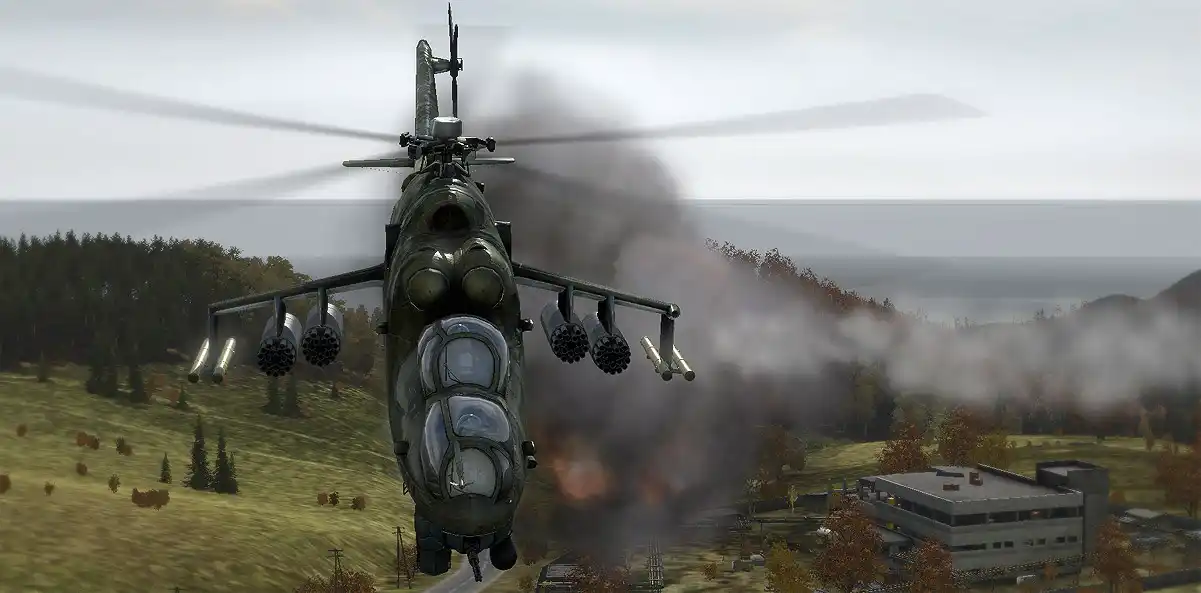
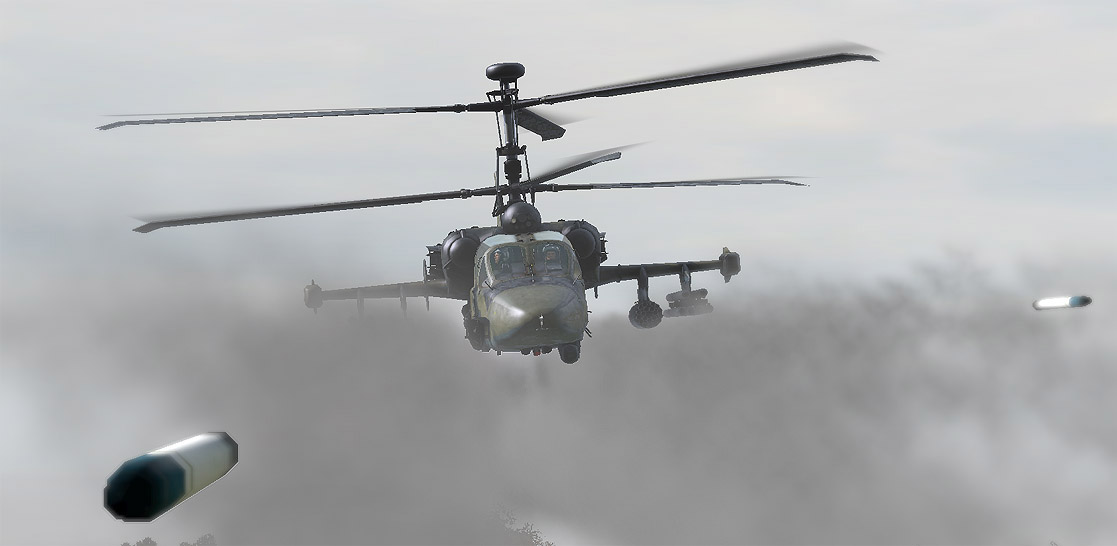
Helicopters are the most dangerous CAS aircraft in most situations. Their ability to loiter over the battlefield and deliver precision anti-tank, cannon, and rocket fire makes them a threat that should never be underestimated.
If helicopters are a known threat, all efforts should be made to avoid detection by them. This is done primarily via intelligent movement routes and techniques which prevent the enemy helo from being able to visually acquire friendly elements. Stay low, stay concealed, and move via concealed routes whenever possible.
If anti-air defense is organic to friendly forces, a sharp eye and ear must be kept for the approach of enemy helicopters. With proper warning, a helo can be brought down by MANPAD missiles before it knows what is happening.
If anti-air defense is not available to friendly forces, the best method is to avoid detection entirely. The only other defenses infantry have is via the massing of fires from machineguns, rifles, and anti-tank rockets or missiles. Helicopters that are oblivious to infantry presence and believe themselves to be safe will occasionally go low and slow enough to be accurately engaged by anti-tank rockets. If the opportunity presents itself, it should be taken, but ONLY if the anti-tank gunner is >90% positive he will successfully make the shot.
Fixed-Wing (Jets)
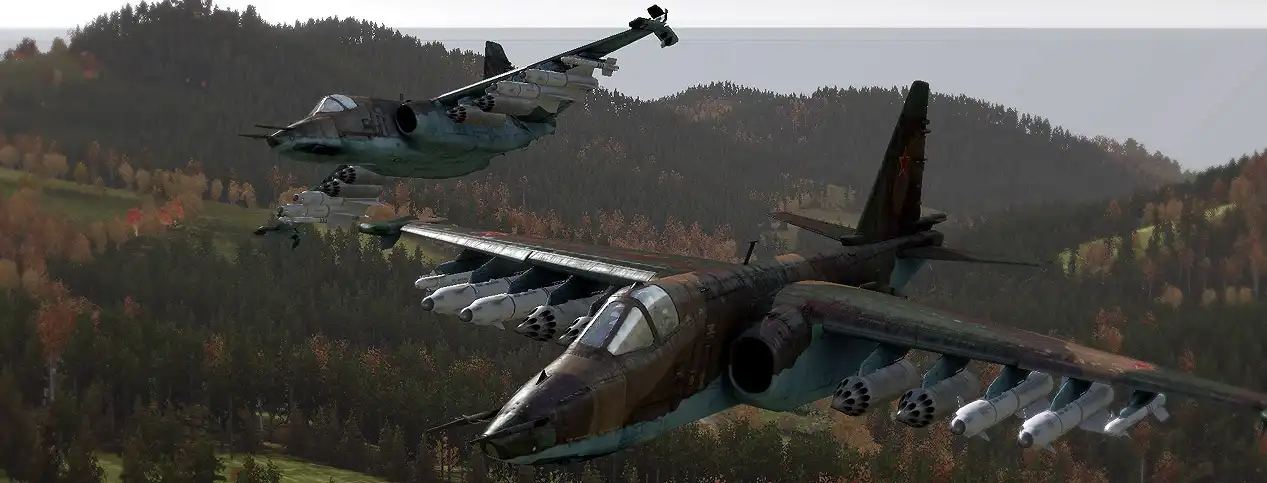
The main thing to remember when being attacked by jets is that movement perpendicular to the line of attack works best. This is especially true if they are strafing you with cannon fire or attacking with rockets. Another good thing to do is get on the reverse slope of a hill, and whenever the aircraft makes a pass, adjust your position so that you're once again on the far side of the hill relative to it.
The primary weakness of jet attack aircraft is the difficulty they have in picking out infantry at the speeds they fly. Thus, cover and concealment have a pronounced effect against them compared to rotary-wing aircraft.
Reaction to Artillery Attack/Indirect Fire
There are a few basic tips for how to act when coming under artillery attack or other indirect fire.
- Stay alert and know what to listen for . You may be able to hear the artillery unit firing in the distance before the rounds have impacted. This is most likely if you're being fired on by mortars or high-angle artillery fire. You may even hear the rounds coming in if they're subsonic. Other types of artillery will explode amongst your forces without warning and will likely catch everyone by surprise.
- Call out "Incoming!" as soon as you suspect that artillery is being fired on your position. The rule of thumb here is that it's better to be safe than sorry.
- If you're defending a location and cannot stray far, spread out and take the best cover you can find. Keep your eyes open for enemy infantry closing in under the cover of the barrage.
- If you're moving in the wild when the artillery comes in, follow your element leader and listen to his guidance . He will tell you a direction to run to get out of the impact area. Once clear, regroup with your element and continue on.
Enemy artillery can be taken out by counter-battery fire or close air support, if available, while mortar positions (which are usually much closer) can sometimes be assaulted and captured by ground attack.
Triangulation can be used to figure out the enemy positions - if two squads are separated by a good distance and can hear the firing artillery, compass bearings can be taken by each unit and then compared to get a fix on the likely location of the artillery.


