![]()
Tips for the Infantryman in a MOUT Environment 
MOUT/CQB combat is easily the most dangerous environment for infantry to operate. Threats can come from above, or appear and disappear in an instant in the urban clutter. The fighting is fast, violent, and confusing. Good communication is needed at all levels to provide timely information as well as avoid friendly fire incidents. MOUT combat at the platoon level must be done at a deliberate, methodical pace, and all elements need to be able to move in a cohesive manner that prevents anyone from getting cut off or lost, and maintains a very high level of situational awareness and defensive cohesion.
There are several tips for the infantrymen operating in these environments.
- Stay aware of the vertical element in a MOUT environment. Enemies can be on the rooftops, and it requires sharp observation from all players to spot them before they can do harm.
- Know your sector of observation/cover and be diligent in watching/covering it. One person letting their guard down for a few seconds can doom many.
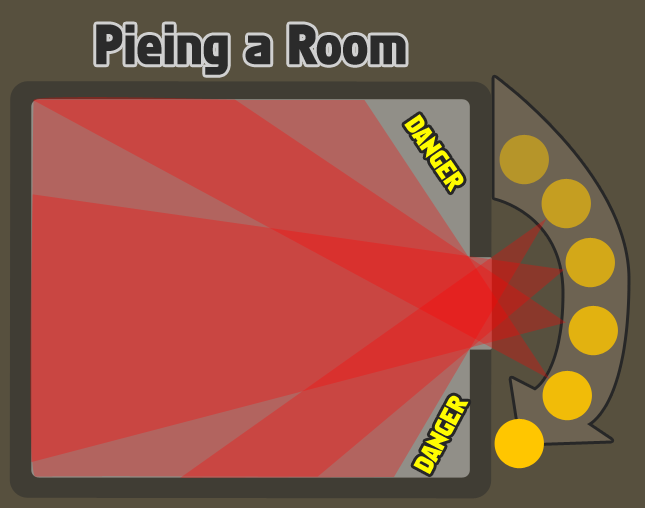
- Pie off all danger areas. Pieing is simply the process of moving carefully and deliberately in a fashion that allows you to see as much of an area as possible before entering it. This has a multitude of uses in all areas of combat, but becomes particularly important in MOUT/CQB with buildings and streets. Pieing a room allows for you to visually clear everything except for a corner or two, which allows you to enter and immediately focus on the danger areas (ie uncleared corners) without having to do a full sweep of the rest of the room at the same time.
- Stay off of the walls. Walls act as backdrops for explosive rounds to detonate on, and being too close to them will make it that much easier for an enemy to lob a grenade or rocket your way and take you down. You will constantly face the dilemma of whether being close to a wall will provide protection or put you at extra risk - weigh the options quickly and pick the best one for the scenario.
- Stay out of the open. Move from covered position to covered position, and avoid lingering in the open. Streets are natural kill zones in urban areas and are frequently covered by machineguns.
- Be aware of the danger of ricochets. Traveling down a narrow alleyway can become even more dangerous when rounds being fired at you start ricocheting off of the ground and walls to wreak even more havoc. Cannon rounds, such as those from an LAV or Bradley IFV, are particularly deadly when they begin to ricochet.
Tips for the Infantry Leader in a MOUT Environment 
- Move with deliberation. In the MOUT fight, haphazard movement, excessively fast speeds, and overextending units easily results in casualties.
- Smoke is extremely effective in MOUT - use it! Know how to employ smoke properly, and use it to maximum effect whenever possible. One well-placed smoke grenade can mask an entire street or one side of a building and save lives through screening friendlies or masking the enemy.
- Machineguns, emplaced properly, can cut an entire street (or more) off from enemy maneuver. Emplacing your machinegun assets properly can be a huge factor in winning an urban fight.
- Know how to split up as a fireteam into covering and clearing teams and clear a structure. These two enter the structure, with one peeling to the left, and the other to the right. They secure each room and move methodically throughout the structure until it is cleared, at which point they exit the structure, join up with their other two fireteam members, and continue on.
- Do not commit more than a fireteam to the interior of a structure up to medium size. Very large buildings should have two fireteams at most, with the third acting as a covering team. Cramming too many people into a building, especially with the way ArmA2 handles explosive damage, is asking for a catastrophe.
Clearing a Building 
Clearing a building is one of the most dangerous tasks a team can be assigned, requiring a team-wide solid understanding of CQB tactics in order to successfully carry it out.
Why to Clear a Building 
There are many reasons for why a building may need to be cleared out via infantry. Some of these reasons follow.
- Must secure the building, but cannot demolish it due to any of the following:
- Area is too hot to safely place demolitions
- No demolitions are available, or cannot spare demo on the building due to operational needs.
- Collateral damage is a concern
- ROE Restrictions
- Civilians inside or nearby
- Building contains assets that cannot be destroyed, such as intelligence material, prisoners, etc.
- Building presents a threat to the security of friendly forces and must be cleared to ensure security.
- A threat is perceived when enemy combatants are known or suspected to be inside. They could be shooters, spotters, observers/lookouts, or triggermen.
- Building is identified as key terrain.
- It offers a good friendly position if taken
- Taking it denies an effective defensive position to the enemy
- It is an objective
Covering & Clearing Teams 
In order to effectively clear a building, an element must split itself into two parts - one is the covering team, which provides security outside of the structure. The other is the clearing team, which actually goes into the structure to clear it out room by room. The cover team is typically the fireteam leader and rifleman, while the clearing team consists of the automatic rifleman and his assistant.
The cover team is responsible for:
- Suppressing the building while the clearing team moves into position
- Suppressing floors that the clearing team is not on
- Communicating with the clearing team to coordinate said suppression
- Preventing any hostile forces from exiting the building
The clearing team is responsible for:
- Moving methodically through the structure room-by-room until it is cleared of hostile forces
- Communicating their movements to the cover team so that the cover team can shift fire accordingly
While ArmA2 is not a full-fidelity "CQB Sim" in the vein of Raven Shield or SWAT 4, there will be times when players must enter and clear a room or number of rooms due to the tactical situation. In order to pull this off successfully, players should be familiar with the basic room clearing procedures.
Entry & Stack Methods 
When it comes to making entry into a room, the members of the clearing team have two options.
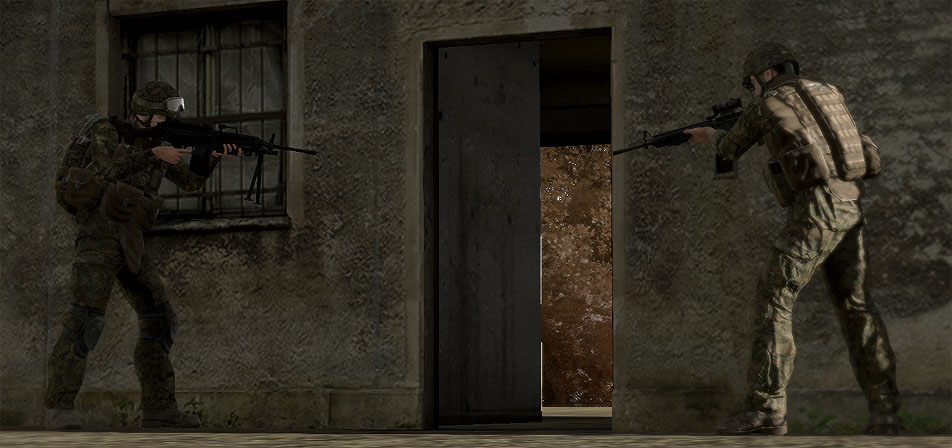
Hook - In this, the player moves into the doorway and then immediately hooks to the side that he had been 'stacked up' on. For instance - if the player is on the right side of the doorway, he will enter through the doorway and immediately turn right.
Cross - In this, the player moves through the doorway and continues opposite of the direction he had been 'stacked up'. For instance - if the player is on the right side of the doorway, he will move through the doorway and cross to the left side once inside the room.
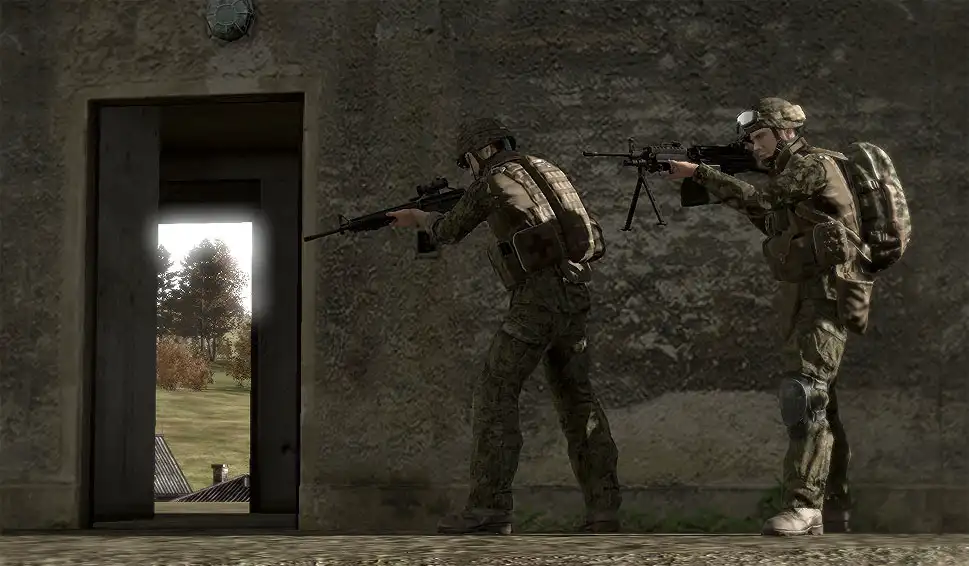
There are two ways that a 2-man stack can 'stack up' on a door - one is with both members on the same side of the doorway ("stack"). If this is the case, the first man will state his entry type ("Cross!" or "Hook!"), and the second man will do the opposite, to ensure proper coverage of the room. This type of stack is best used when an open door is present. If the entry type is not stated, the second man simply does the opposite of what the entry man does.
When ordering a stack, the lead man will either say "stack left" or "stack right" - the directions are relative to facing the doorway. "Stack left" will result in the entry team being on the left side of the door.
The other option is to have one player on either side of the doorway ("split stack"). The senior player will state his entry type, and the other player will prepare to do the same type of entry, except from the opposite side of the door. This type of stack is best assumed when a closed door is present - movement across an open doorway for the sake of setting up a 'split stack' should never be done.
Room Clearing Procedures 
When the stack is set, the next step is to actually carry out an entry from start to finish. For this, the following steps act as a guideline for how a typical room takedown occurs.
- Ensure your weapon is on full-automatic and that you have a fresh magazine inserted.
- Frag or bang the room (optional). Frag grenades are difficult to throw accurately in ArmA2, so you may want to avoid "fragging" rooms until you've become quite familiar with how to use them in the urban environment.
 introduces a number of different throw styles that can be used to tailor a throw to the situation at hand, as well as "flashbangs" that can be used to stun or blind any enemies inside of a room, with less chance of catastrophic death to friendlies in the event of a bad throw. If a frag or bang has been thrown, the players wait for it to detonate before entering.
 - Each player enters in sequence, engaging targets to their front as they move through and out of the 'fatal funnel' that is the doorway.
- After moving through the doorway, each player continues in the direction prescribed by their entry type (hook or cross), clearing from his front to the corner he is moving towards. Players must continue to move into their 'corner' regardless of the amount of enemy fire received - continuing to push to their corner will draw fire towards them, allowing the following members of the stack to successfully enter the room and begin engaging the enemy.
- After clearing his 'near' corner, he continues moving towards it while pivoting to clear the wall that runs to his 'far' corner.
- After clearing the far corner, he clears to the center of the room, then clears to the other side of the room, stopping short of where his teammate is.
- Once the room is deemed clear, each player uses direct-speaking or group VON to announce "Clear!" to his teammate.
The entire process, from start to finish, happens in a few seconds at most.
Since ArmA2 is ultimately not a CQB sim, that's about as far as we'll go into CQB tactics. Knowing how to enter rooms properly should prepare you for the most common CQB situations you'll encounter in the game.
Note that if you are using a covering team outside of the building, the clearing team should state loudly that they are "coming out" of the structure before doing so, to ensure that the covering team does not mistakenly engage them.
#ref(): File not found: "full_clear.gif" at page "ShackTac ArmA2 TTP2 Guide/Tactics/MOUT and CQB"
Demolishing a Building 
Why to Demolish a Building 
Building demolition is typically a significant decision to make in a mission. Buildings can be anything from houses to factories, bunkers, et cetera. To destroy them requires a lot of explosive power, and the expenditure of that power must be carefully considered. The building must present a threat to friendly forces that is significant enough that destruction of it is the most reasonable course of action.
Some of the considerations that must be made before demolition can be carried out are as follows.
- Collateral damage is not a concern.
- Demolishing the building has no negative impact on mission goals.
- Demolition assets are available (satchels, armor, CAS) and can be employed successfully.
- The building has significant coverage of friendly operational areas and cannot be secured or occupied, making it a security risk.
- Enemies are known or highly suspected to be inside and clearing would likely cause unacceptable friendly casualties.
Preparing to Demolish a Building 
When a building has been singled out for demolition, the first step is for friendly units to suppress it, isolate it, and establish security around it. Isolation is the act of ensuring that anyone inside of the building is unable to escape, and anyone outside of it is unable to get in. Suppression helps to prevent anyone inside from engaging friendly forces while the demolition is conducted. Security ensures that the forces working to demolish the building are protected from attacks from any other hostiles in the area.
Isolation, suppression, and security can be achieved via the proper placement of fireteams and their automatic riflemen, attached machinegun teams, or armed vehicles.
Demolition Options Available 
When it comes to actually destroying the building, there are several options available, depending on the current mission and assets. We will cover the pros, cons, and recommended minimum safe distances for each of the major options below. Ultimately, the decision of what type of demolition is to be used rests at the senior element leader orchestrating the demolition - typically a squad leader or the platoon commander.
- Satchel charges
- Pros:
- Very precise and controlled method of demolition.
- Can be coordinated and conducted very rapidly.
- Can be done with stealth to prevent the enemy from reacting before it is too late.
- Cons:
- Short range. Requires infantry to move to the building and place the demolitions, potentially exposing them to enemy fire.
- May require multiple satchel charges to accomplish complete destruction.
- Safety distance: Short.
- No cover: 30-60m
- Hard cover: 15m
- Pros:
- Armored support
- Pros:
- Very precise and controlled method of demolition.
- Can be coordinated and conducted quickly if the armored support is near the infantry.
- Armor can both demolish the building and selectively engage targets within it via cannon or machinegun fire.
- Can be employed a long distance away from the objective.
- Cons:
- If the armor is not close to friendly infantry, it may take some time to get them on-station, which may warn the enemy as to what is happening.
- May take more time to demolish the building piece-by-piece.
- Safety distance: Short.
- No cover: 50-100m
- Hard cover: 20m
- Pros:
- Close Air Support (CAS)
- Pros:
- Bombs are second-to-none when it comes to building destruction. Nothing says "I want that building gone!" like 2000 pounds of pain dropping through the chimney. Bombs will destroy a building and anyone inside on the first pass, as long as they're delivered correctly, and can cause significant damage to anyone near the building.
- Can be very precise with laser guidance.
- Can be called in from a long distance away from the objective.
- Cons:
- Destructive power of CAS can result in horrific friendly fire incidents if ground forces do not take the proper precautions, or if the FAC does not control the aircraft approach, ordnance usage, etc, properly.
- CAS can be slow to respond to a support request. This is in part due to the difficulty that exists in coordinating a strike from a fast-moving, high-flying aircraft against what is a relatively small and precise target, with the possibility of friendly forces in close proximity to it.
- Non-laser-guided bombs can be imprecise and require an extra degree of careful coordination between the FAC and aircraft to avoid fratricide. Marking the target via smoke or extremely competent visual descriptions is critical, and making a pass with cannons before dropping bombs can be used as an additional control method.
- Safety distance: Moderate.
- No cover: 200-300m
- Hard cover: 150m
- Pros:
- Artillery support
- Pros:
- Variety of effects types and fuze types.
- Powerful damage, ability to sustain fire for minutes at a time.
- Can obliterate the ever-loving shit out of a building and everything around it.
- Can be called in from a long distance away from the objective.
- Cons:
- Calling for artillery and waiting for the rounds to impact can take time.
- Less precise than other methods. May require adjustment to get rounds on target.
- Requires an additional amount of stand-off distance to avoid fratricide.
- Safety distance: Long.
- No cover: 350-500m
- Hard cover: 250m
- Pros:
Crossing Urban Danger Areas (ie: Streets) 
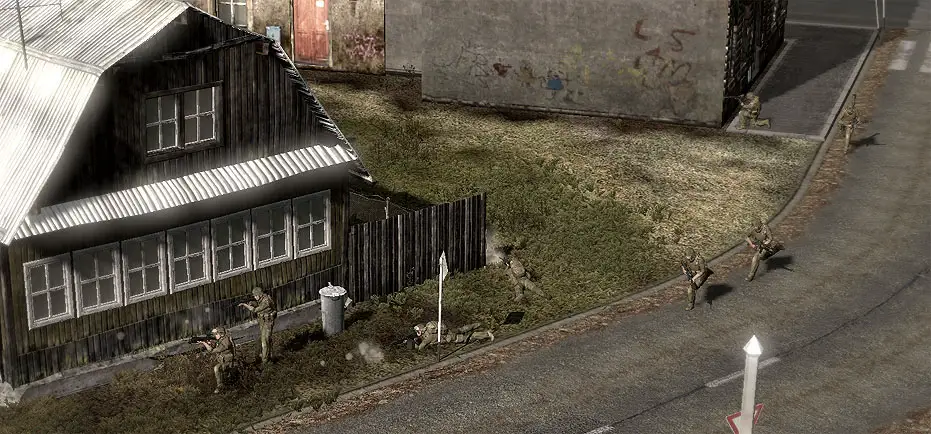
Every team member needs to be familiar with what to do when dealing with danger areas in the urban environment. Due to the chaotic and fast-paced nature of urban combat, there are no strict roles for each fireteam member to take when crossing urban danger areas. Instead, roles are based upon where in the formation a given person is, regardless of their fireteam role.
as a rifleman provides cover"
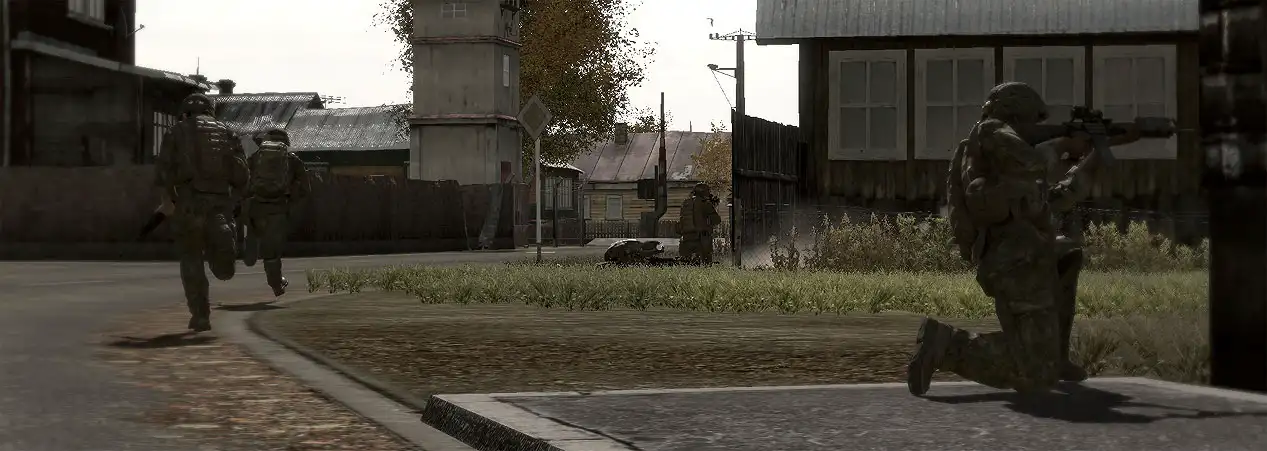
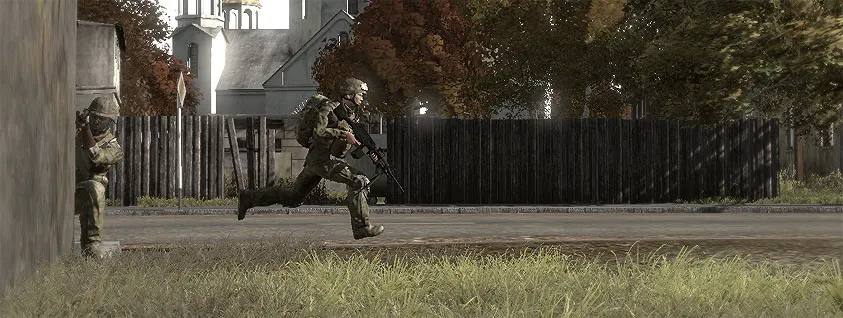
When moving up to a street danger area, the first person in the formation will stop at the corner, scan both directions, take a knee, and then say "Set!" over direct-speaking VON. The second person in the formation will then move up, make his own scan, and decide on how he will move across. When he is ready, he will say "Crossing!" and then rush across the danger area. The third and fourth fireteam members will follow after him at intervals of their choosing, based upon whether enemy fire was received and various other METT-TC considerations. The third person will say "Crossing!" before moving, while the fourth will say "Last man!" to let the cover man know that it will be his turn to move next. The last person to cross will be the cover man, who was the first person to have reached the corner.
covering their own movements as they go"
Other Urban Tactics 
High/Low Corner Stack 
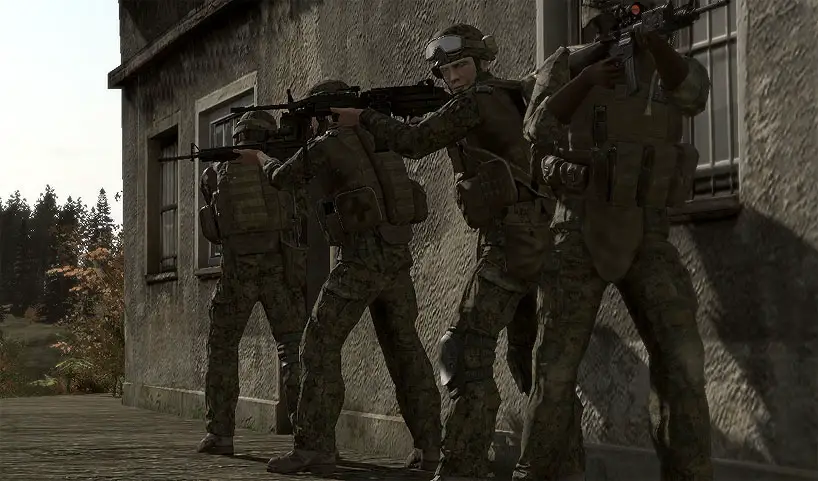
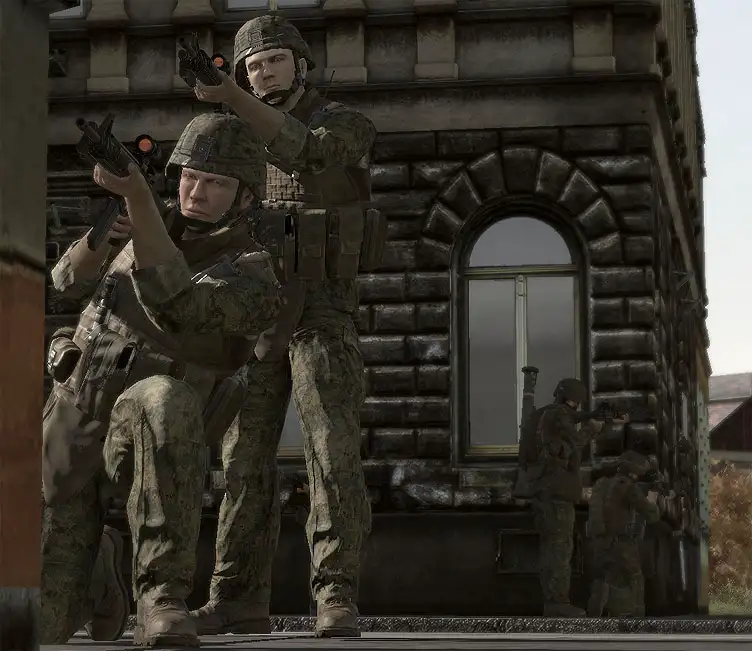
When covering corners, if one player kneels while another stands behind them, two pairs of eyes and two rifles can cover the same area, increasing effectiveness. This is commonly known as a "high/low stack" and can be employed naturally whenever the situation allows. Note that the kneeling player must not stand unless he has cleared it with the standing player - else he's likely to stand up into a bullet.
utilizing high/low stacks to cover both ends of a street"
Running the Rabbit 
"Running the rabbit" is a cute way to describe the process of having one player dart at full-speed across a dangerous area in an attempt to expose enemy positions by drawing fire, while other players cover him and seek to engage anyone who tries to engage the 'rabbit'. It's a ballsy maneuver and generally isn't the first trick employed, as it's incredibly risky for the 'rabbit' player.
Note that you can also 'run the rabbit' in a CQB fight - when doing this, the first entry man charges deep into the room, drawing the attention and potentially the fire of the enemy, while the rest of the stack enters after him and engages the potentially distracted enemies.
Note too that this tactic, in a CQB employment, does not have a terribly high success rate. Use it with caution. It's much more likely to be successful when employed in a MOUT or outdoors fight where the distances are greater, and the enemy is less likely to be able to effectively engage a moving target.
 新規
新規 編集
編集 添付
添付 一覧
一覧 最終更新
最終更新 差分
差分 バックアップ
 凍結
凍結 複製
複製 名前変更
名前変更 ヘルプ
ヘルプ
