グループウェア EGroupWare
グループウェアサービスを提供する。
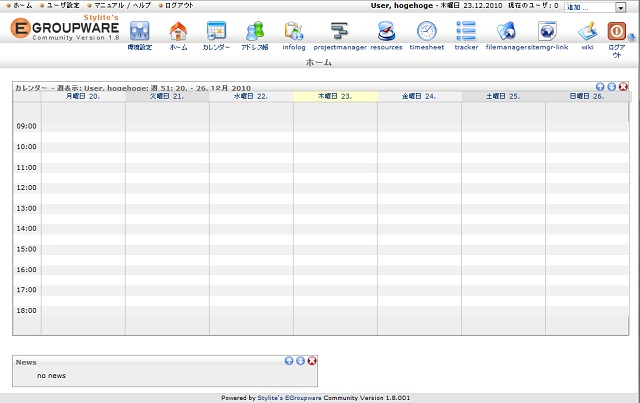
EGroupWareはphpGroupWareから派生したPHPで動くポピュラーなツール。マルチリンガルで開発が進められており日本語化も進んでいる。見た目は結構いい。
まだまだ日本語化は不十分ではあるが今後に期待したい
やりたいこと
IE等のWebブラウザから、本格的なグループウェアを提供する
http://192.168.0.10/egroupware/
条件
| 使用OS | CentOS5.5 64bit |
| アプリ | Apache+PHP+MySQL (CentOS付属) |
| 文字コード | UTF-8 |
ファイル入手
- 本家 EGroupware - Online Groupware, CRM: Home
http://www.egroupware.org/
- 今回は以下ファイルを入手
eGroupware-1.8.001.20101201.zip
http://sourceforge.net/projects/egroupware/files/eGroupware-1.8/eGroupware-1.8.001.20101201/
利用条件構築
- PHPを5.2以上にバージョンアップ
- PHPをのアップロードサイズを8MBに設定
MySQLデータベース作成
(1)MySQL データベース作成
【telnet】
- MySQLにログイン
# mysql -u root -pmysqlpass
Welcome to the MySQL monitor.  Commands end with ; or \g.
Your MySQL connection id is 2
Server version: 5.1.53 Source distribution
Copyright (c) 2000, 2010, Oracle and/or its affiliates. All rights reserved.
This software comes with ABSOLUTELY NO WARRANTY. This is free software,
and you are welcome to modify and redistribute it under the GPL v2 license
Type 'help;' or '\h' for help. Type '\c' to clear the current input statement.
- 「egroupware」データベース作成
mysql> create database egroupware ;
Query OK, 1 row affected (0.00 sec)
- 「egroupware」ユーザ作成
mysql> grant all privileges on egroupware.* to egroupwareuser@localhost
       identified by  'egroupwarepass';
Query OK, 0 rows affected (0.02 sec)
- 終了
mysql> exit
Bye
#
(2)MySQL -データベース接続に問題が無いか確認
# mysql -u egroupwareuser -pegroupwarepass
Welcome to the MySQL monitor.  Commands end with ; or \g.
Your MySQL connection id is 3
Server version: 5.1.53 Source distribution
Copyright (c) 2000, 2010, Oracle and/or its affiliates. All rights reserved.
This software comes with ABSOLUTELY NO WARRANTY. This is free software,
and you are welcome to modify and redistribute it under the GPL v2 license
- 終了
mysql> exit
Bye
#
インストール
(1) ファイル転送
【FTP】
ftp にて、ユーザエリア「/home/hogehoge」に eGroupware-1.8.001.20101201.zip をアップ
(2)ファイルを展開
【Telnet】
- パッケージがあるか確認
# ls -l
-rw-r--r-- 1 hogehoge hogehoge 15435907 12月 23 12:15 eGroupware-1.8.001.20101201.zip
- パッケージを解凍
# unzip eGroupware-1.8.001.20101201.zip
Archive:  eGroupware-1.8.001.20101201.zip
   creating: egroupware/
   creating: egroupware/infolog/
     :
- 解凍ファイルがあるか確認
# ls -l
-rw-r--r--  1 hogehoge hogehoge 15435907 12月 23 12:15 eGroupware-1.8.001.20101201.zip
drwxr-xr-x 33 root     root         4096 12月  1 23:13 egroupware
(3)html直下にコピー
【telnet】
- ファイルコピー
# cp -R egroupware /var/www/html/
- ディレクトリがあるか確認
# ls -l /var/www/html/
drwxr-xr-x 33 root root 4096 12月 23 12:20 egroupware
- 所有者変更
# chown -R apache:apache /var/www/html/egroupware/
- 確認
# ls -l /var/www/html/
drwxr-xr-x 33 apache apache 4096 12月 23 12:20 egroupware
(4)環境設定ディレクトリの作成
phpGroupWareの環境を /home/phpGroupWare に設定
- 環境設定ディレクトリの作成
# mkdir -p /var/lib/egroupware/default/files
# mkdir /var/lib/egroupware/default/backup
- 所有者変更
# chown -R apache:apache /var/lib/egroupware/
- 確認
# ls -l /var/lib/egroupware/default/
drwxr-xr-x 2 apache apache 4096 12月 23 13:06 backup
drwxr-xr-x 2 apache apache 4096 12月 23 13:06 files
動作確認
【Web】
以下URLにアクセス
http://192.168.0.10/egroupware/ → EGroupWare 設定画面が表示
設定
(1)phpGroupWare 設定画面
【Web】
- 以下URLにアクセス
http://192.168.0.10/phpgroupware/ → phpGroupWare 設定画面が表示
- 「Run installation tests」をクリック
→「Checking the eGroupWare Installation」画面が出るので×を確認し解消
# vi /etc/php.ini
memory_limit = 128M
post_max_size = 8M
upload_max_filesize = 8M
date.timezone = Asia/Tokyo
- 「Continue to the Header Admin」をクリック
→「setup」画面が出るので以下をセット
・Header Password → 管理者パスワードを設定
・DB Name → egroupware
・DB User → egroupwareuser
・DB Password → egroupwarepass
・Configuration Password → 管理者パスワードを設定
→「Write」をクリック
・・「Created header.inc.php!」が出るので「Continue」をクリック
- 言語が出てくるので「japanese」を選択
(2)phpGroupWare セットアップ - ドメイン: default(mysql) 画面
- 「Setup/Config Admin Login」にログイン
→「セットアップ - ドメイン: default(mysql)」が出るので×を解消していく
・Step 1 - テーブル作成
→「インストール」をクリック
→「インストールを確認を」をクリック
★×→○に変更
・Step 2 - 環境設定
→「環境設定」をクリック
×を○にすること。
mailserver未作成時はダミーIPを埋めること
・Step 3 - Admin Account
→「Create admin account」をクリック
★管理者アカウントを作成
- 「Back to user login」(左メニュー上)クリック
→ログイン画面
(3)phpGroupWare ログイン画面
(2)後処理
【telnet】
- ヘッダーファイルのアクセスを制限
# chmod 640 /var/www/html/egroupware/header.inc.php
- 終了
# exit
exit
$
遭遇したトラブル
adminアカウントが作成できない''
問題:
「セットアップ - ドメイン: default(mysql)」でSTEP3admin管理」が丸にならない
原因:
「Step 2 - 環境設定」を全て○にする必要あり
mailserverを設定してない場合、ダミーデータを入れておくこと
謝辞
テキスト作成に当たり、以下サイトを参考にさせて頂きました。ありがとうございます。
http://www.egroupware.org/index.php?page_name=wiki&lang=&wikipage=Manual

