データ
開始条件
- レベル24
メッセージ
「Oh, whassup! Let me tell you something. I settled in around here nicely, but something just doesn't feel right anyway. I mean, there's no confidence about what tomorrow may bring! Forget it, I just caught some sads ... Anyhow, I'd like to stay well-informed about what is happening in the neighborhood to feel more at peace. I'll give you a hint of some shady spot where I'd like to install some smart cams. I'm not good at this stuff, so may boys will explain the details. The cameras can be found at the Mechanic's, he used to sell them. Obviously, not a word to him about our business.」
「All this tech is clearly not for me, picture is hazed and the signal is shit, but I've already spotted some "fat rats". Thanks, huge help!」
目標
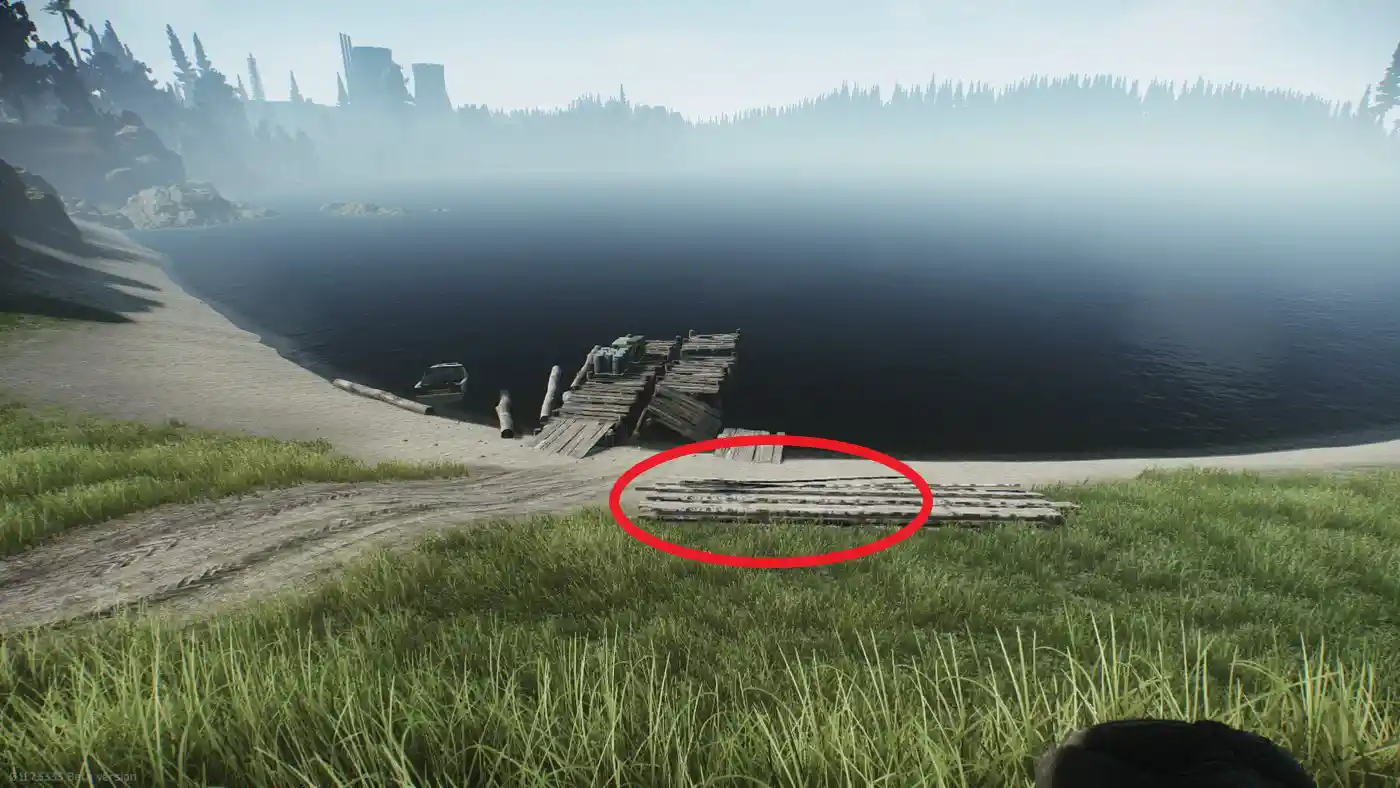
- WOODSの製材所にある桟橋を監視できる場所にWIFIカメラを設置する。
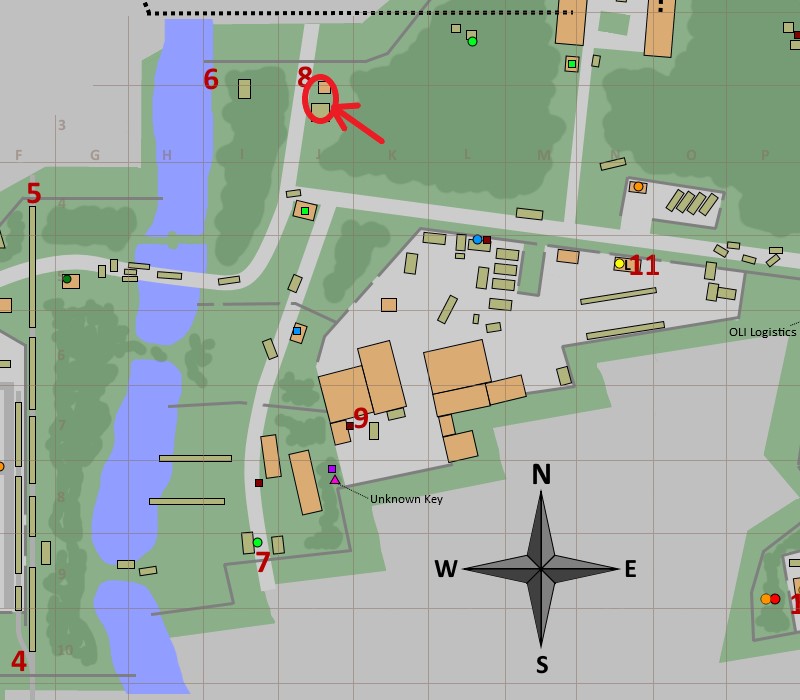
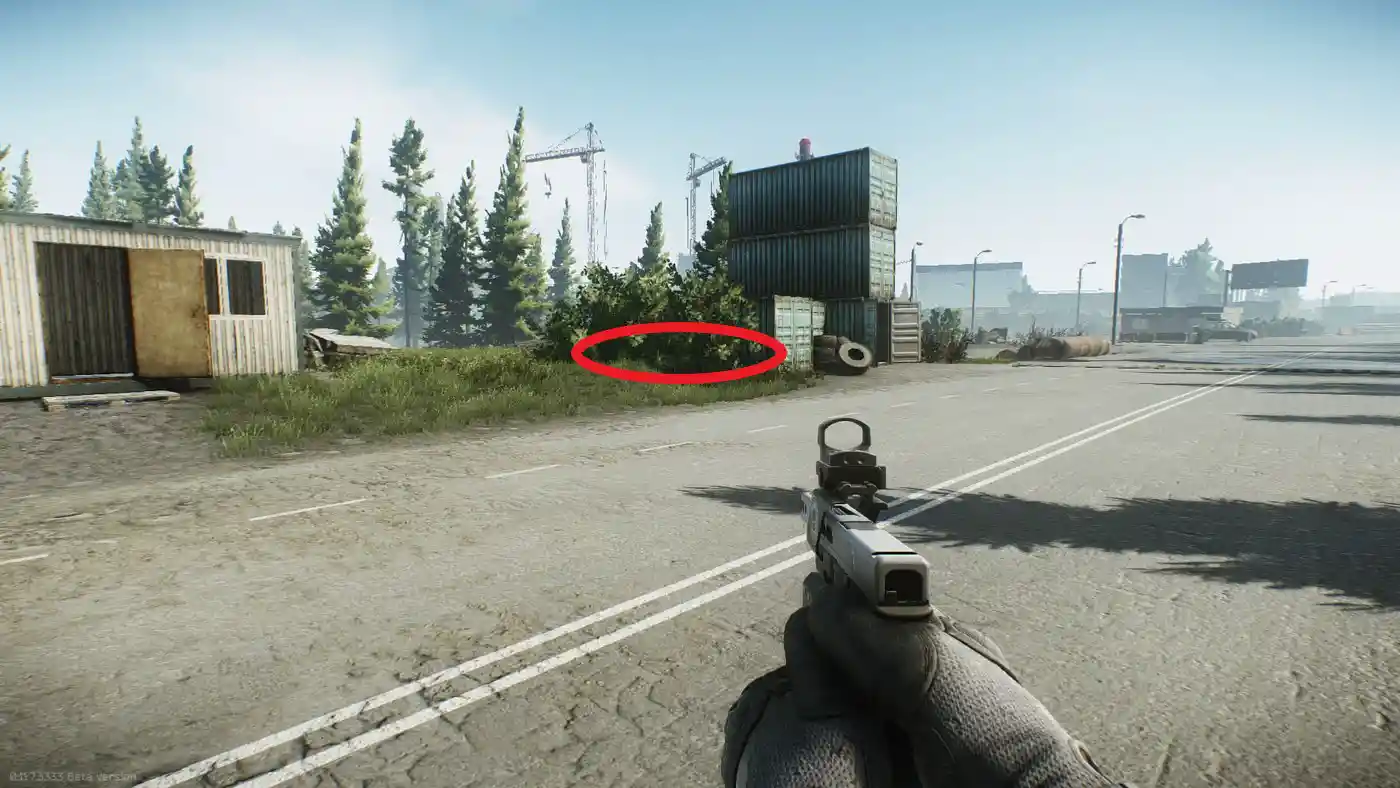
- CUSTOMSから港へ向かう道を監視できる場所にWIFIカメラを設置する。
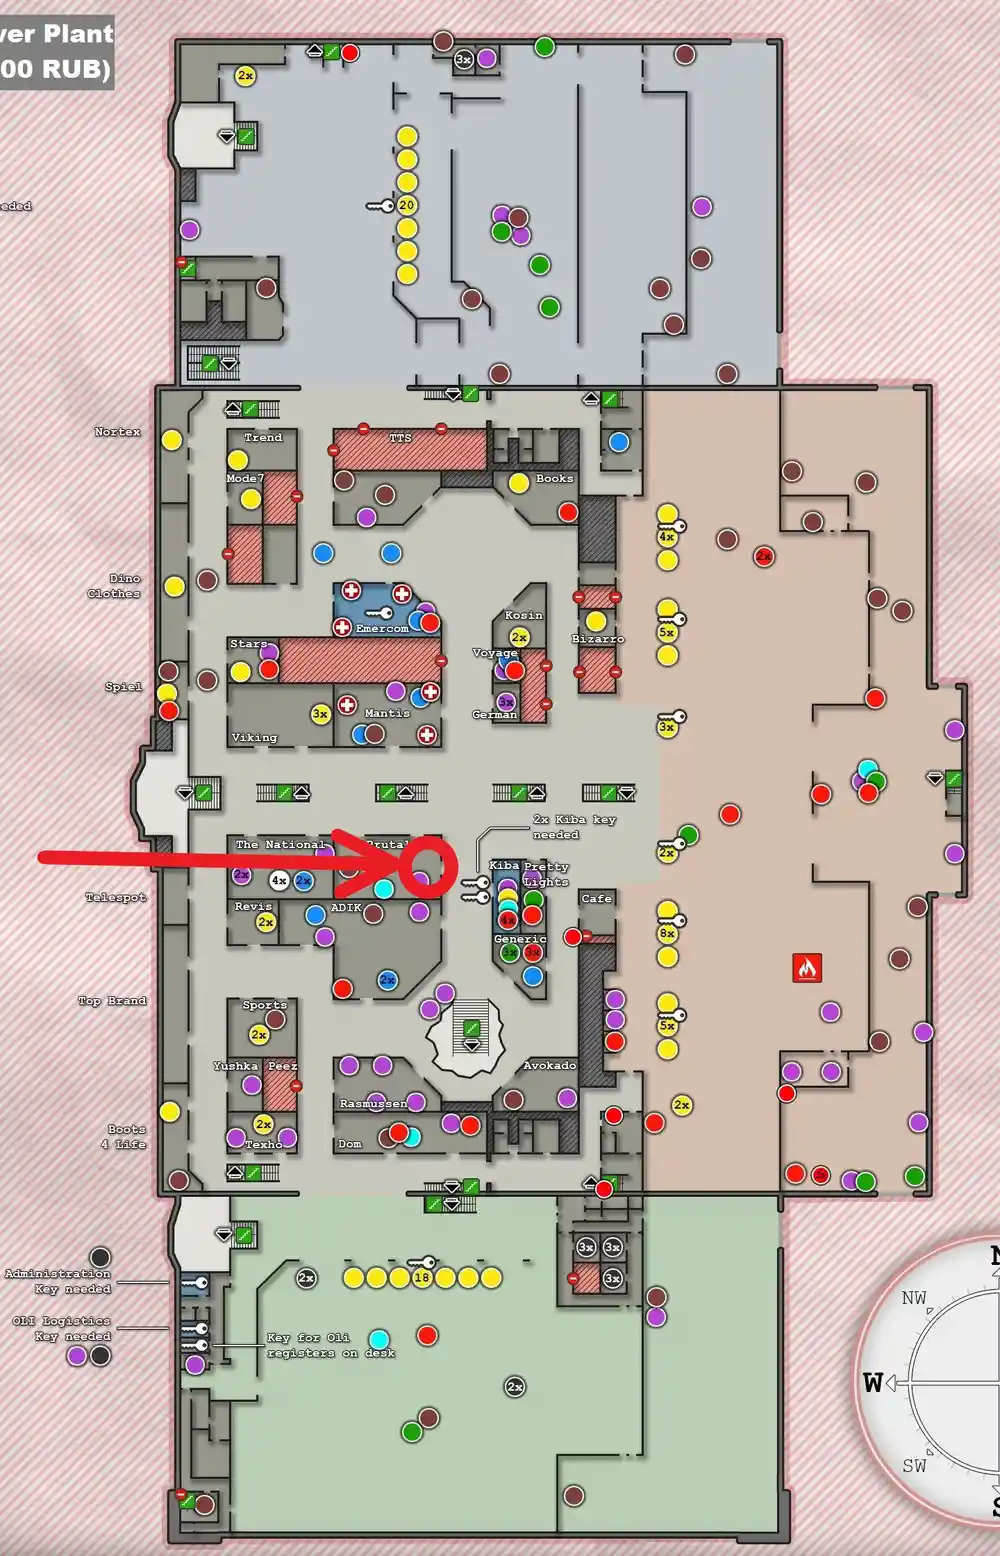
- INTERCHANGEにあるKiba Armsストアを監視できる場所にWIFIカメラを設置する。
必要なアイテム
| アイコン | アイテム名 | 必要な数 | 要求事項 | FiR | 備考 |
|---|---|---|---|---|---|
| WI-FI Camera | 3 | 設置 | 不必要 | - |
報酬
- 経験値+14,000
- Skier親密度+0.05
- 資金+45,000₽
- 資金+47,250₽ ※ Intelligence Center Level 1
- 資金+51,750₽ ※ Intelligence Center Level 2
- AKM/AK-74 FAB Defense UAS stock x2
- AK CNC Warrior 5.56x45 muzzle device adapter x4
- EOTech Vudu 1-6x24 30mm riflescope x1
- タスク受注時に「WI-FI Camera」の販売アンロック
攻略のヒント
カメラの設置はインタラクトキー(F)長押しすることで出来る。
設置は20秒掛かる(その場で動けなくなる)ので、設置の際は周囲の安全を確認すること!
設置の途中(カウントダウン中)でやめると、カウントダウンは最初(20秒)からやり直しになる。
カウントダウンが終われば設置完了。設置後にKIA,MIA,ランスルーしても設置扱いになる。
- 設置する場所(3か所)
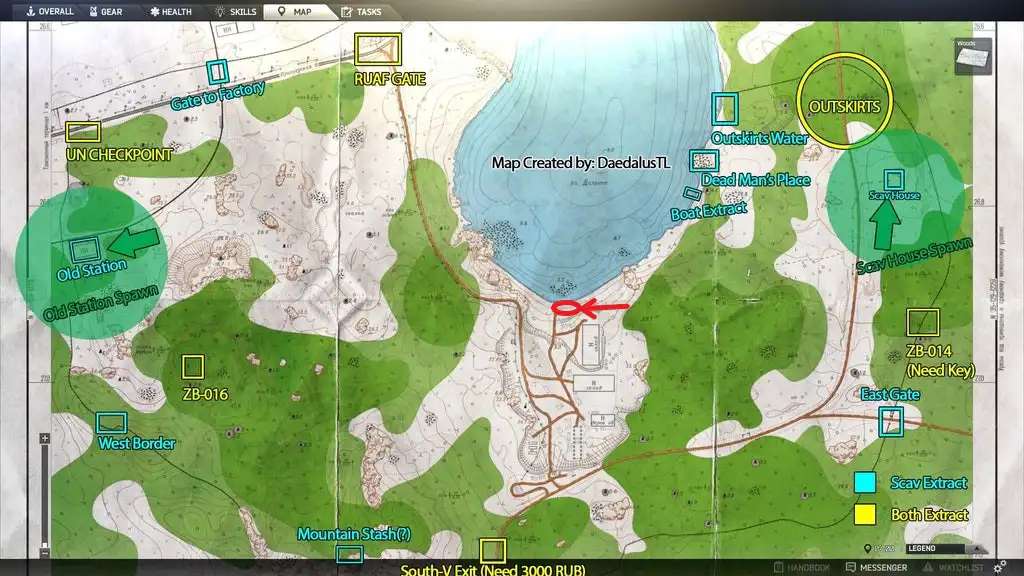
- 「Woods」の桟橋から数メートル後ろにある木材が積み上げられた場所。
- 「Customs」のSniper Road Block付近、キャビンとコンテナの間にある草むらの中。
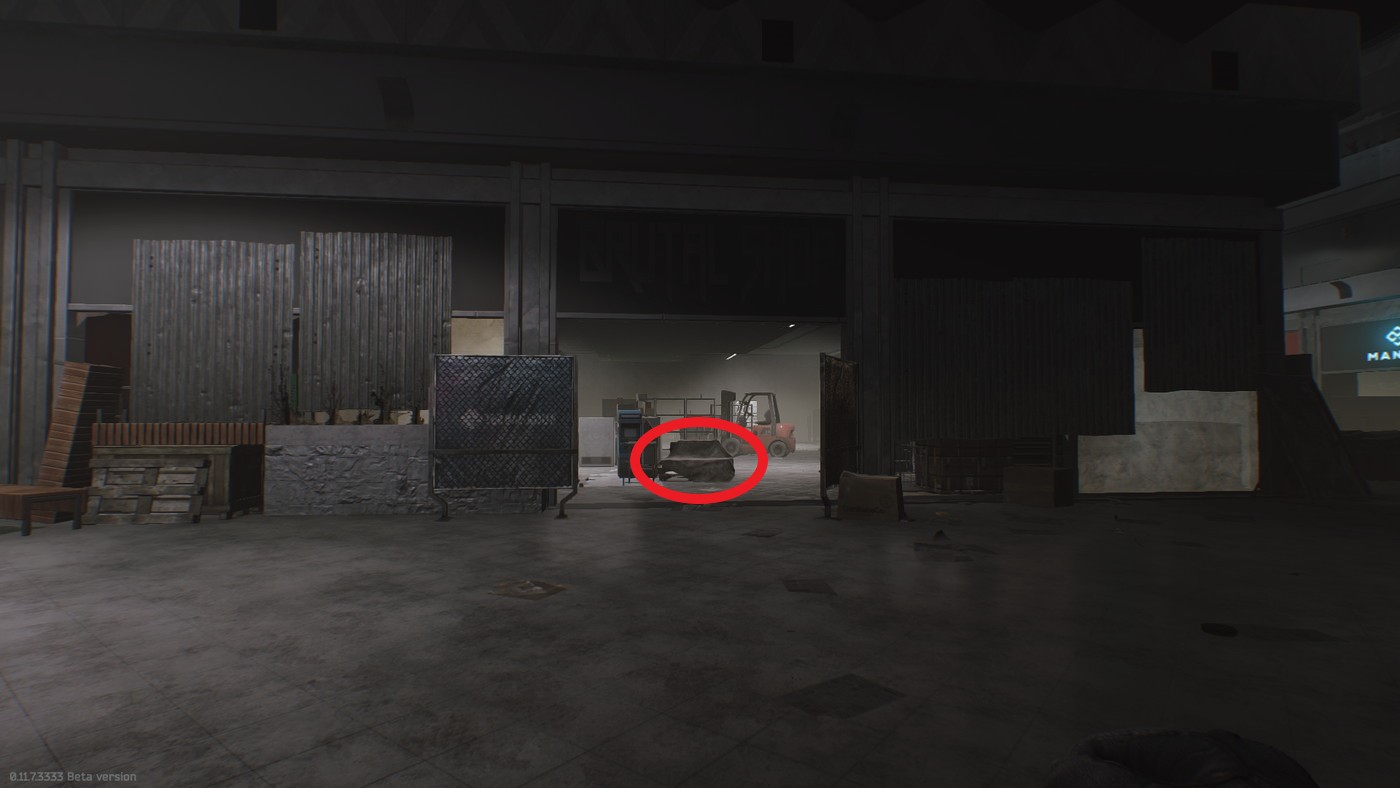
- 「Interchange」の中央モール、ガンショップ「KIBA」の向かい「Brutal」の中、KIBA側から入って目の前にある木製パレット。
| MAP名 設置場所 | 各方位から見た画像 | 設置の例 | その他画像 |
| WOODS | |||
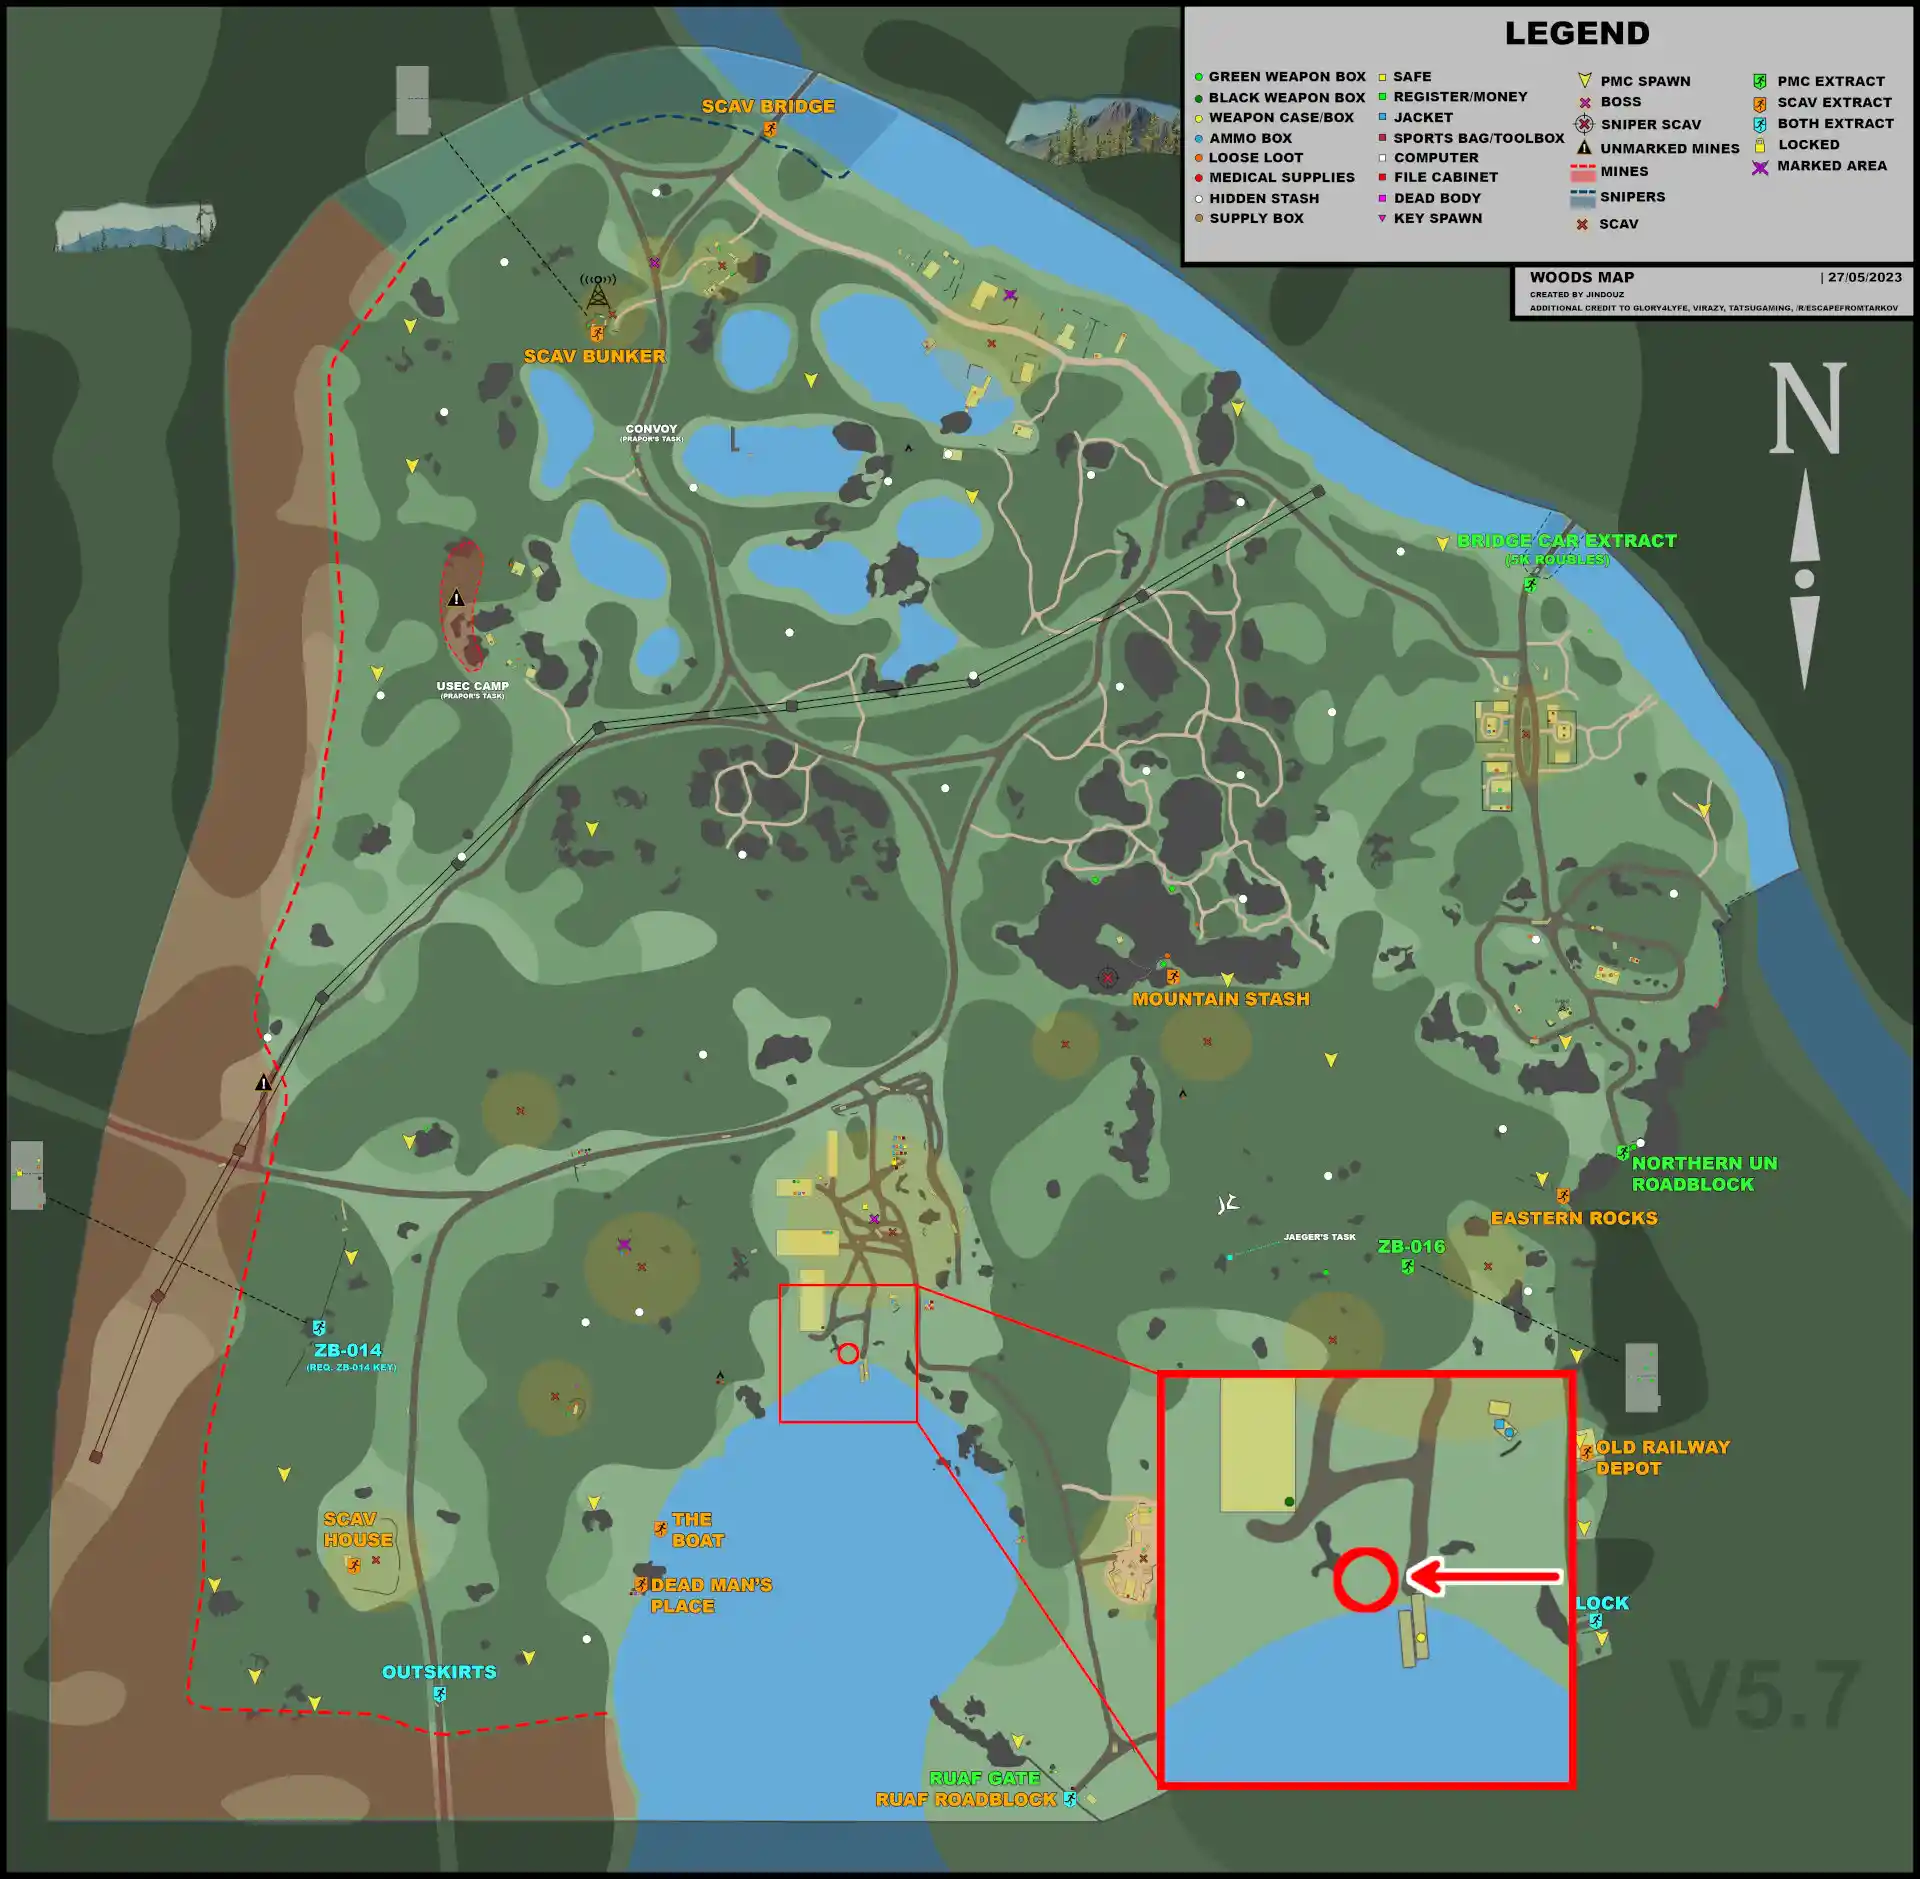 | 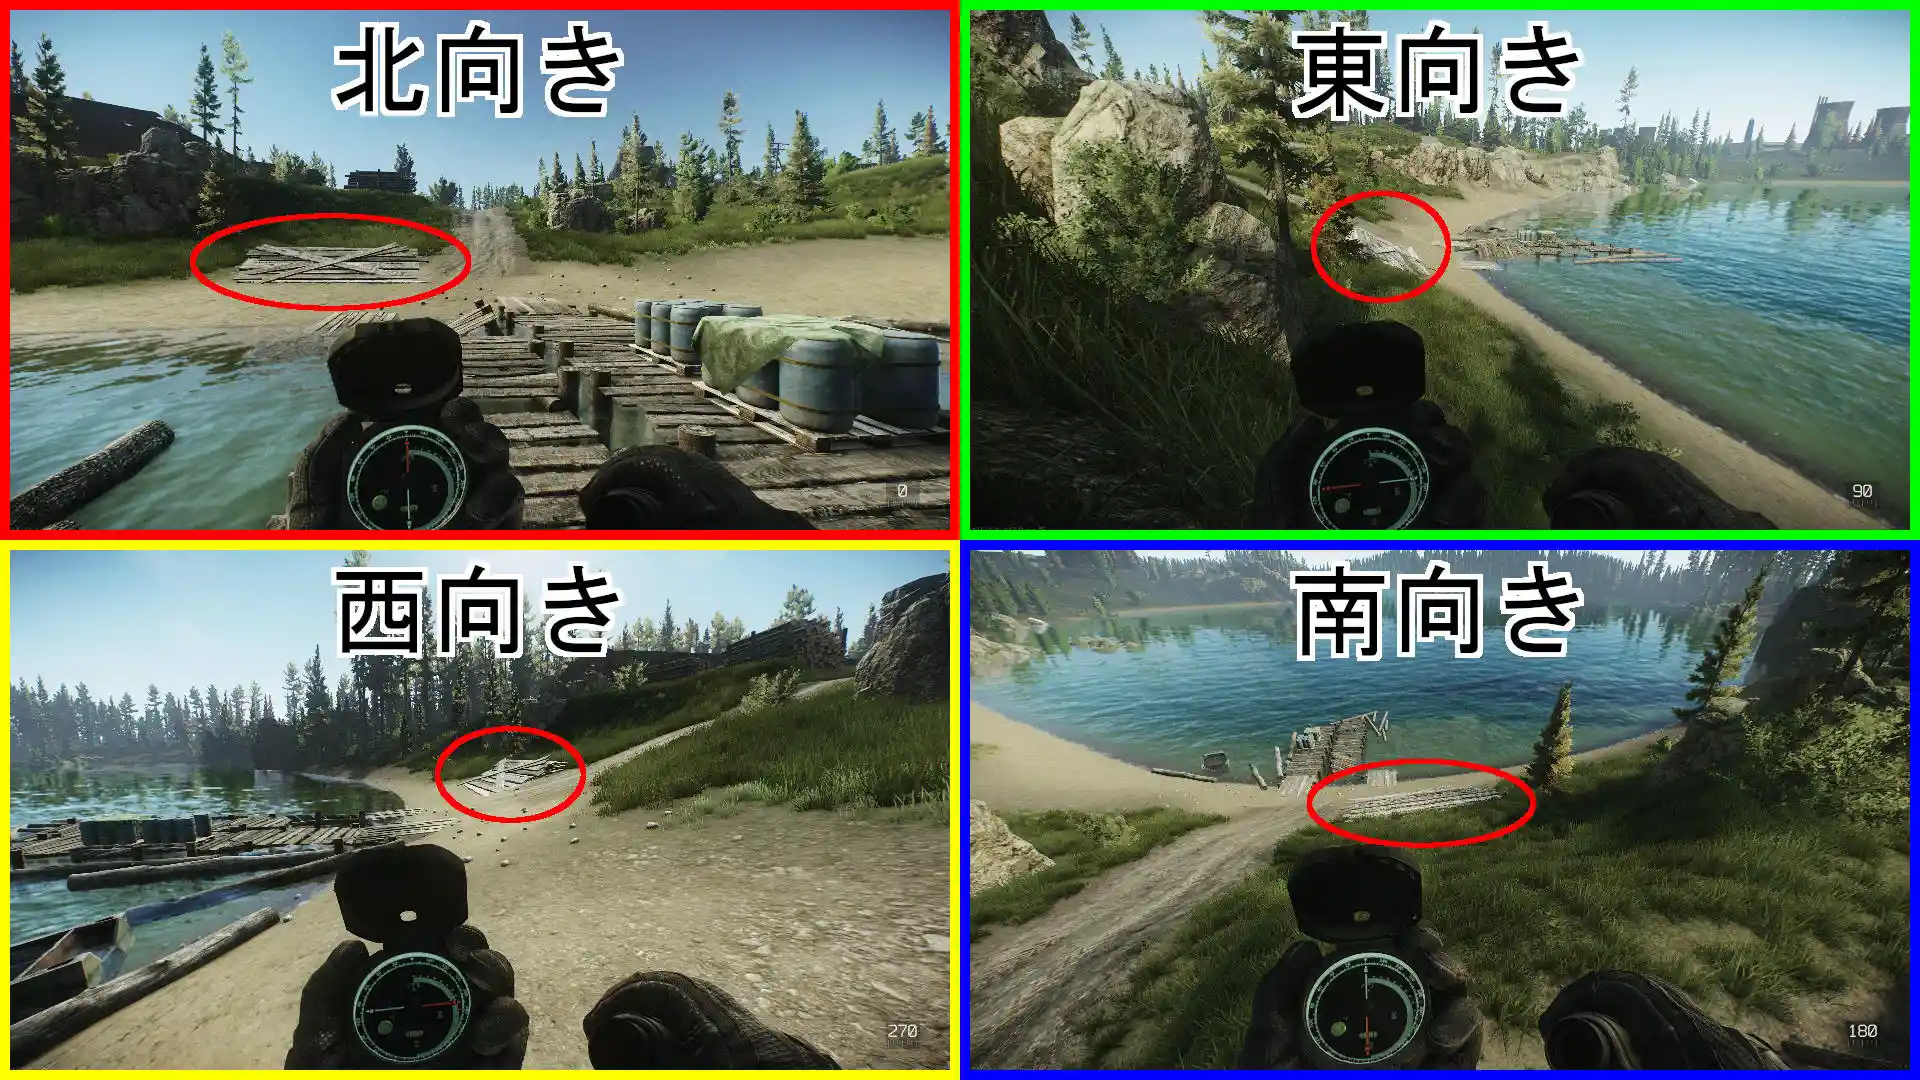 | 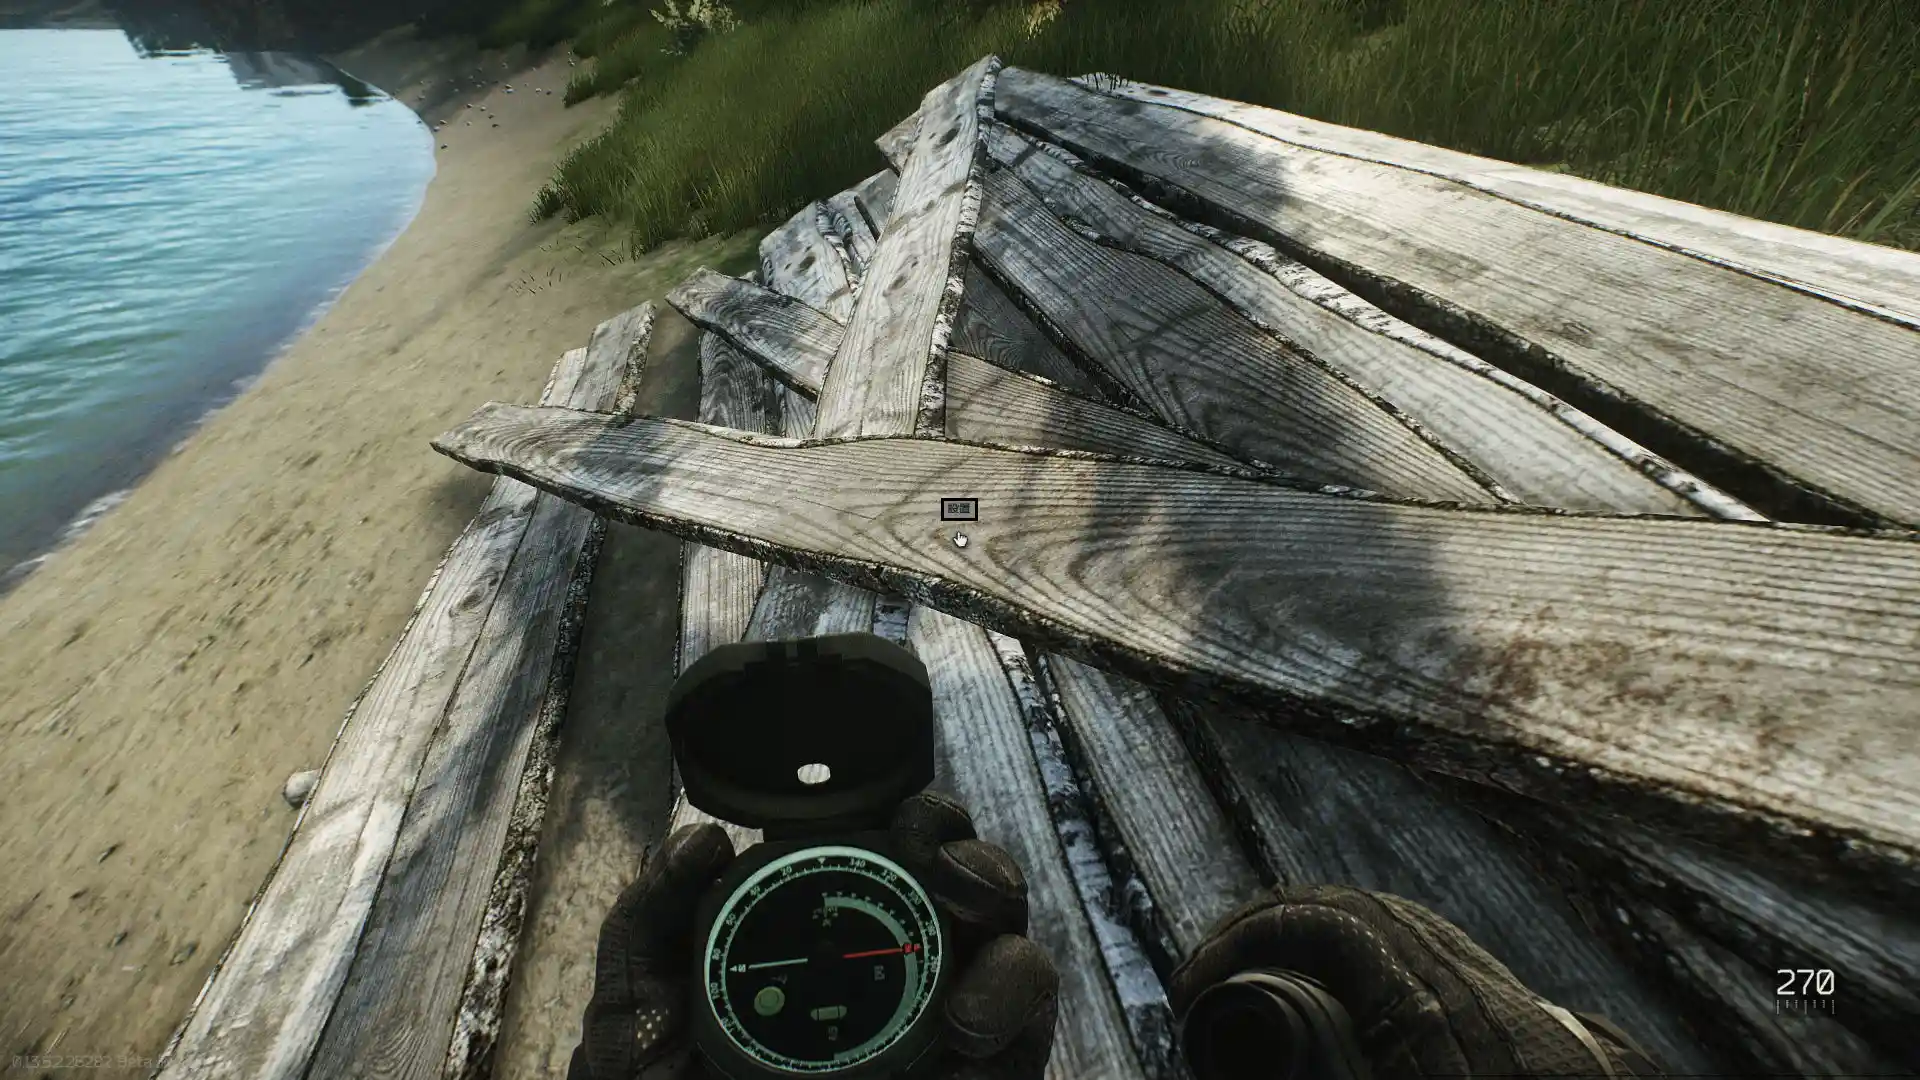 | 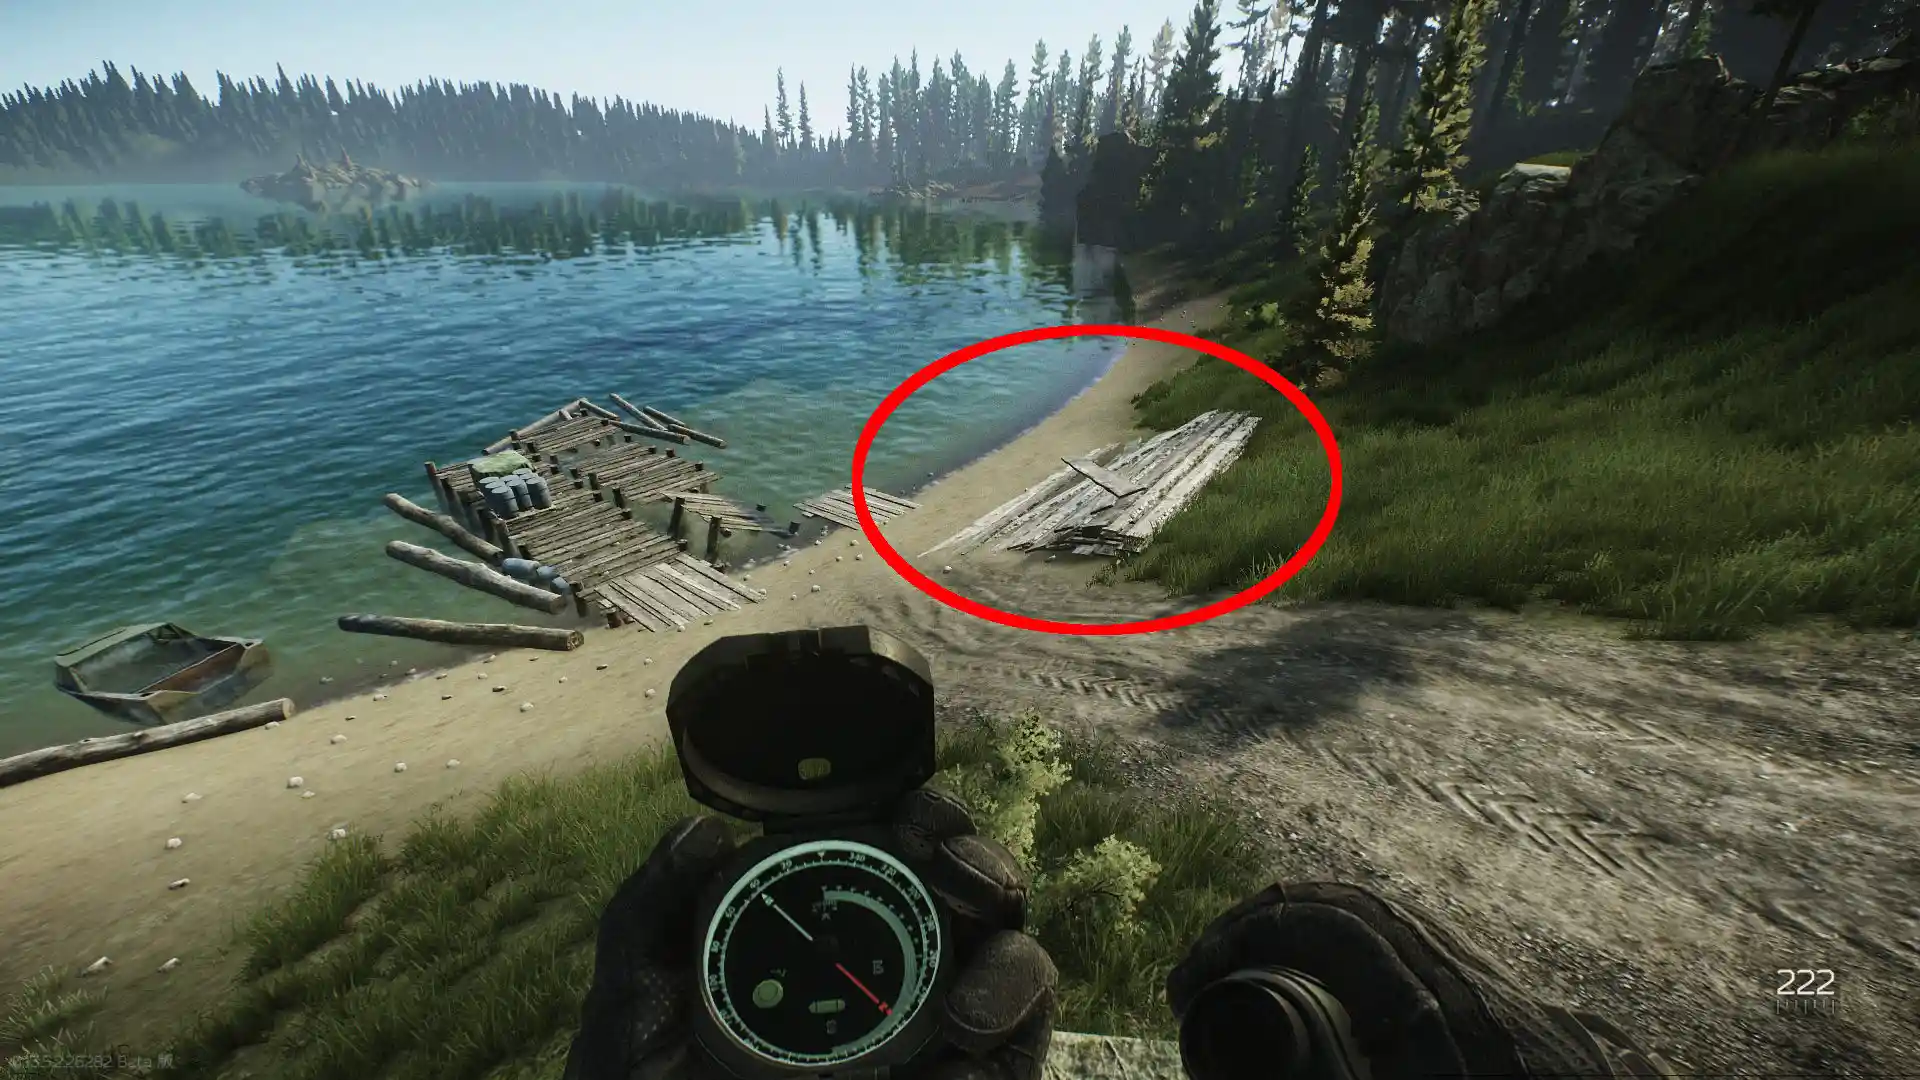 |
| CUSTOMS | |||
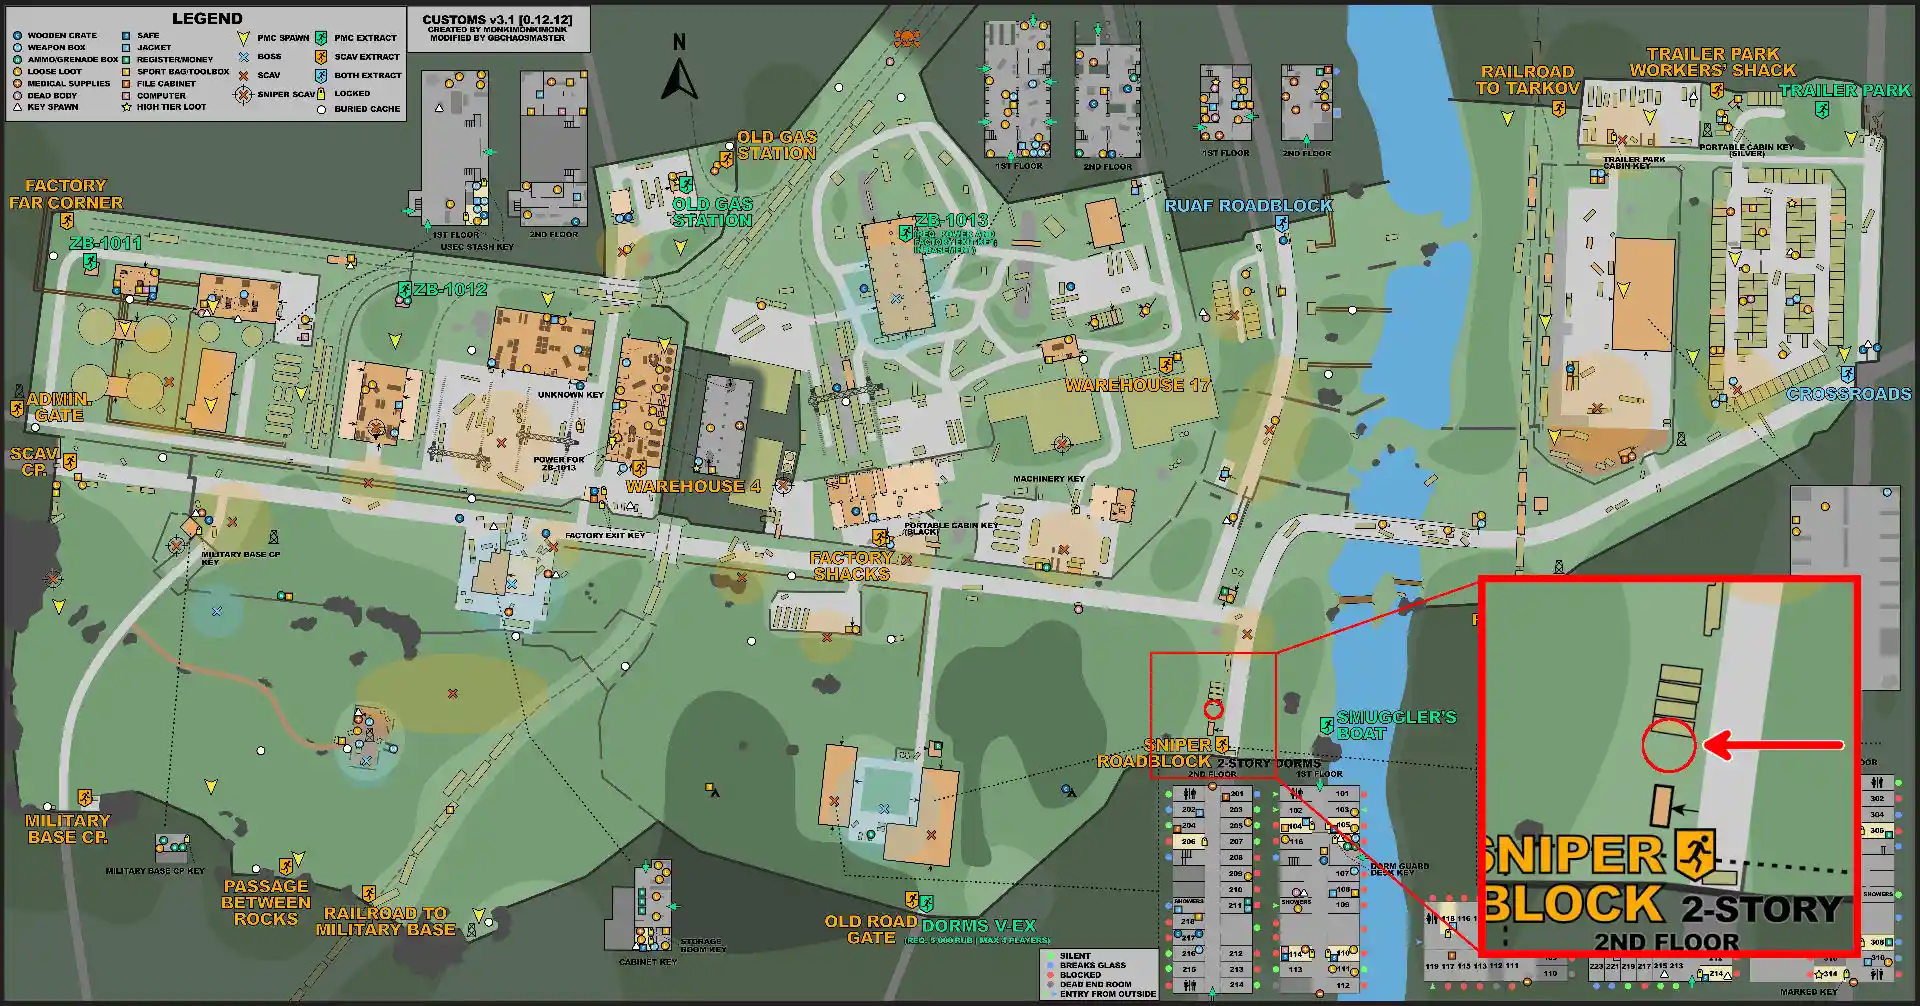 | 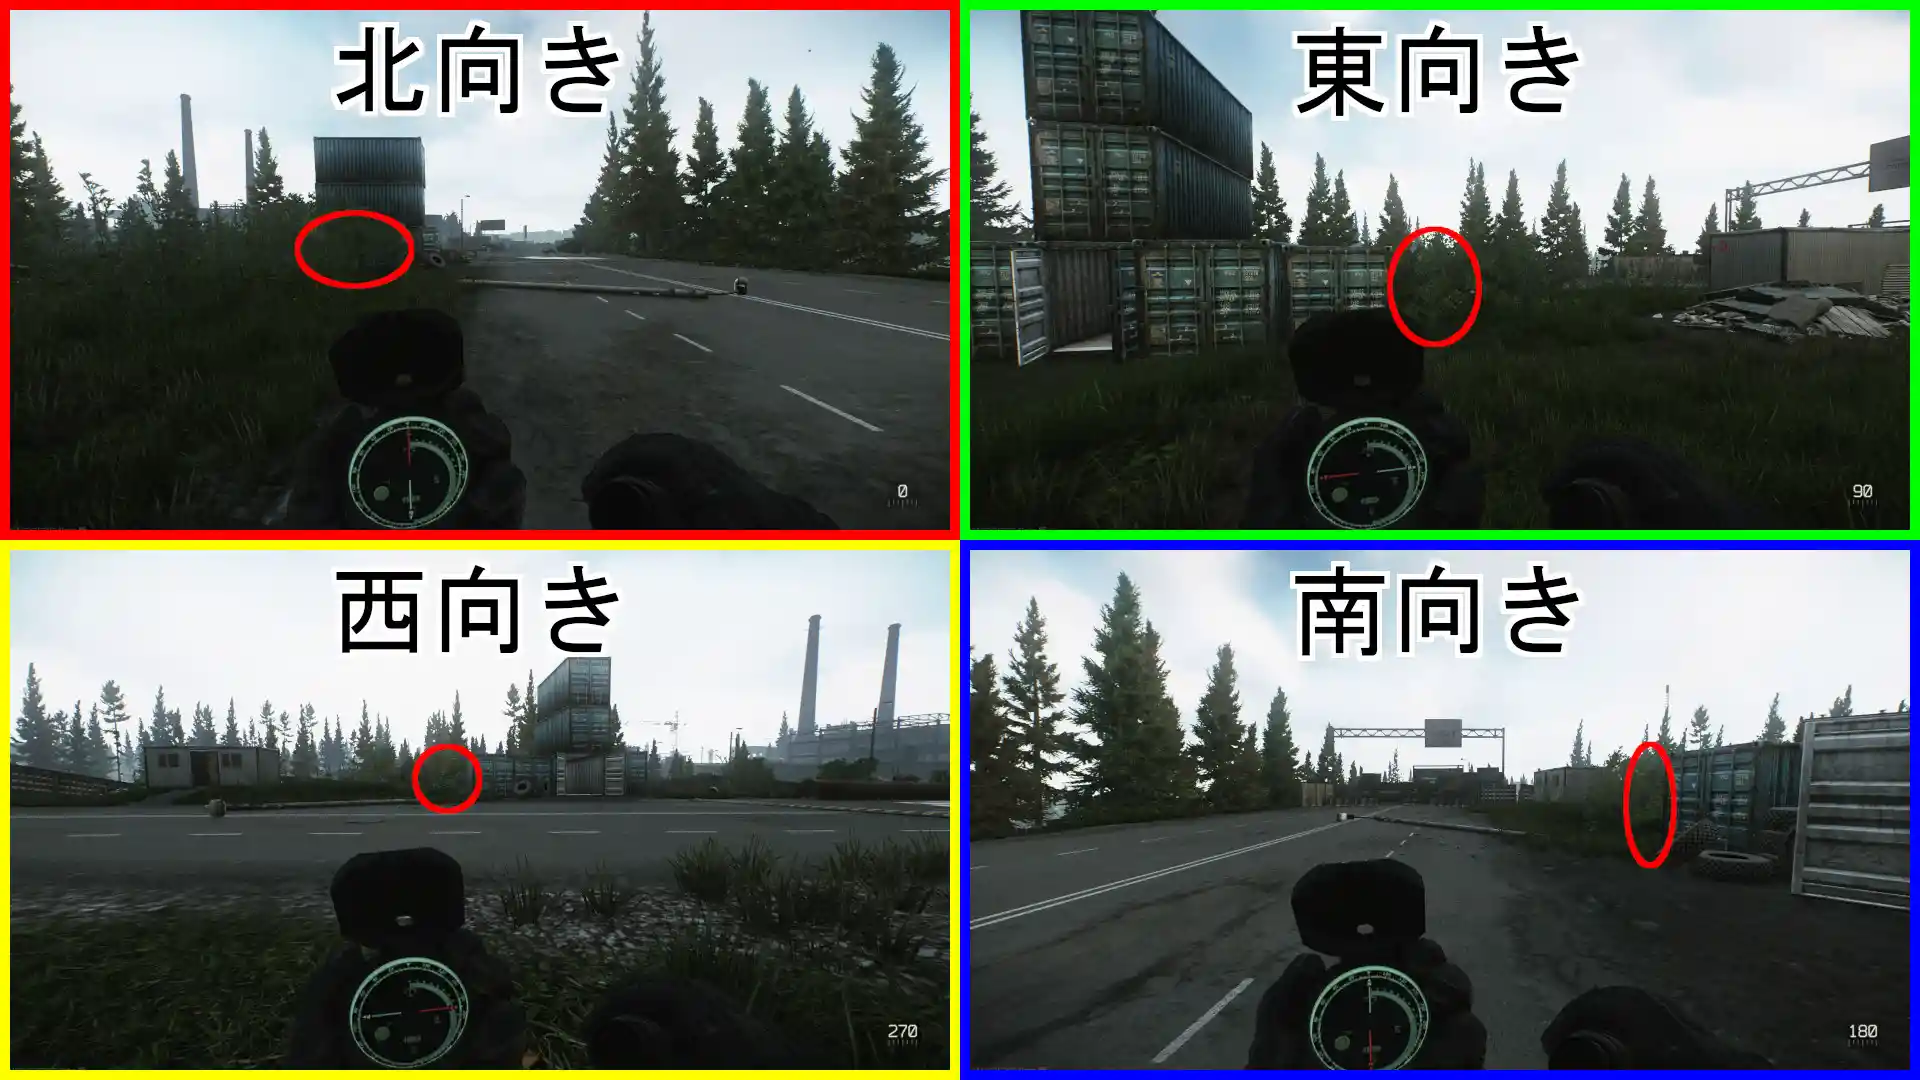 | 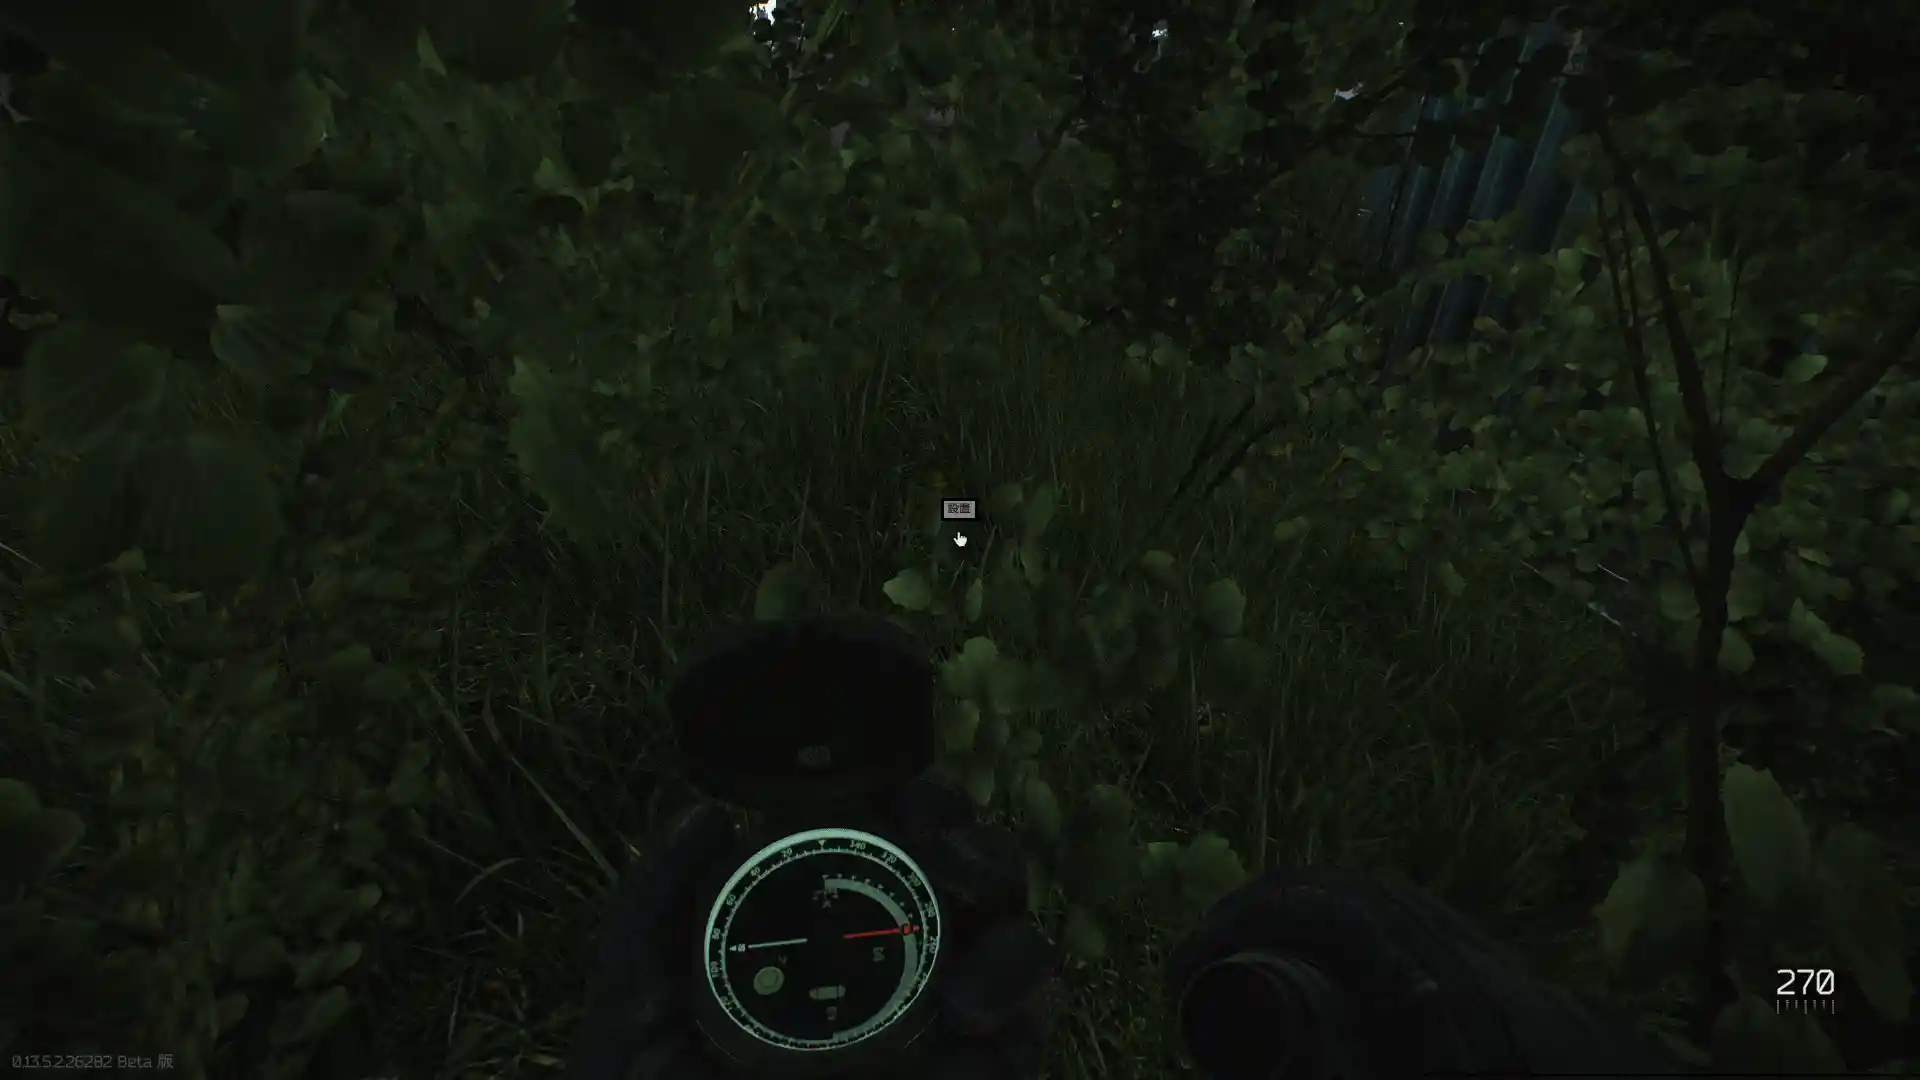 | 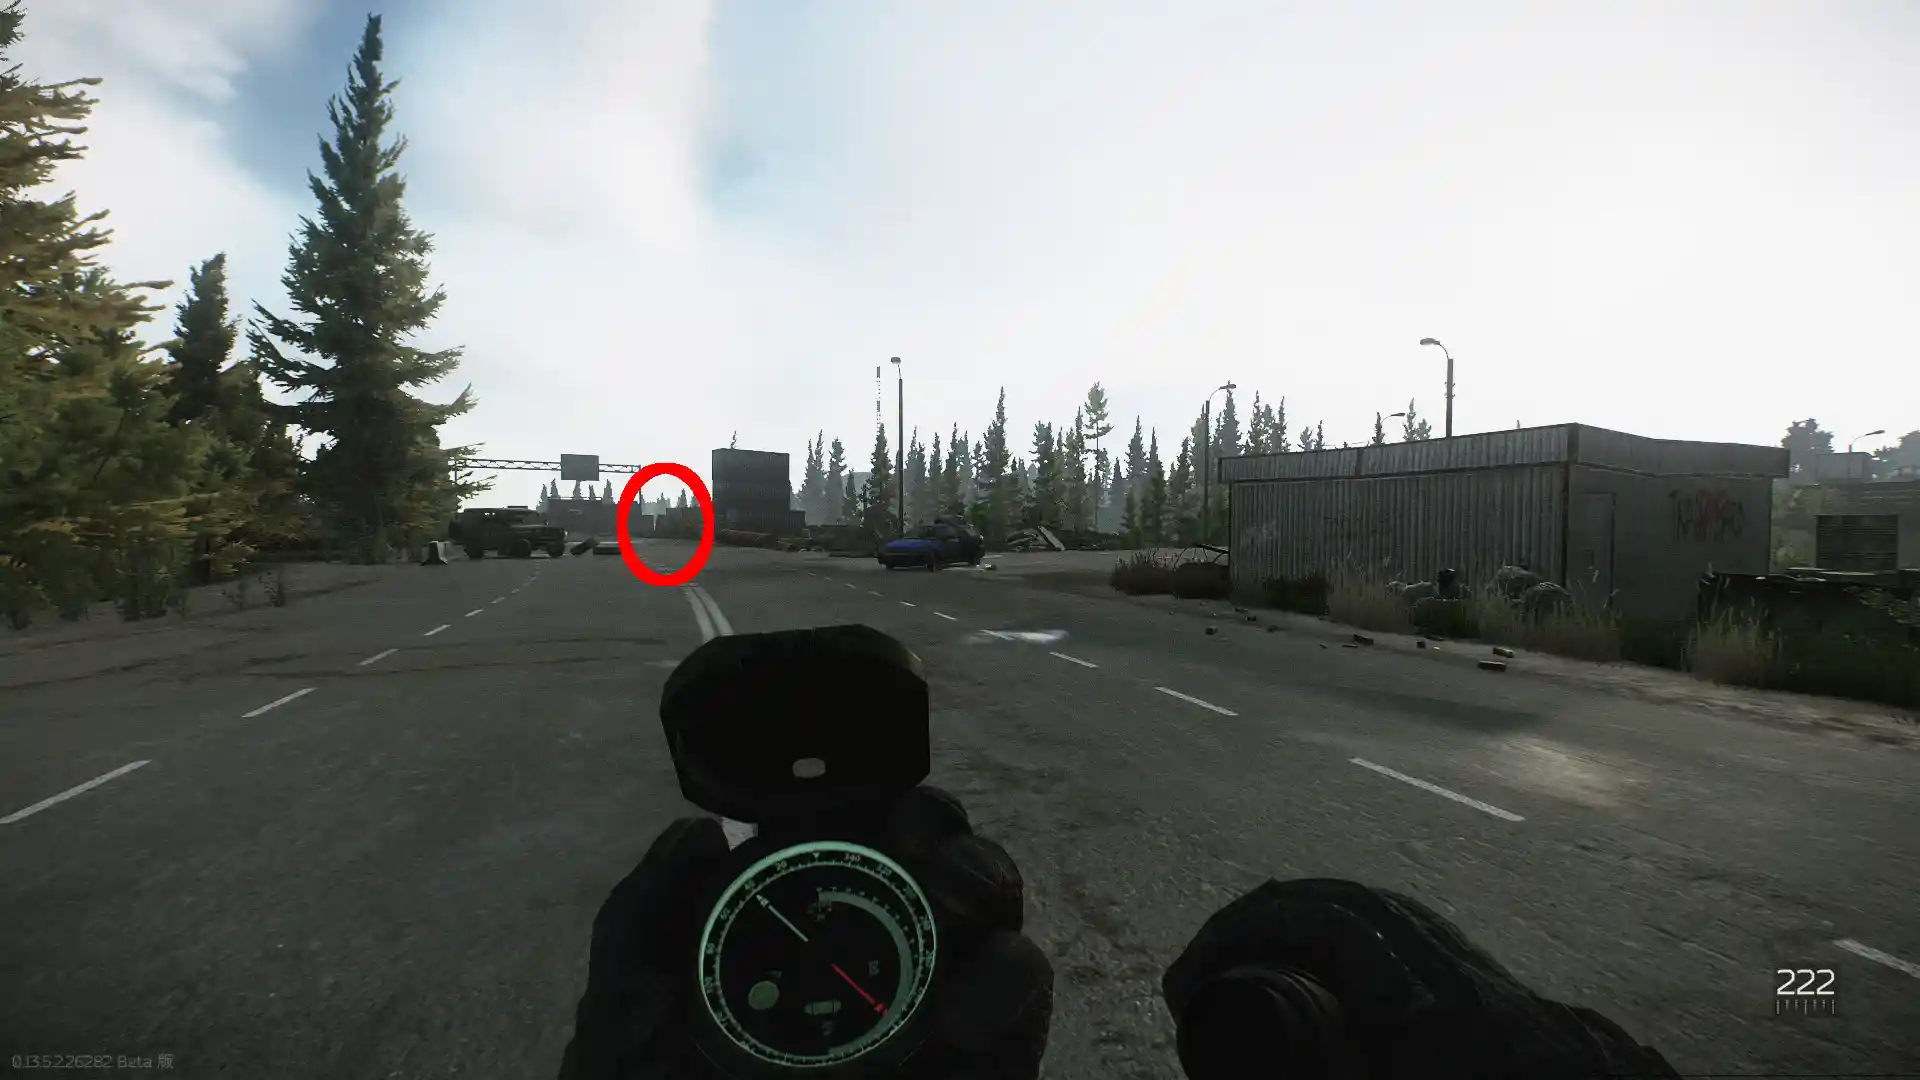 |
| INTERCHANGE | |||
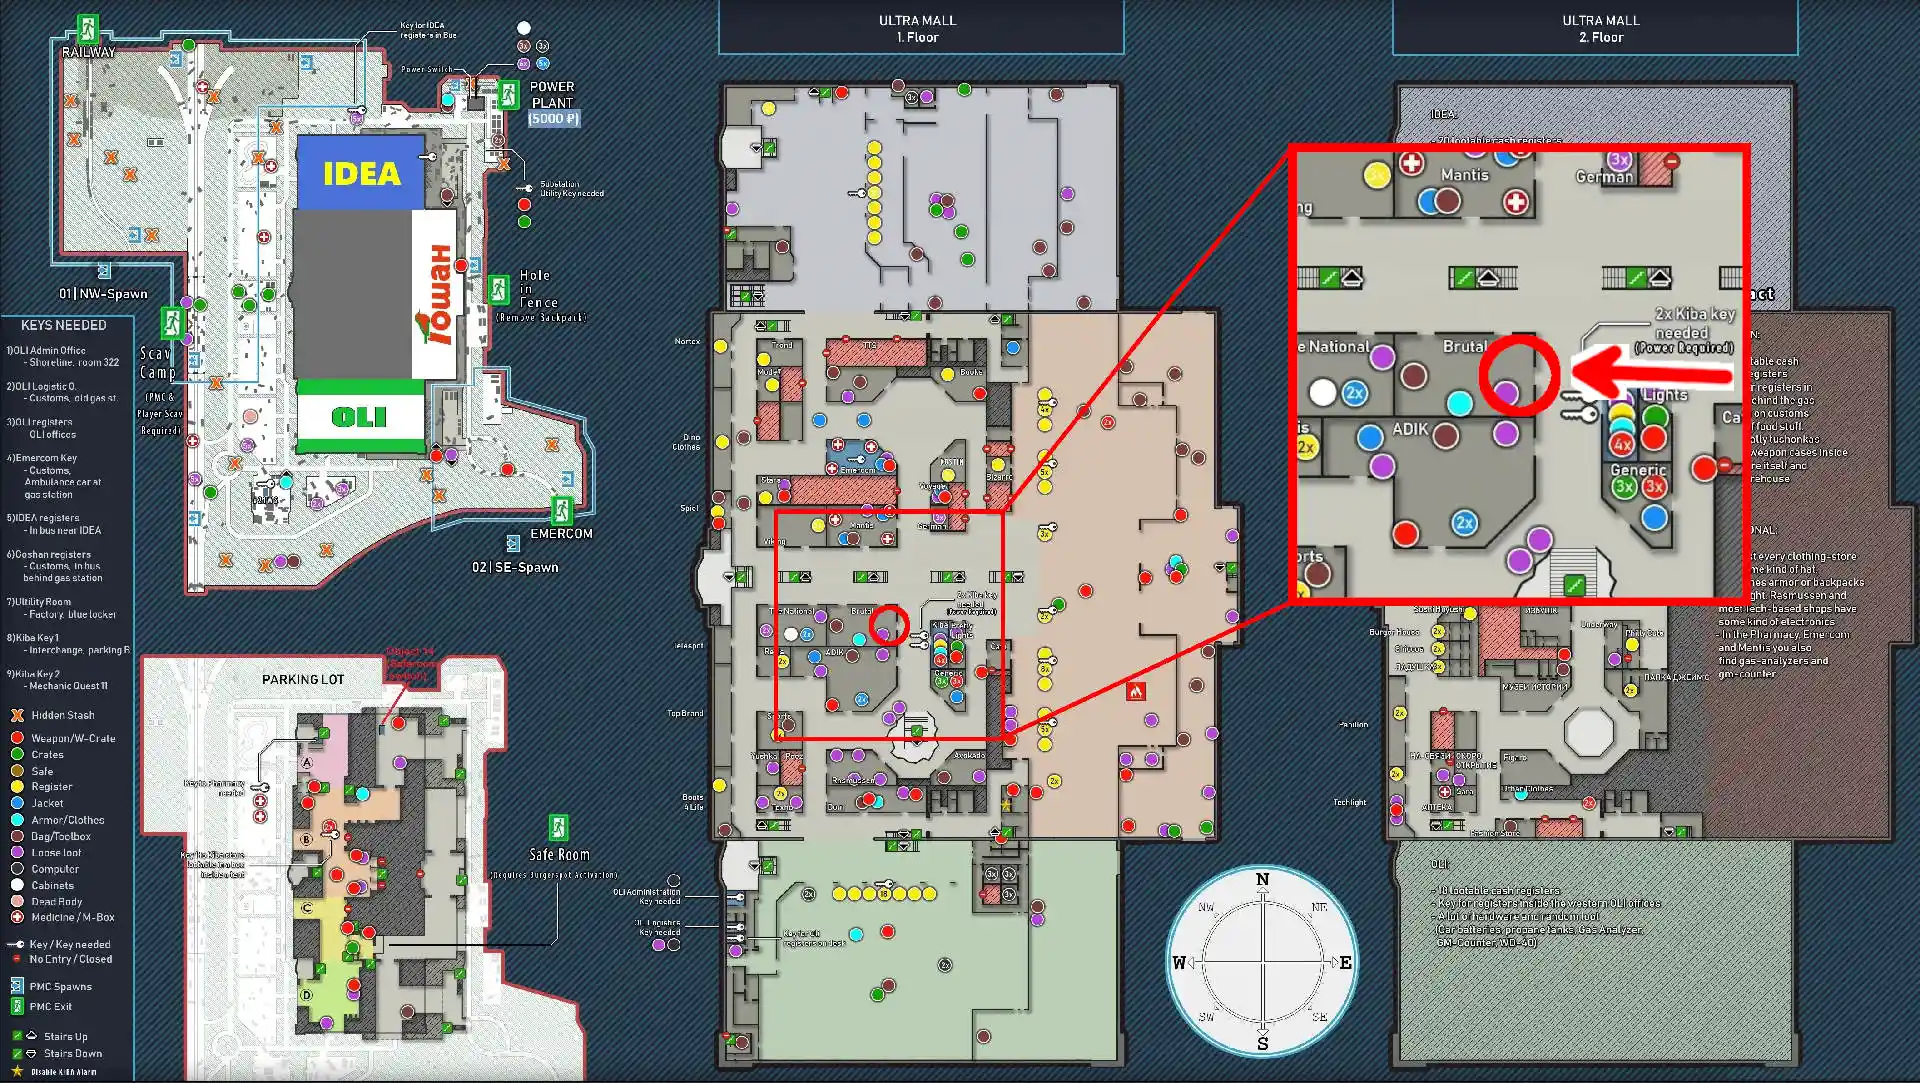 | 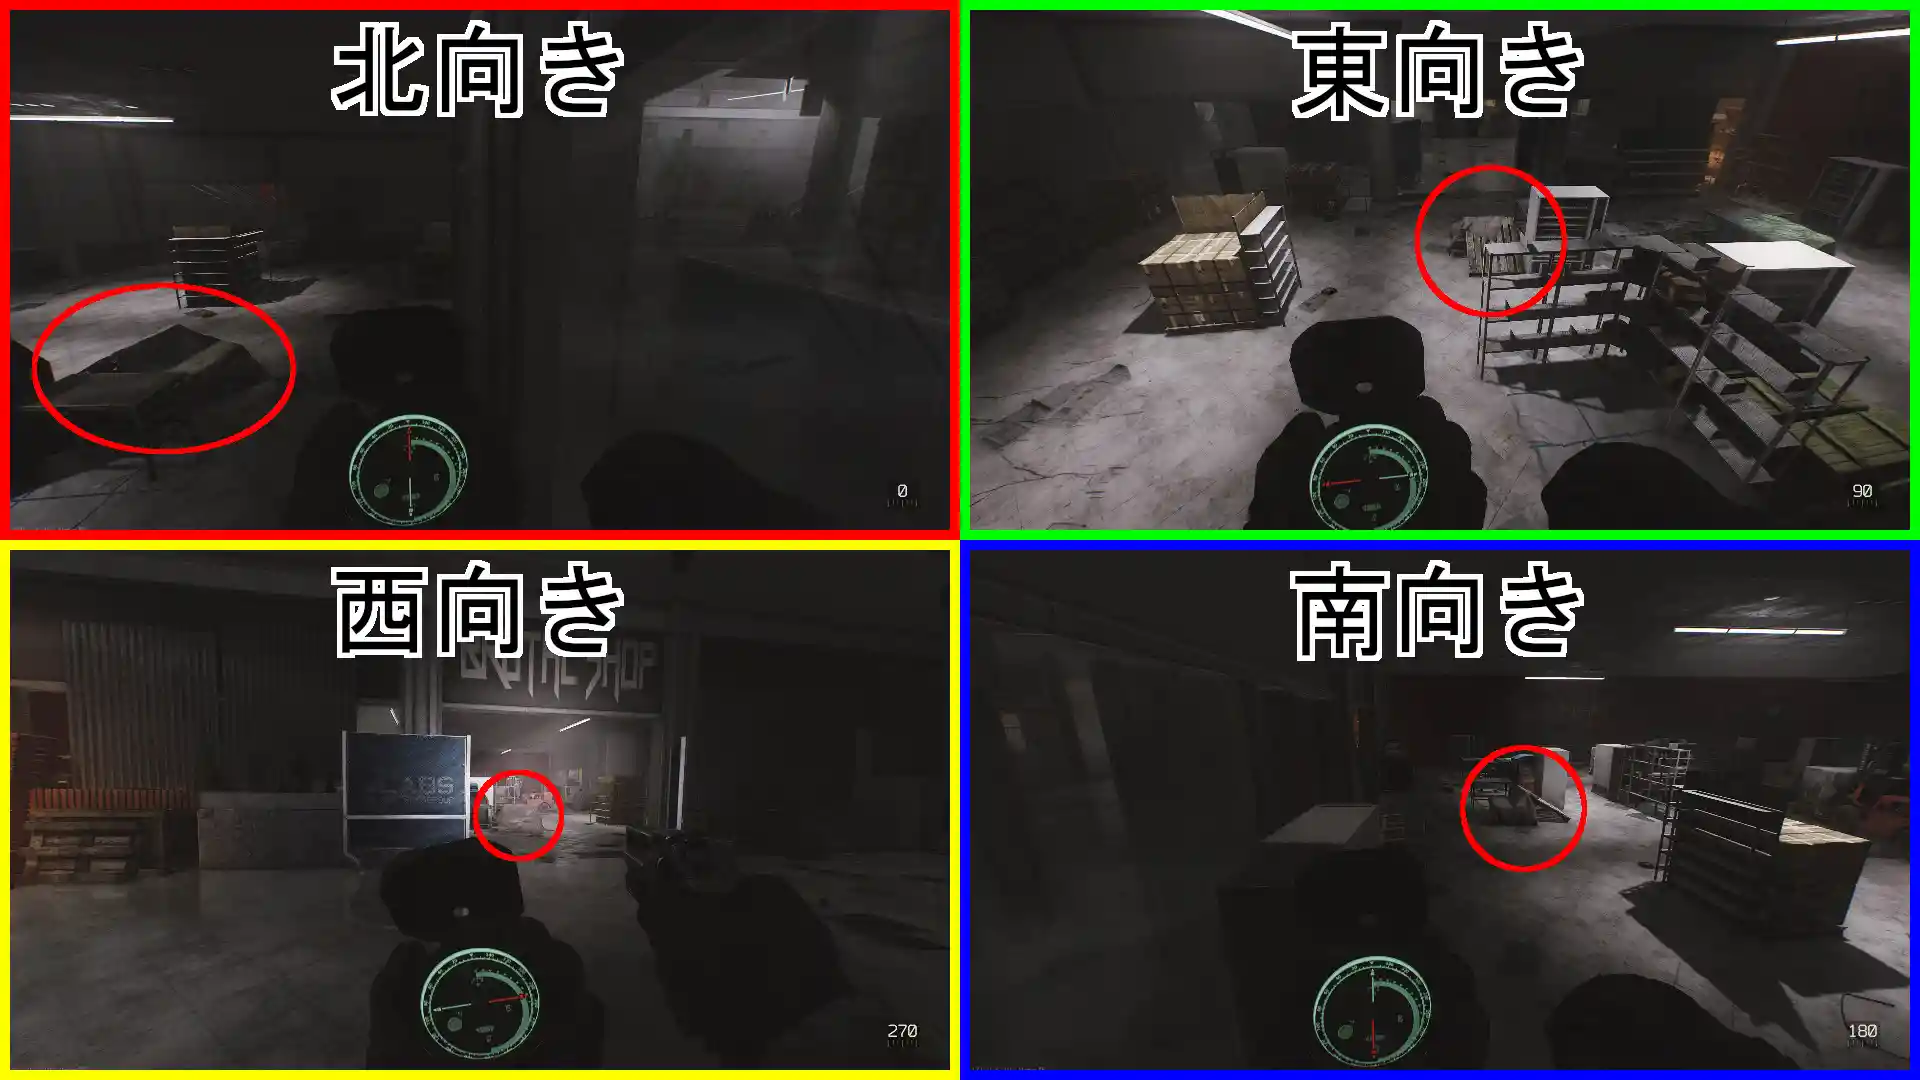 | 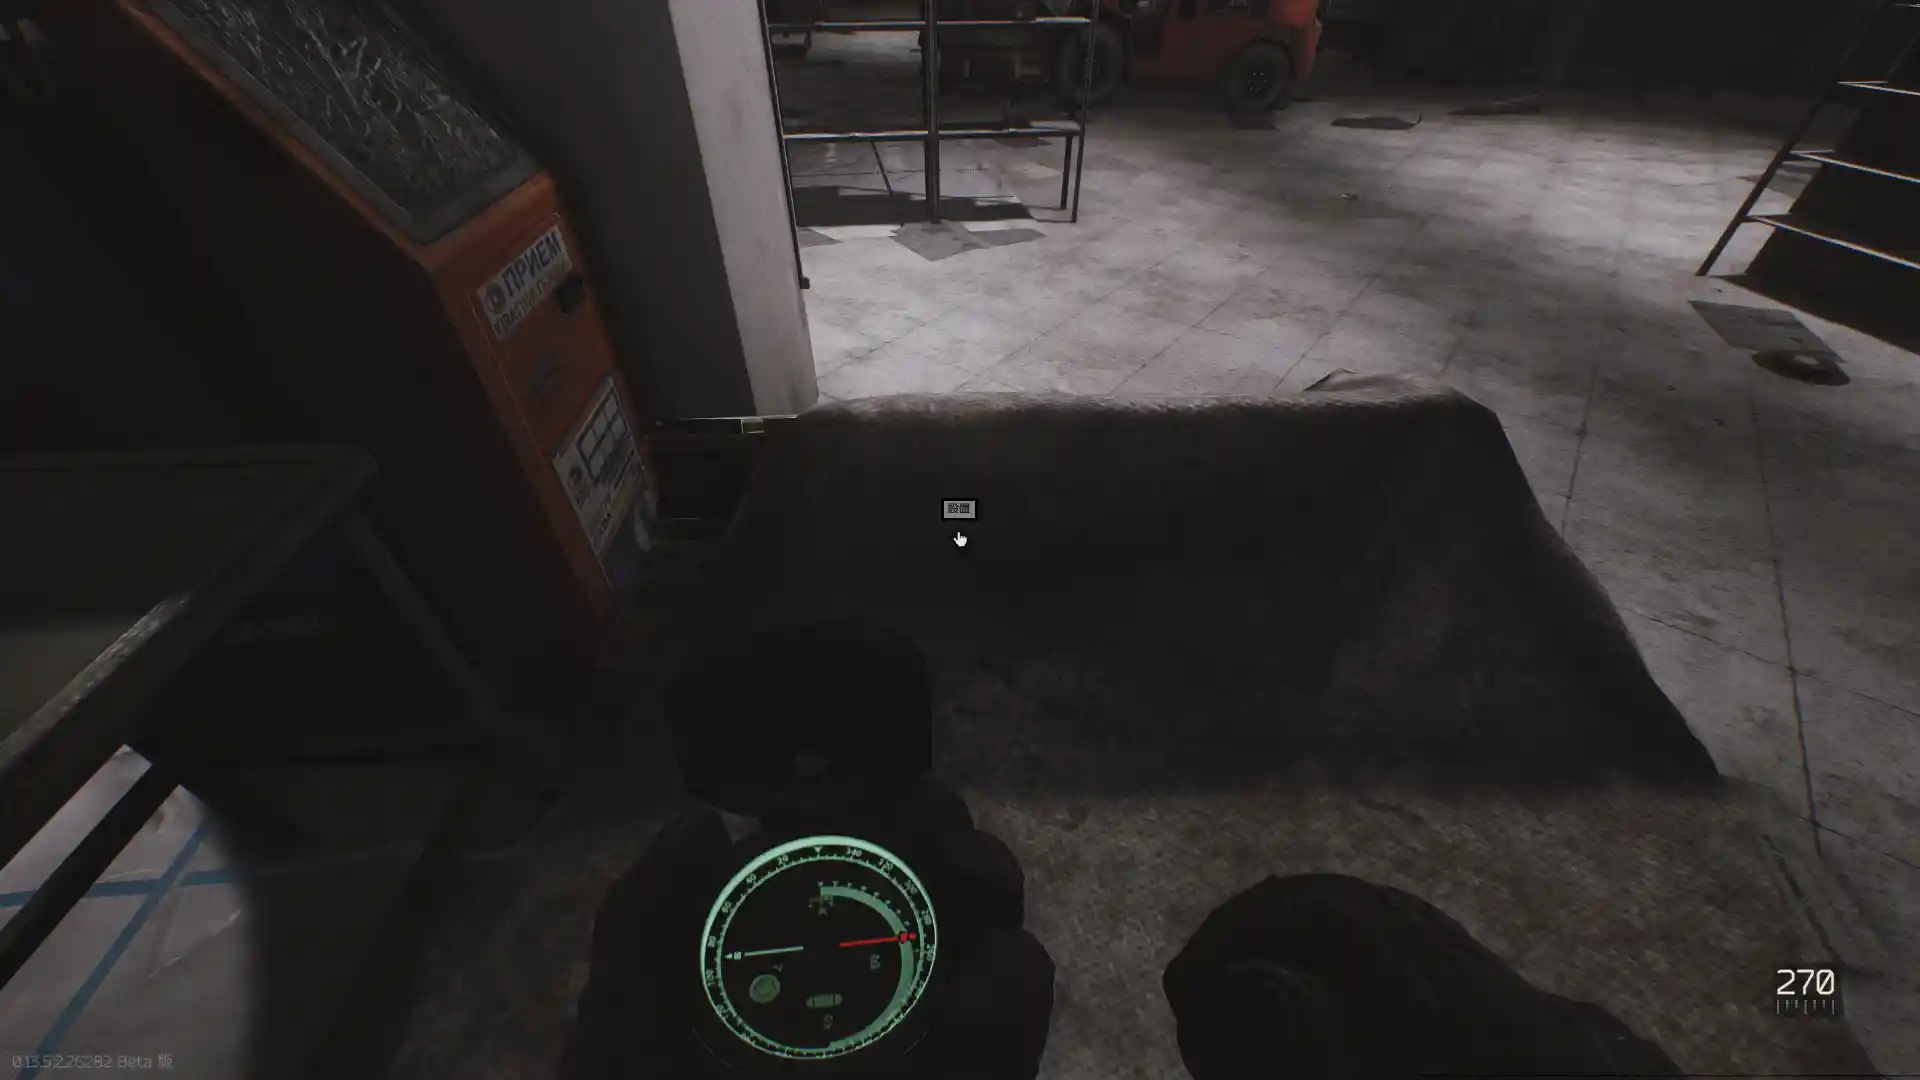 | 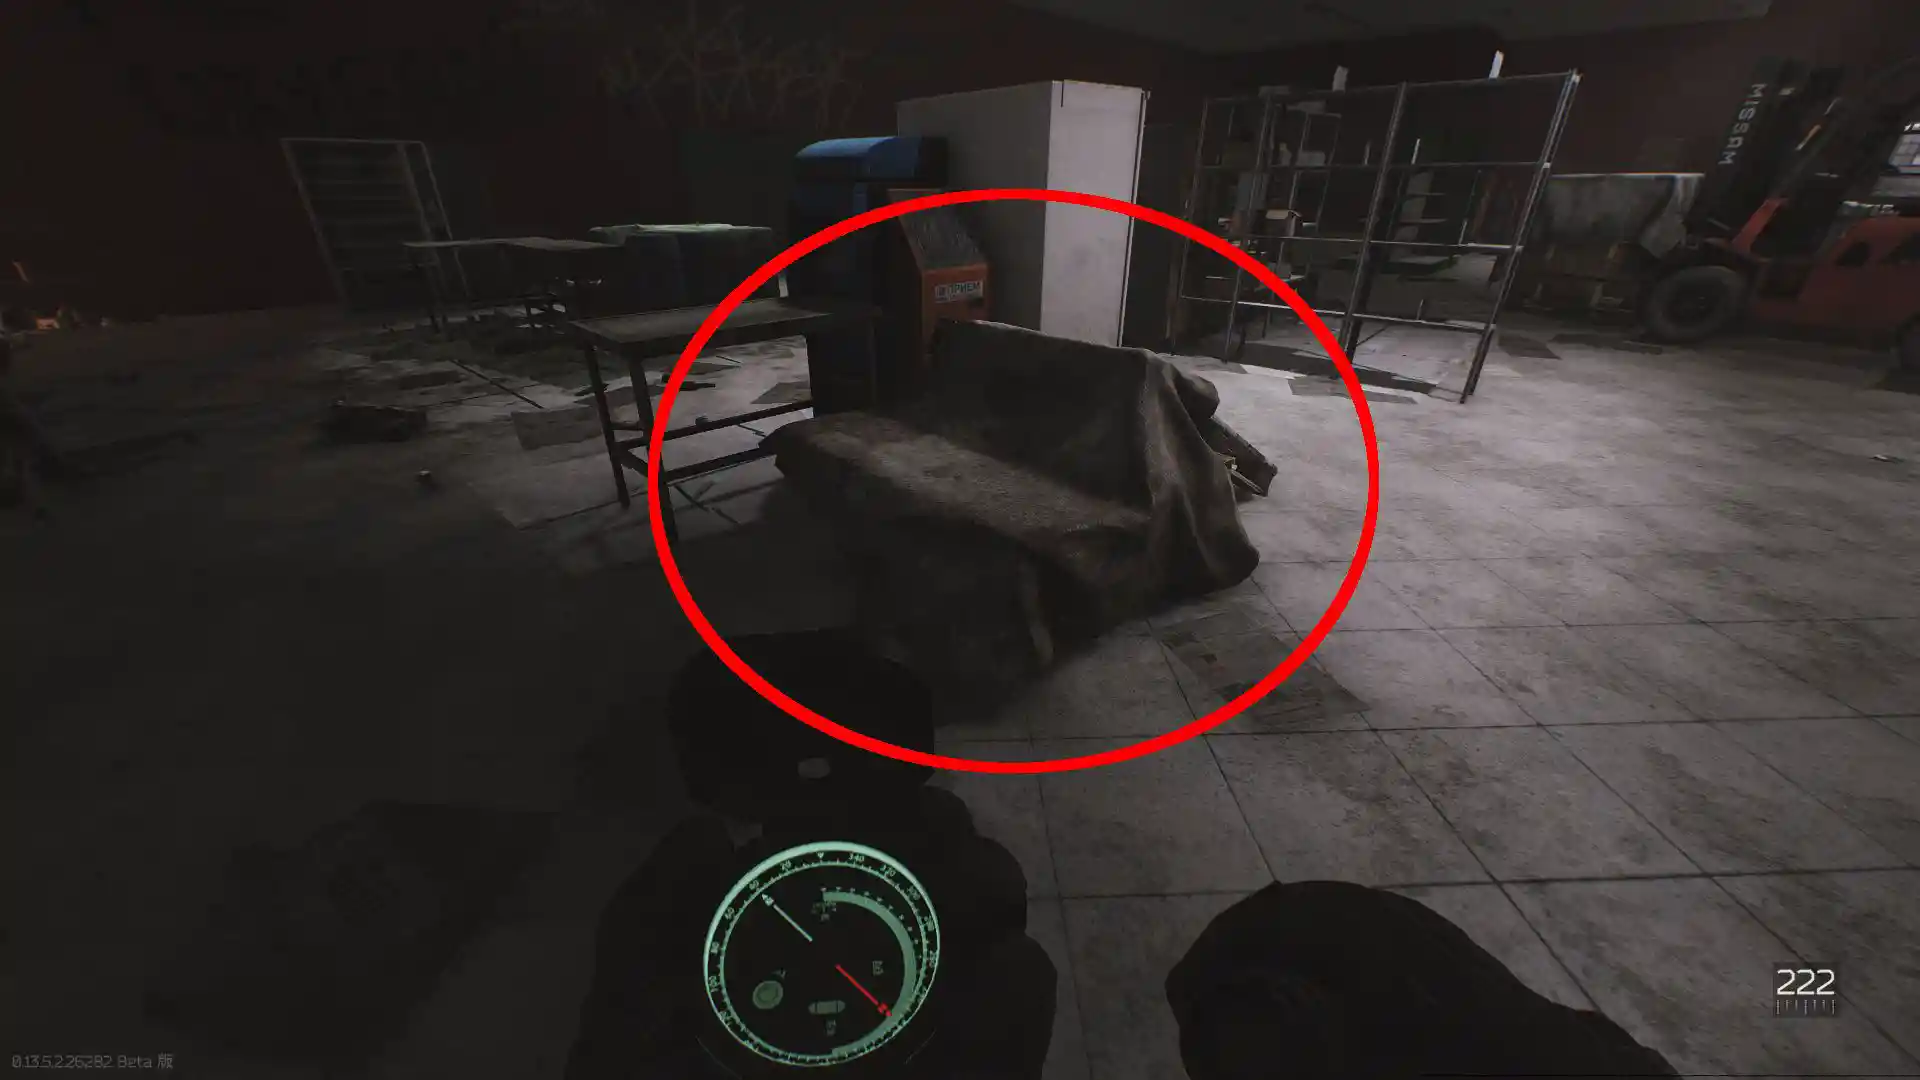 |
| インチェの道順 | 1.正面中央入り口から入る | 2.入口を抜け階段を上る(1Fへ) | 3.上ったら真っすぐ進む |
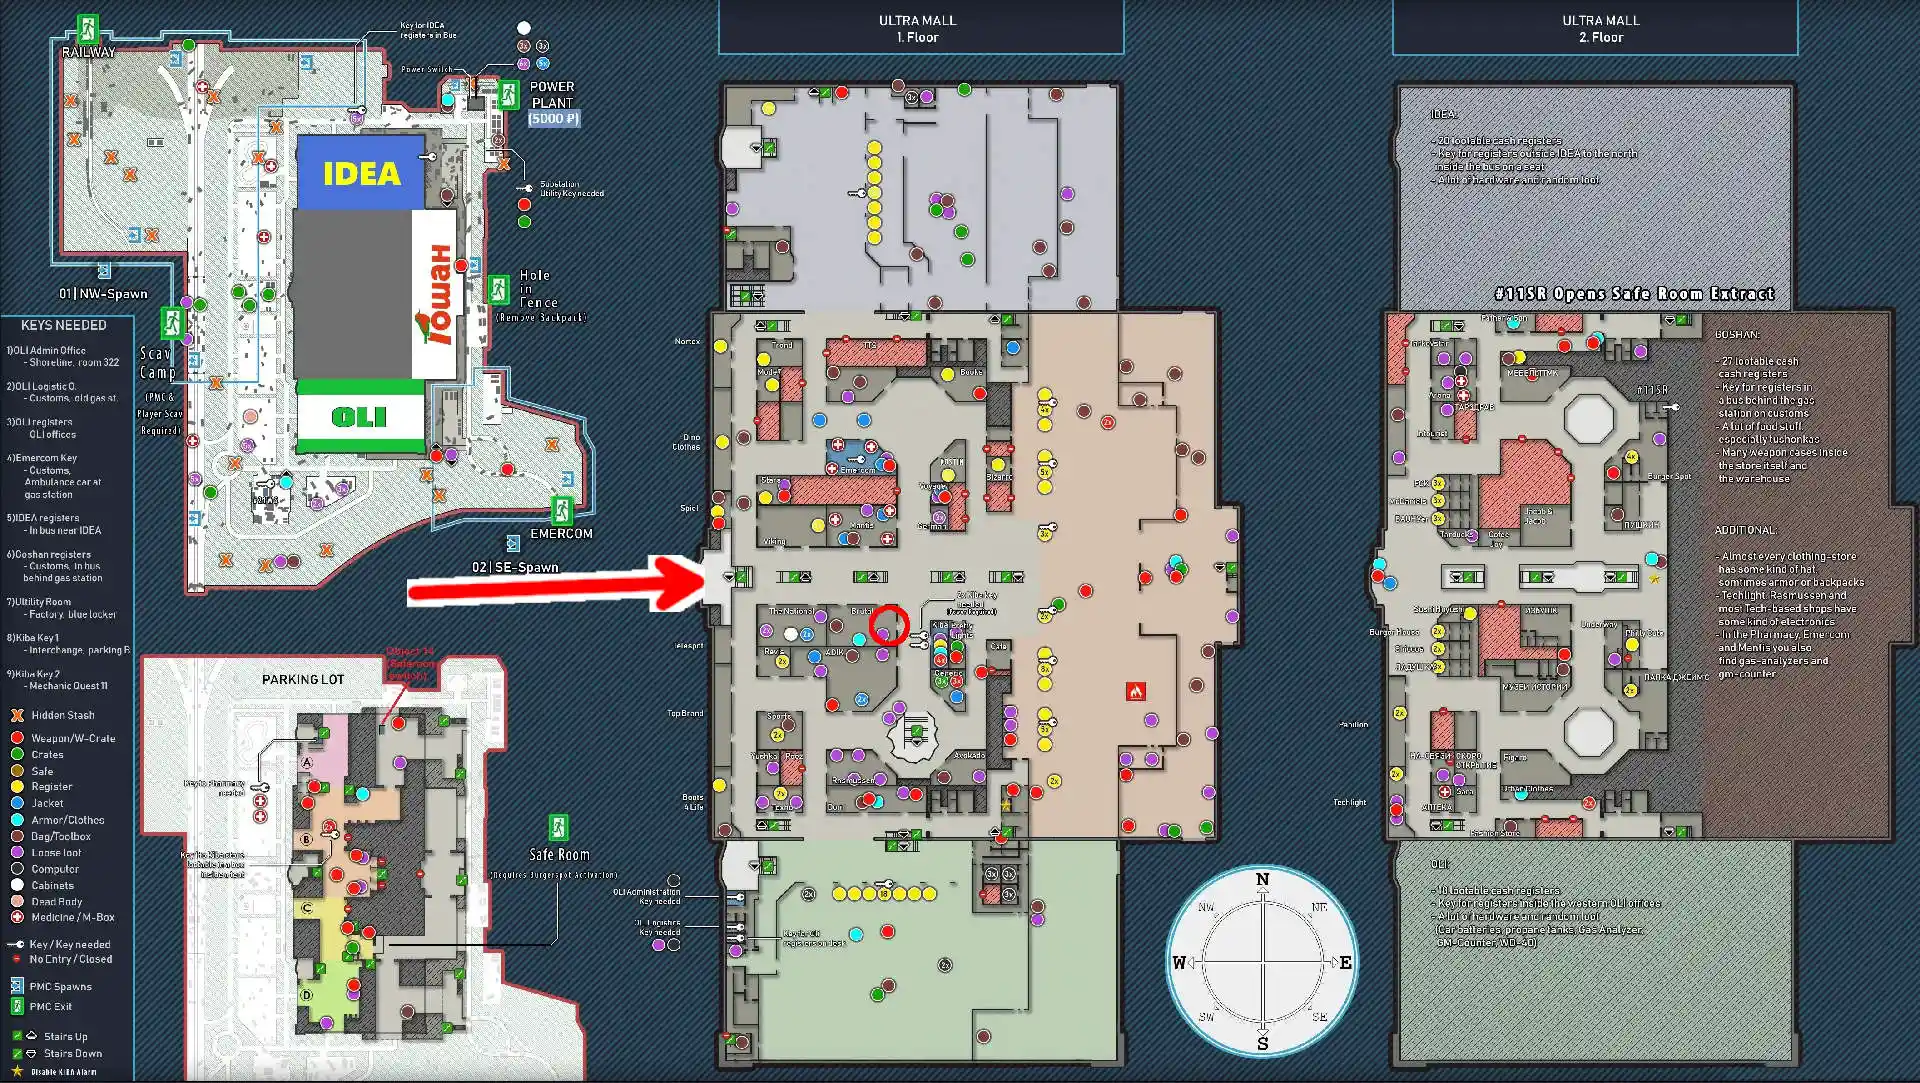 ※あくまでも一例※ 画像では正面中央入口から侵入 裏口から入るも良し 2Fから降りるも良し 自分の好きな道を選びましょう | 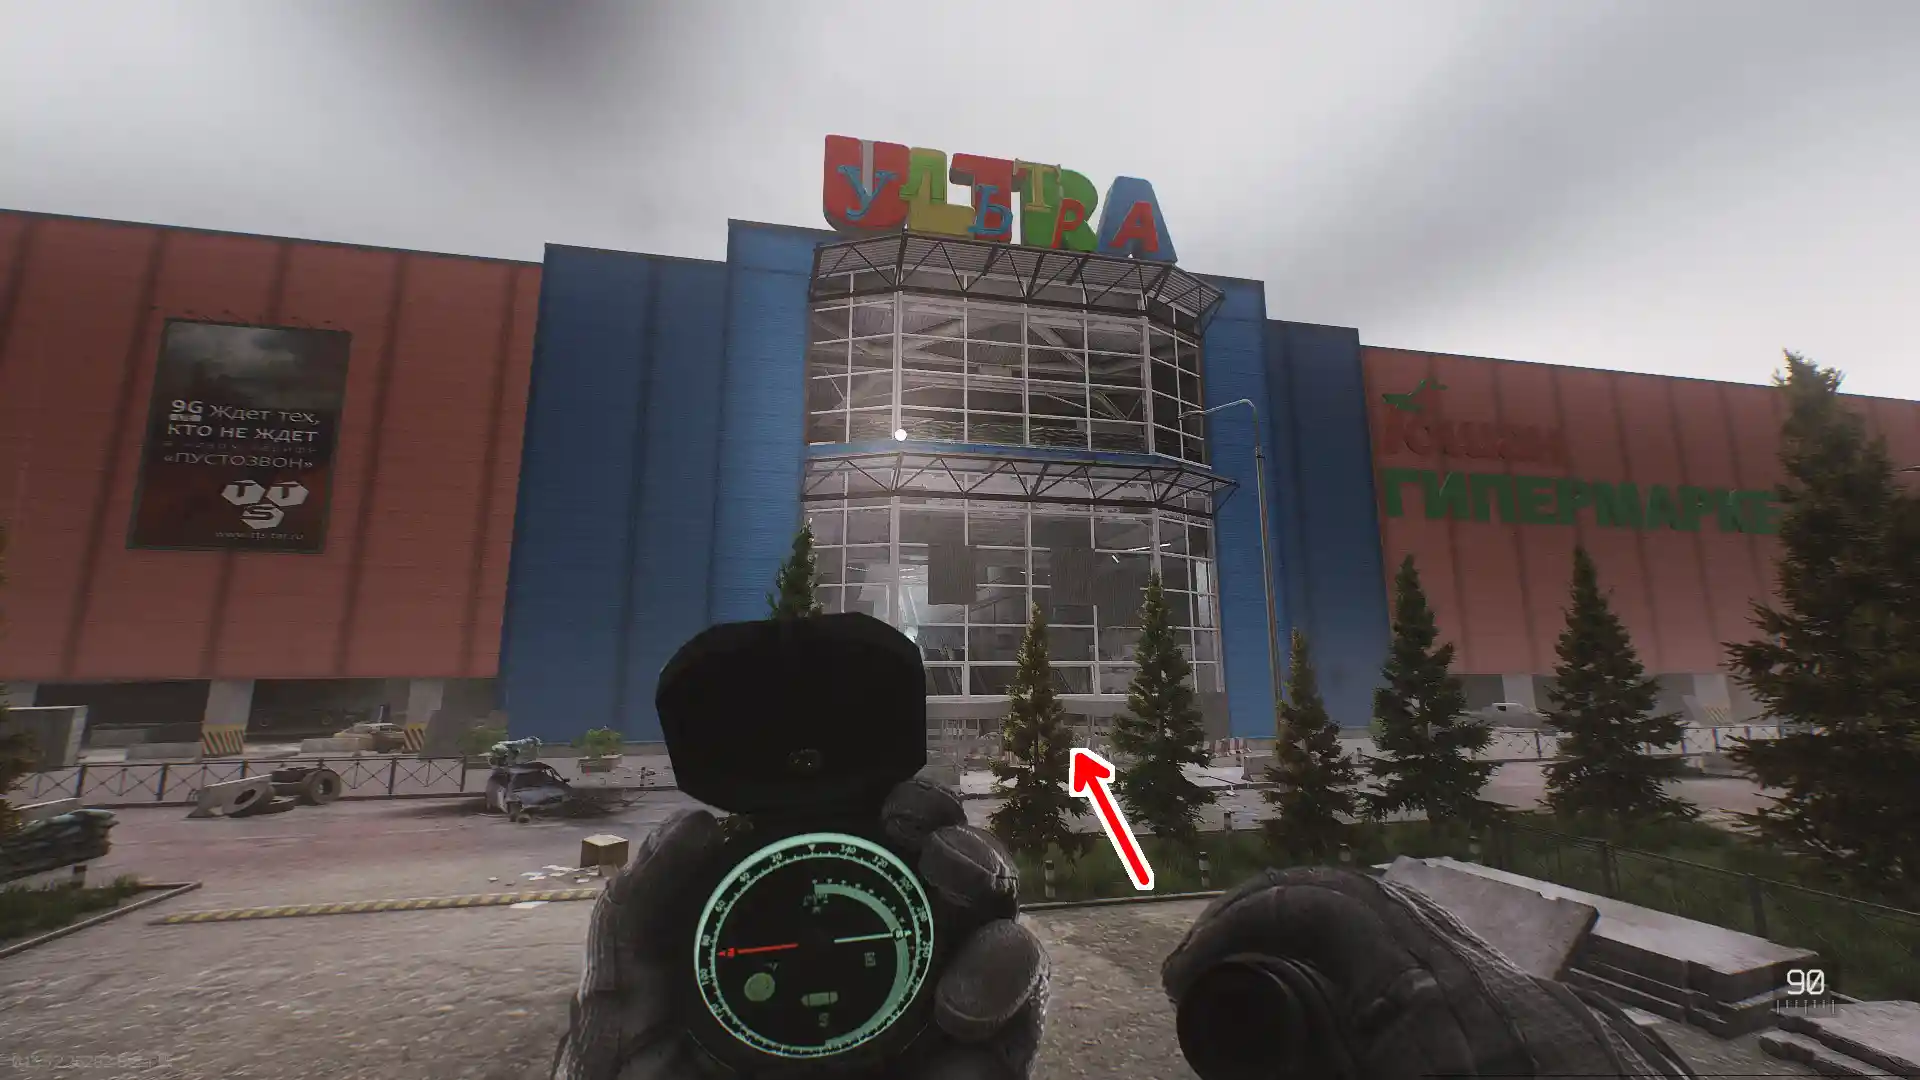 | 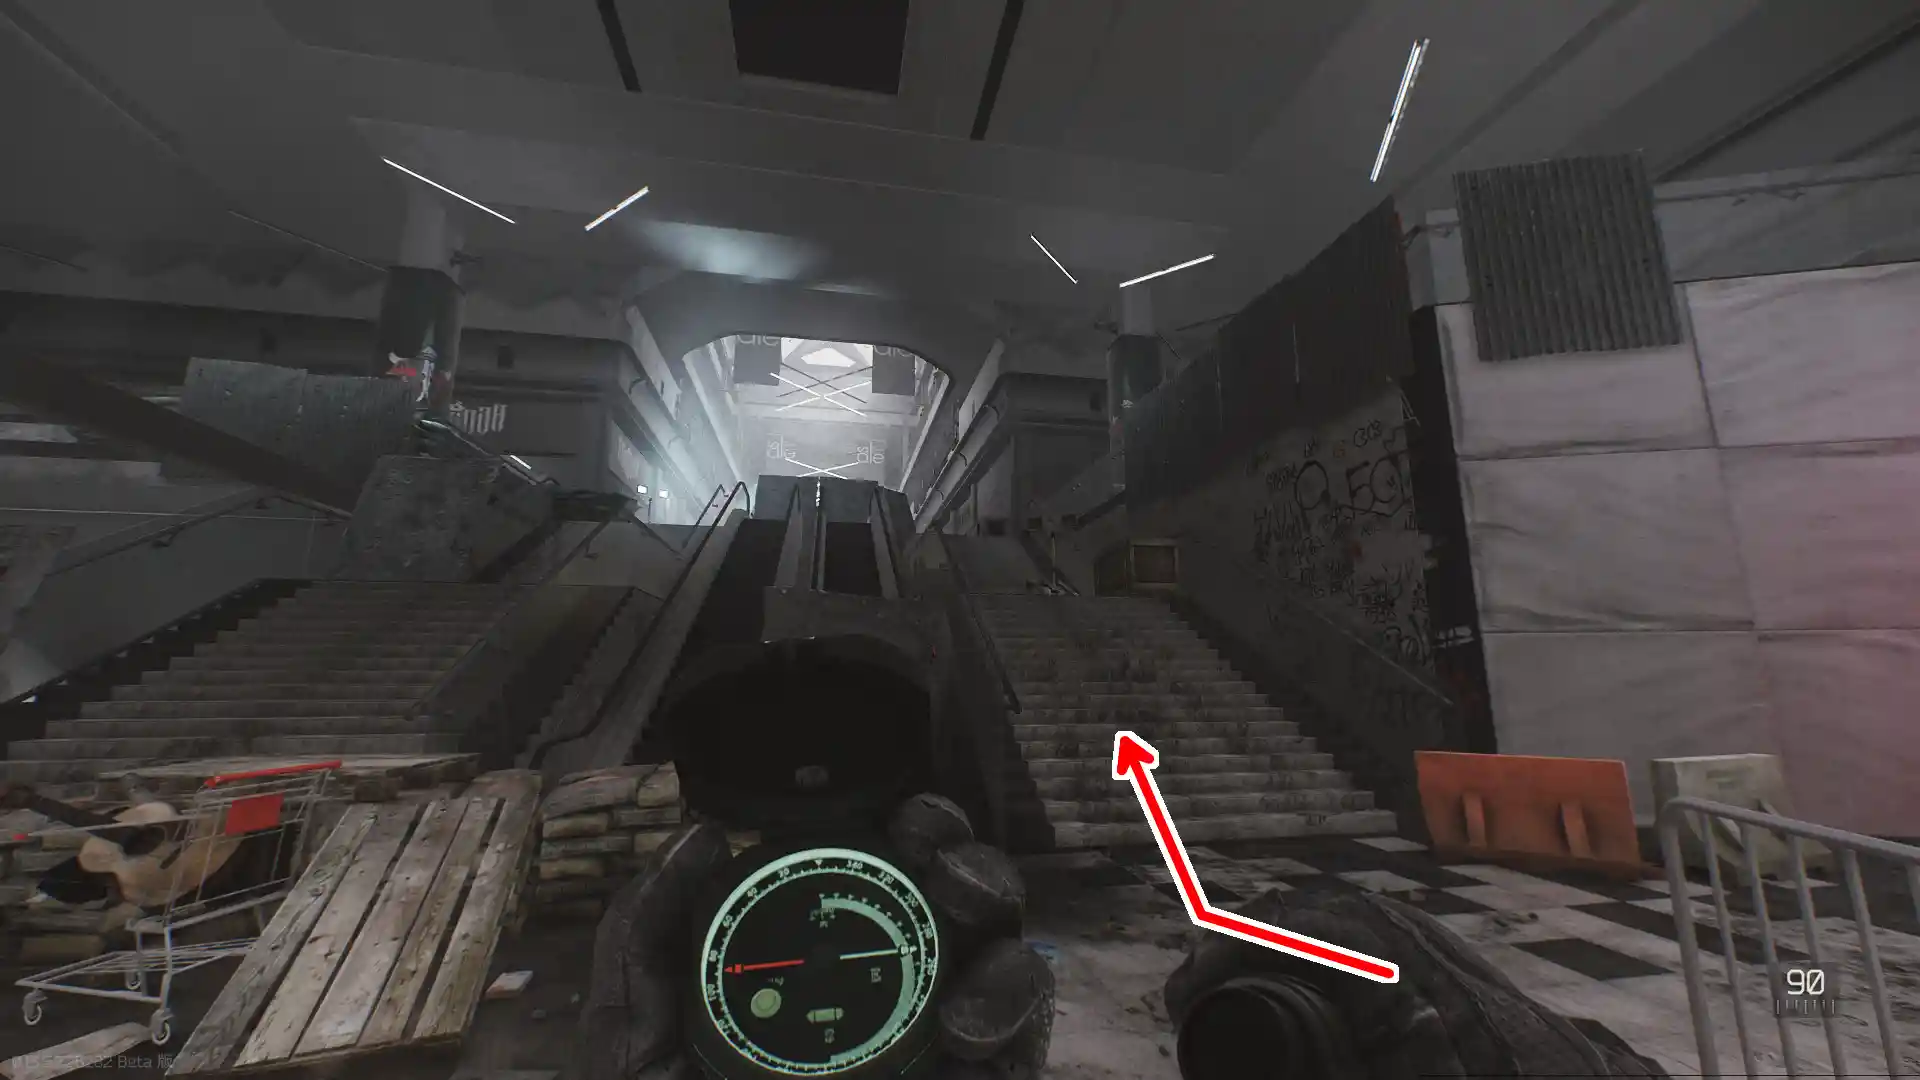 | 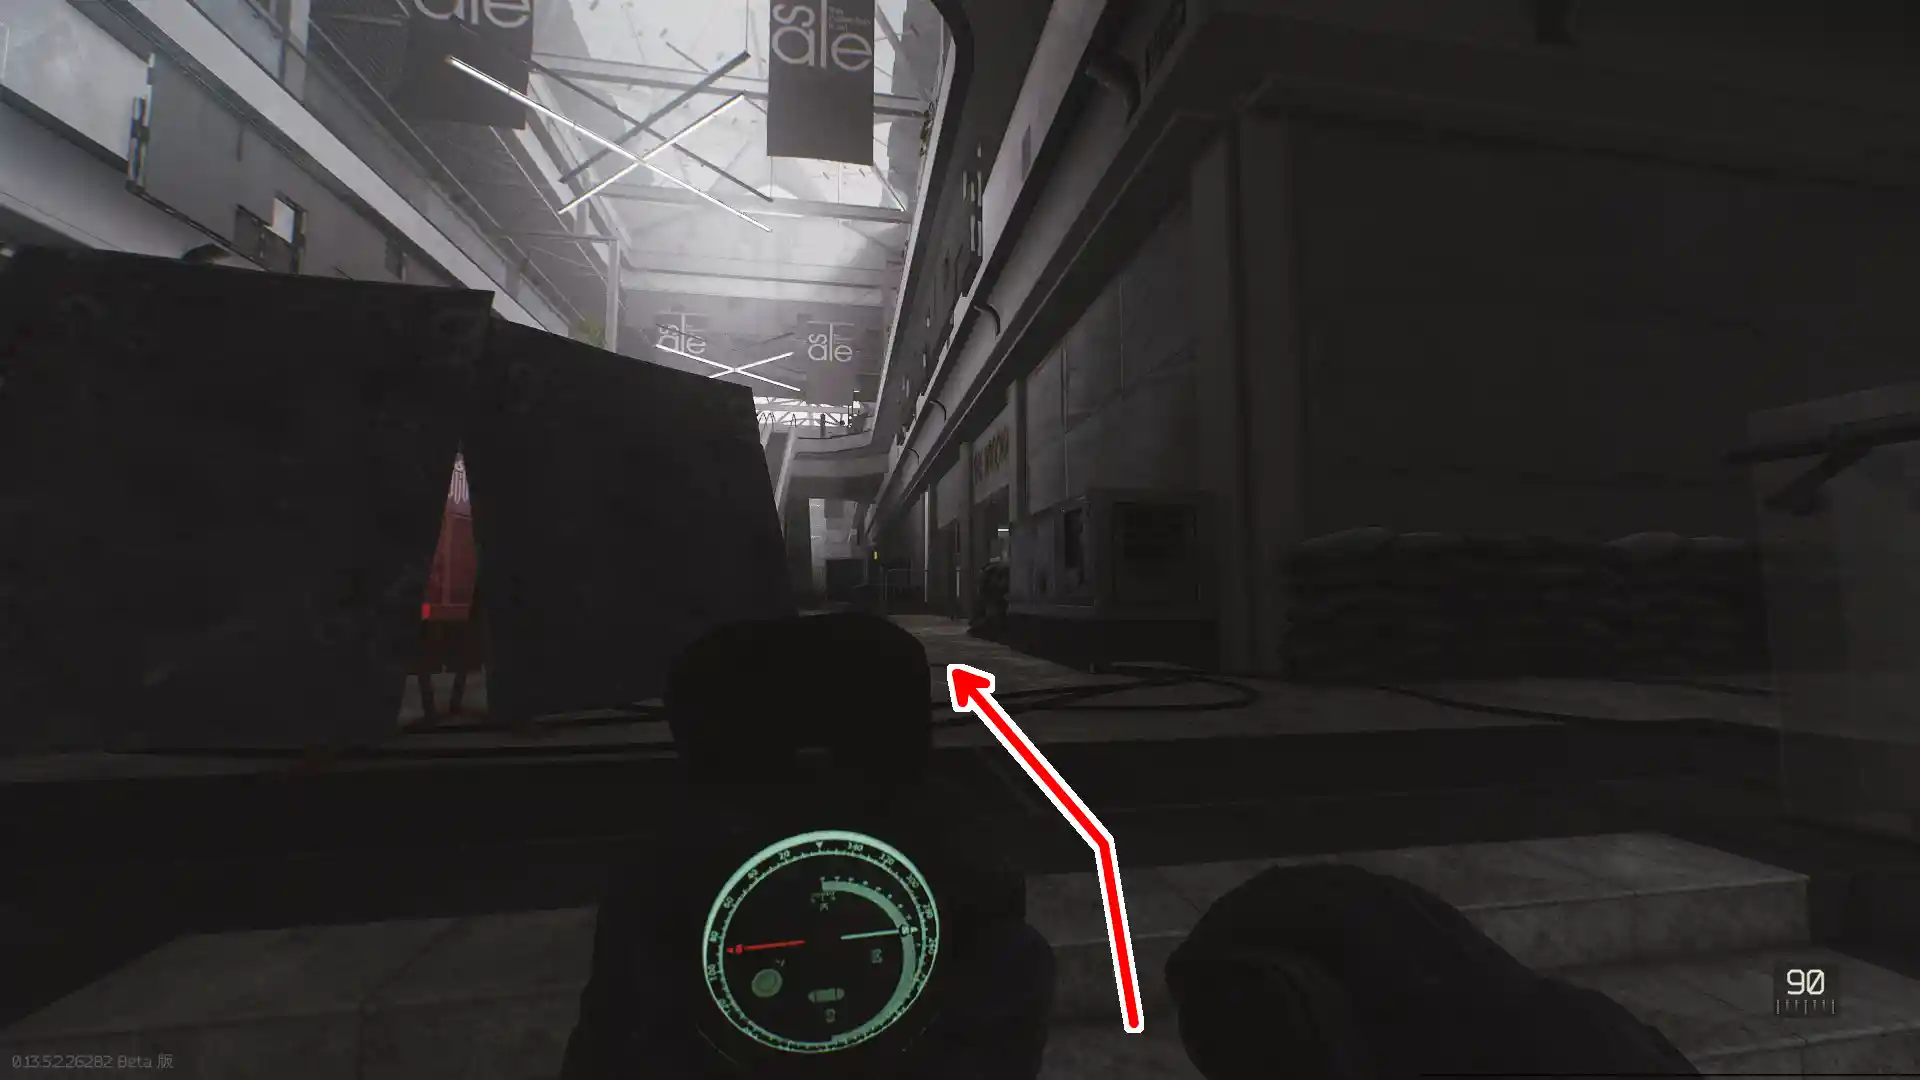 |
| 4.LABSの青い仕切りを抜けて更に進む | 5.黄色く光る電光掲示板まで進む | 6.黄色の電光掲示板がある店に入る | |
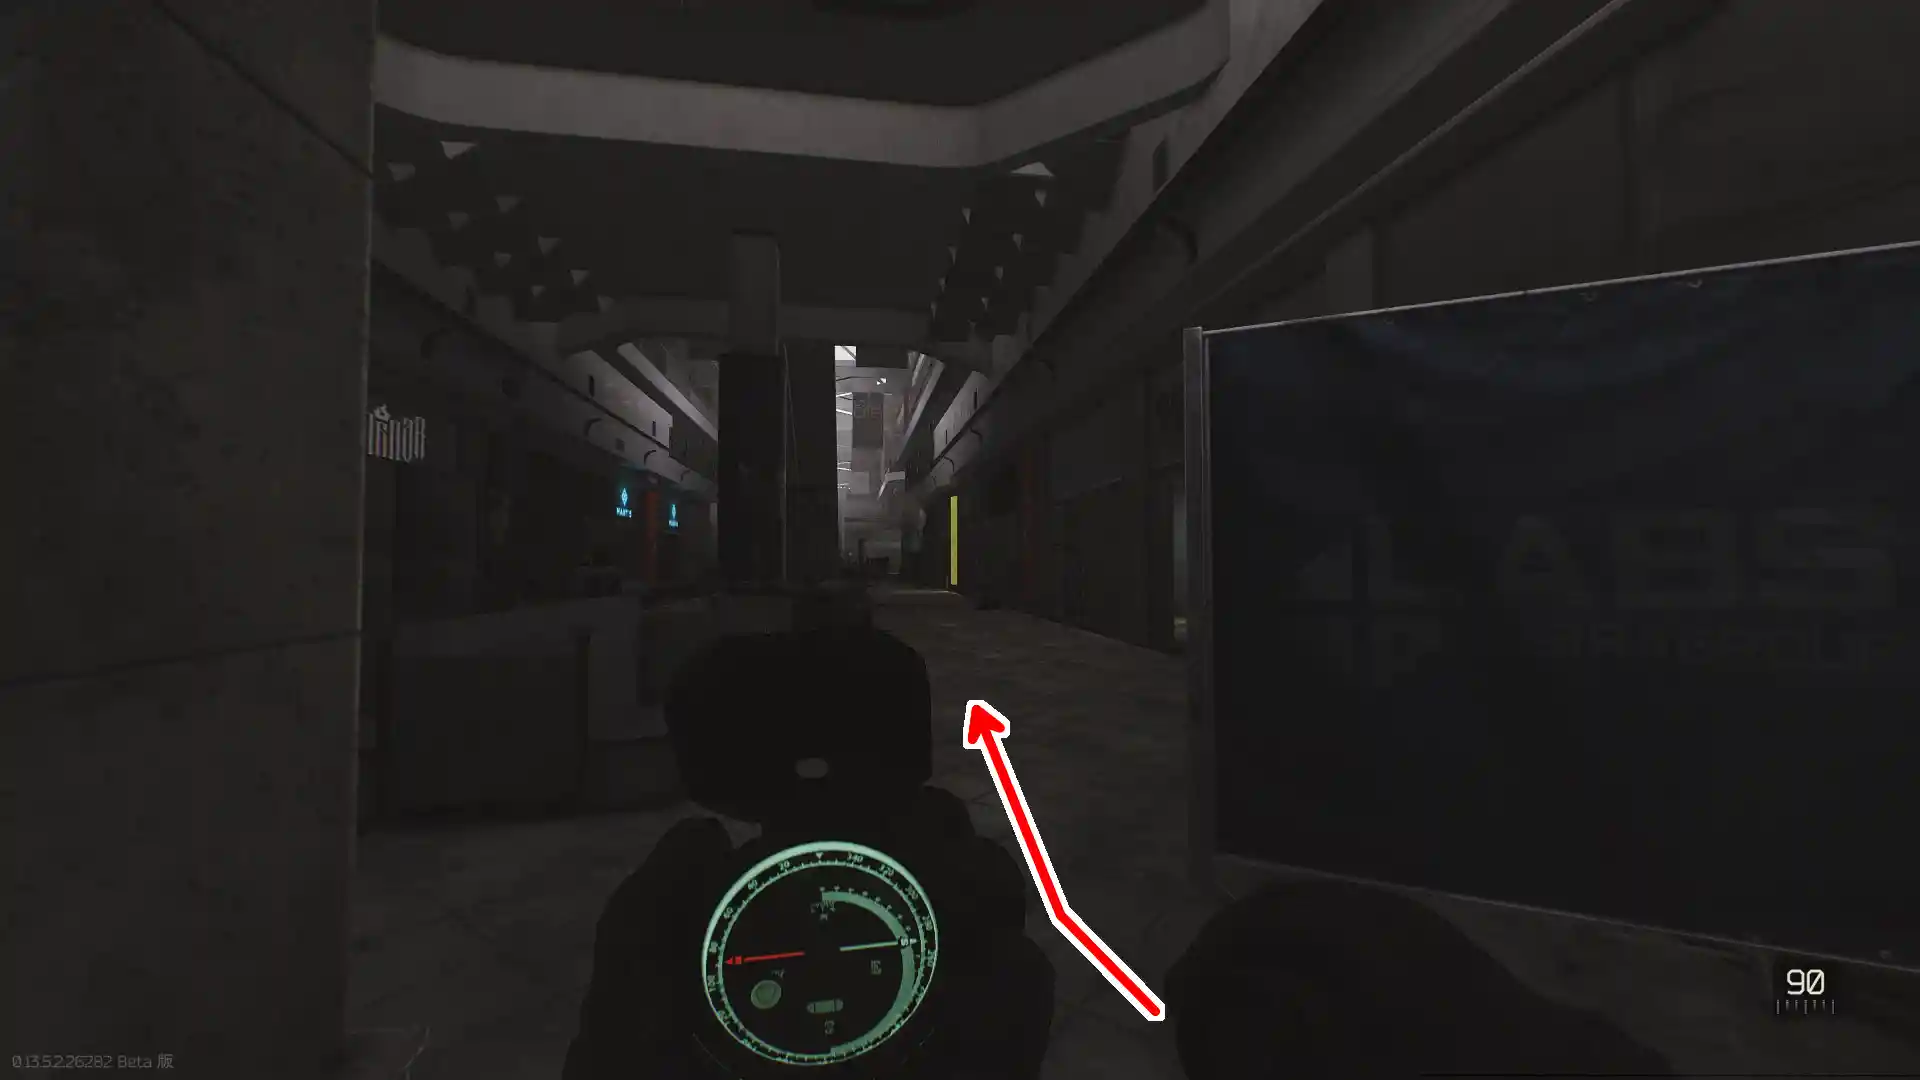 | 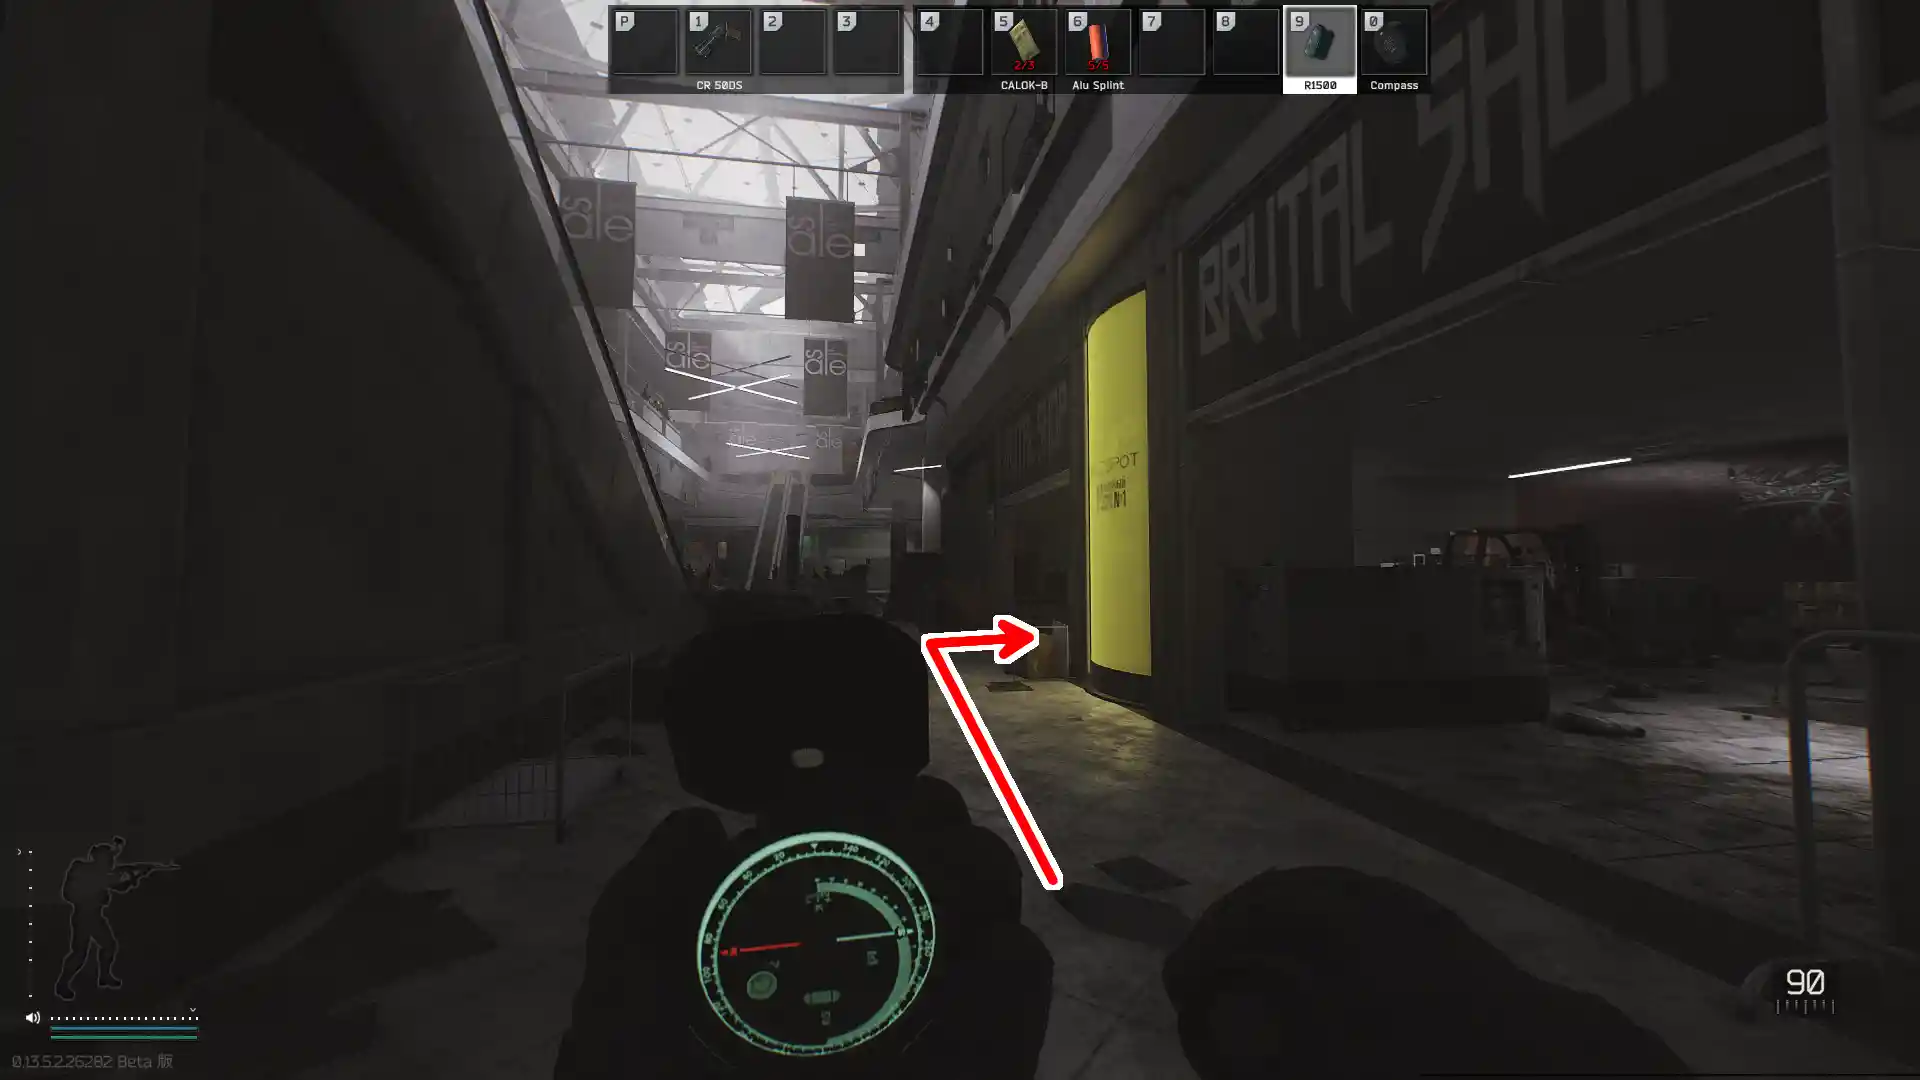 | 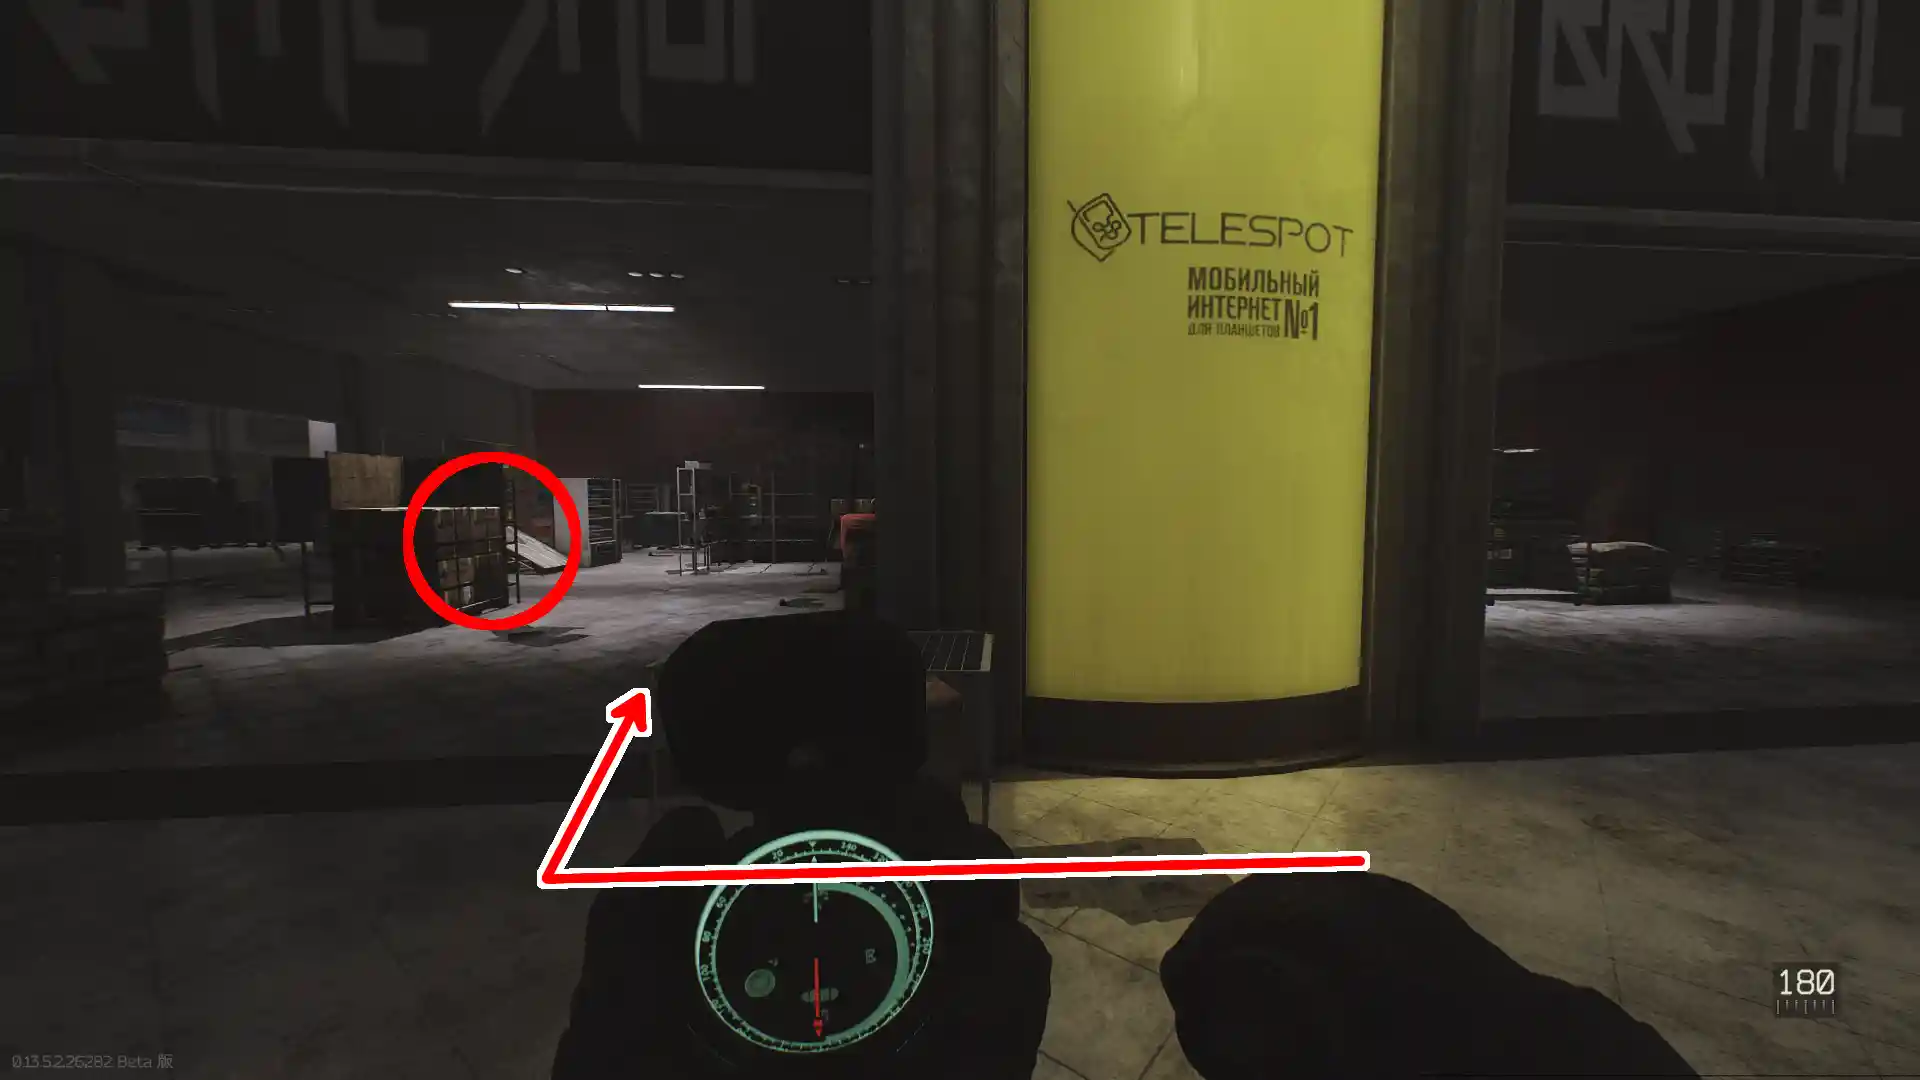 | |
コメント
備考
この記事は、Fandom の Escape from Tarkov Wiki の「Informed Means Armed」の要素が利用されており、これはクリエイティブ・コモンズ 表示 - 非営利 - 継承 のライセンス下で提供されています。

![[hatena]](https://cdn.wikiwiki.jp/to/w/common/image/face/hatena.gif?v=4)
![[tip]](https://cdn.wikiwiki.jp/to/w/common/image/face/tip.gif?v=4)